Introduction
Recently, we came across a situation where quite a number of production servers needed to be downgraded from SQL Server 2008R2 Enterprise to its respective Standard edition. Probable reason being, when the identified servers were initially set up, a proper analysis whether there would be any requirement for enterprise feature or not was not done. Therefore, we came up with the plan to downgrade such servers.
In this part 1, I am going to describe the process of downgrading from Enterprise to standard edition (SQL server) for those servers which are not using any of enterprise features.
Note* Enterprise features is something which we check at database level for all databases hosted on that particular server and not at server level.
Pre-requisite
I have prepared a checklist which is handy while performing this downgrade.
Note* In case you have quite a number of databases, then running:
SELECT * FROM sys.dm_db_persisted_sku_features
individually on each database could be tedious.
Therefore, you can use sp_foreach db to check the same for you.
CREATE TABLE #Tables(DB_Name nvarchar(100),feature_name NVARCHAR(4000),feature_id int );
EXEC sp_foreachdb N'use ?
INSERT #AllTables SELECT db_name() DN_Name,feature_name, _
	feature_id FROM sys.dm_db_persisted_sku_features';
SELECT * FROM #Tables ORDER BY 1;
DROP TABLE #Tables;
Once you have verified that no enterprise features are being used from above query should be good to proceed with the downgrade activity as described below:
Let’s Begin
Step 1
Make sure the database(s) and its respective application(s) are not connected.
Step 2
Check for any running SQL agent Jobs and make sure they are accordingly stopped. If there are quite a number of jobs, you can stop the SQL Server Agent services.
Step 3
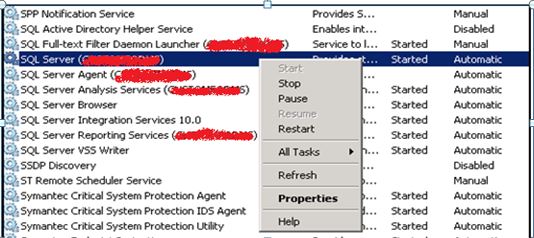
Now stop the SQL Server services for the instance identified for a downgrade.

Step 4
Copy the System database as shown below, i.e., the Master, MSDB and Model to a location different from current as we would need them later.

Step 5
Now you need to simply uninstall the SQL server involved in this activity as shown below:
Go to Programs and Features.

Click Uninstall.

Now click on Remove.

Next screen would be to specify the instance of SQL server you need to remove.
Here, you can uninstall the SQL Server Enterprise edition and its components. (Includes SSIS, SSAS, SSRS, SSDT) if applicable. There is no need to uninstall the Shared Components (SSMS, Client Tools, and Connectivity). But even if you feel the need to do so, you are good to go with that as well.

As shown below, I am not going to uninstall the Shared Components, therefore I have not checked the options for that while removing the other components.

Click Next and complete the uninstall process.

Step 6
Reboot the server.
After rebooting, you will notice that the user databases would still exist on their same directories while system databases are the one that will be vanished. That is the reason why we copied the data and log files accordingly for them.
Step 7
Once the Enterprise edition has been completely removed from the machine, we will need to install the respective SQL server standard edition for the same.
Insert/Mount the media and install.


Here we will not go in description on how to get the installation done. There are various articles which can be referred online for same.
Step 8
Once the SQL Server has been installed successfully, connect to the new instance and click for new query and run below:
SELECT @@Version

Hence, it confirms that we have successfully installed the Standard edition.
Also, one more thing that we need to notice is on the build number, which as highlighted in the above screenshot has changed from 10.50.1790.0 to 10.50.1600.1. Therefore, we have to ensure to apply correct security patches in order to bring the build number back to its original, before moving ahead.
For more information on the build number and their respective version, please see http://sqlserverbuilds.blogspot.in/.
After applying the updates, you can verify the same by executing the query:
SELECT @@Version

Step 9
Now we will proceed ahead and stop the SQL Server services running.

Step 10
Now, simply copy and paste the system database files copied earlier (i.e., mdf and ldf files for master, msdb and model) as shown below:

Step 11
Once files are copied, we can start the SQL Services back to running.

Once the SQL Server is back and running, we should see all the required jobs, logins, ssis packages, databases etc., visible and should be good to go from hereafter.
Even though it may not be required but since my databases were not that big in size, on a safer note, I went ahead with running DBCC CHECKDB after the downgrade was completed, just to make sure for any corruption that might not be sitting out there.
History
- First version of the post
