We can use the admin center of Office 365 for managing Office 365 and SharePoint Online. However, if we use the PowerShell for Office 365 to create scripts for regular tasks, it will be much easier and consistent on an ongoing basis. Let's explore how we can leverage PowerShell for Office 365 from a remote machine.
In order to be able to run PowerShell commands for Office 365, you need to have administrator rights. Also, the remote machine where you plan to run the PowerShell commands should be a 64-bit machine with at least Windows 7 or Windows Server 2008 R2. Go ahead and install the following where you will be running the PowerShell commands:
- Microsoft Online Services Sign-in Assistant
- Azure Active Directory Module
Managing Office 365
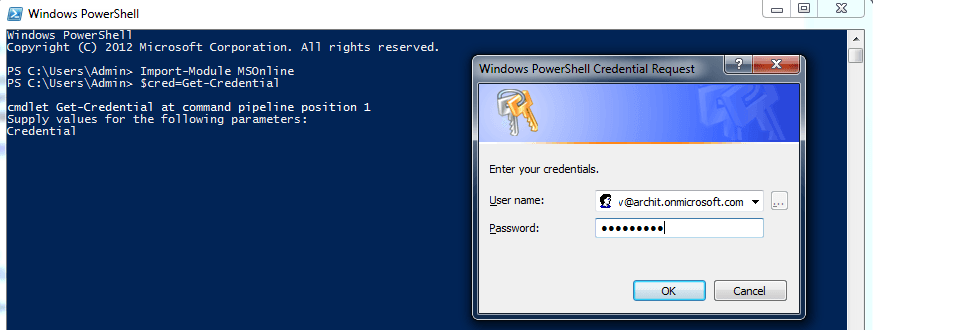
The first step is to import the MSOnline module into PowerShell session.
Import-Module MSOnline
Next, get the admin credential into a variable.
$credential = Get-Credential
After running this command, a login prompt pops up. Give the Office 365 admin credentials. The credentials will not be validated. It will just be stored in the variable.

Now, you can establish the connection using the credential variable.
Connect-MsolService -Credential $credential
If the entered credentials are correct, the connection will be established. After that, you can start issuing the commands for the Office 365 operations.
The PowerShell commands for Office 365 follow a naming convention of:
<verb>-Msol<noun>. Here, the Msol stands for the Microsoft Online (The module which we have imported).
Suppose I wanted to update my Job Title to “The SharePoint Guide”, I can give a command as follows. It is required to specify the UserPrincipalName as it will indicate which user details we are updating.
Set-MsolUser -UserPrincipalName spdev@archit.onmicrosoft.com -Title "The SharePoint Guide"
After executing this command, if I check by Office 365 Admin portal -> Users -> Edit User -> Additional Details,
I can see that the Job Title change is reflecting.

If you want to add a security group (e.g., SharePoint Developers) in your Azure AD for your Office 365 tenant, you can run the command:
New-MsolGroup –DisplayName "Developers" –Description "SharePoint Developers"
To add a member to this group, first you need to get the user.
$member = Get-MsolUser -UserPrincipalName spdev@archit.onmicrosoft.com
Then, get the group and add the member.
$group = Get-MsolGroup | Where-Object {$_.DisplayName –eq "Developers"}
Add-MsolGroupMember -GroupObjectId $group.ObjectId -GroupMemberType "user"
	-GroupMemberObjectId $member.ObjectId
In Office 365 Admin portal -> Azure AD -> Groups, we can see the Group is created and the user is added to the group.

When you have a lot of users to be added, or a lot of details that need to be updated, it will be much easier to create a script and execute it. Also, since you will keep all the user details in a file (which we can read from the script), you will have a record of what data has been updated.
Managing SharePoint Online
In order to be able to run some of these commands, you need to be the SharePoint Online Global Admin.
Prerequisites
- Atleast Windows Powershell 3.0
- SharePoint Online Management Shell
Once you have installed the above prerequisites, open up the SharePoint Online Management Shell.
As in Office 365, you need to get the credential:
$credential = Get-Credential
This command will open up the pop up to enter the username and password of the SharePoint Online admin.
The commands for SharePoint Online will be of the format:
<verb>-SPO<noun> where the SPO stands for SharePoint Online.
First, you need to connect to the SharePoint tenant.
Connect-SPOService -Url https://archit-admin.sharepoint.com -Credential $credential
Once you are connected successfully, you can issue the commands specific to your SharePoint online tenant
Get-SPOSite will list all the site collections within the tenant
Get-SPOSite | Select URL
If you want to change some properties of the site for example the Title.
First, you need to get the specific site by specifying the url. Then use the Set-SPOSite command:
$site = Get-SPOSite https://archit.sharepoint.com
Set-SPOSite $site -Title "The SharePoint Guide"
Once you have got a reference to the site, you can use the built in commands. For example, the following commands get all the users in the site.
Get-SPOUser -Limit All -Site $site
The -Limit All will ensure all the users are listed.
By default, when you access SharePoint online with the built in commands, you can only do some limited things such as updating the site collection, site and user details.
However, when you use the SharePoint Client side object model with PowerShell, you will have much more functionality available such as updating Lists, List items, etc. Basically, everything that you could do with SharePoint Client side object model.
I will do another post on using the Client Side Object Model with PowerShell.
The post PowerShell for Office 365 appeared first on The SharePoint Guide.
