Hi Folks, Hope you all are fine. Being a senior developer i always like to work/develop in any platforms. It could be either in Windows or Mac. Last couple of days, I was looking new Asp.net 5 and i was wondering to see it's feature of platform independence. Its really amazing. Now any one can develop web application using asp.net 5 inside Mac machine. I am also a proud owner of MacBook Pro  . I was thinking why not i use my Mac as a asp.net development machine. Cool, right? My plan is to cover up the followings:
- What is asp.net 5
- Prerequisite/Installation
- Free awesome editor "Visual Studio Code"
- Basic overview about Yeoman
- Creating Project and running in Mac
What is ASP.NET 5
According to Asp.net it is as follows: ASP.NET 5 is a new open-source and cross-platform framework for building modern cloud-based Web applications using .NET. It built from the ground up to provide an optimized development framework for apps that are either deployed to the cloud or run on-premises. It consists of modular components with minimal overhead, so you retain flexibility while constructing your solutions. You can develop and run your ASP.NET 5 applications cross-platform on Windows, Mac and Linux. ASP.NET 5 is fully open source on GitHub. Cool... 
Prerequisite/Installation
Before jumping into the development, we need to prepare the environment first. Also need to install couple of tools. They are listed down as follows:
What is Mono
Mono is a platform independent dot net framework. Yes right. Details are as follows: "Mono is a free and open source project led by Xamarin (formerly by Novell and originally by Ximian) to create an Ecma standard-compliant, .NET Framework-compatible set of tools including, among others, a C# compiler and a Common Language Runtime."
Free awesome editor "Visual Studio Code"
At last Microsoft introduce very fast, light weight editor (not IDE) named "Visual Studio Code". Question is, what is the difference between IDE and Editor? Ok, IDE is mainly has many features like: all debugging, compilation, package managers, tooling etc managed by simple UI. So basically its naturally very heavy weighted application and takes a lot of resources to run. On the other hand, a editor is something which deals all the functionalities mainly through commands. Its very light weight. This type of editor is very handy for web development. In web development, developer deals with writing html, javascript and css. So they really like to use editor like, Subline Text, TextWrangler, NotePad++ etc. "Visual Studio Code" is similar like that. But the main magic of this editor is it features. All the main features that have in "Visual Studio IDE", present here i.e Powerful Inteli Sense, Git repo integration, code comparison etc. But as i already said, its totally depend on its various commands. Resolving nuget dependency, building, publishing, searching, theming etc uses commands. A developer need hardly 2/3 hour to get into the basic commands and to use it. I will cover some useful commands here also.
Basic overview about Yeoman
One might think, in Visual Studio IDE, we have flexibility to use its installed template to start fast and its very handy. What about in Mac? Well, there are couple of tools actually available where using terminal, we can create various project templates to start. A useful list can be found Here . Its called "Yeoman". First, we will install Yeomen in Mac. Yeoman uses "node" and "HomeBrew", so first we need to install/configure Yeoman. Its pretty simple actually. Steps are as follows:
Download
Homebrew if its not installed already. Verify Homebrew is not sick:
brew doctor
Install Node (with NPM) with Homebrew:
brew install node
Add the following to your bash or zsh profile:
export NODE_PATH="/usr/local/lib/node"
export PATH="/usr/local/share/npm/bin:$PATH"
Restart Terminal, then run:
npm install -g yo grunt-cli bower
Yeoman is now installed with Node and NPM Confirm Ruby is installed with: ruby -v
Thats it. So, probably your development environment is ready to develop a asp.net application inside Mac ! Lets do it
Creating Project and running in MacOS
Create a project directory in Mac (via finder) and goto this directory through the terminal using
cd
command. My projects are kept inside "/Volumes/Backup/Programming/MSProjects/Projects" path. You can create your own directory.
 Now, i will use yeoman to create our project template. We already installed yeoman before. But hold on here. We need to install yeoman code generator first for asp.net type of applications. Lets do that.
npm install -g generator-aspnet
Great. Now we have our generator installed. So all we need now is, to use this generator every time when we create a asp.net type of project/solution. Lets create a asp.net 5 web application using this. Type
yo aspnet
and see the magic
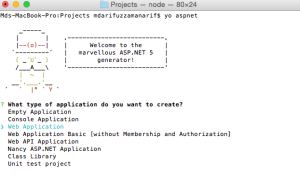
You can select a project type from various template and use just like we do inside Visual Studio. Nice hah. Here I am selecting "Web Application" type template. The magic of this type of template is, all the membership (registration, login, logout etc) are builtin with some basic pages. Lets do that. Press enter (After selecting the template through up/down keys). Then it will ask you to enter a solution name as follows:
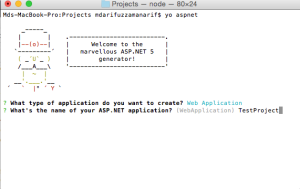
Name it like "TestProject" and press enter. All done, great. Now goto this "TestProject" directory from terminal.
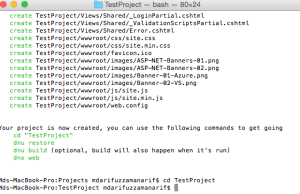
You are almost there to run. Asp.net 5 is fully package oriented. All the dependency (including framework itself) are managed by packages. As all done, we need to download/resolve the necessary packages to make the project complete. It is very simple again. use the below command to do that
dnu restore
You will see some progress in terminal and after a couple of moment, it will be finished.
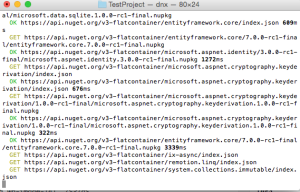
Great. Lets see what have we made till this. Open visual studio code (That you downloaded in first step). And through "File/Open" menu, select our solution directory.
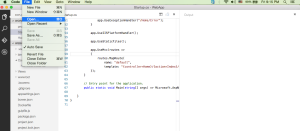
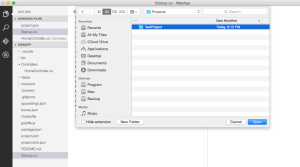
After clicking the "Open" button you will see below:
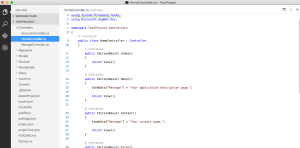
Thats really great. You will see the directory structure in left panel. I just select controller to see the generator code. Nice, lets run this project. What i told you before is, "Visual Studio Code" is totally command based. We can run our project through command of "visual studio code" or via the terminal. Lets do this from terminal for now. Hope you already in terminal and you are in Solution root directory there. Just type
dnx web
and enter 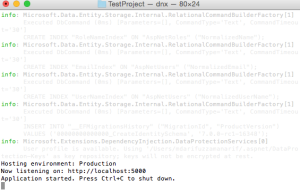
Great. you see "http://localhost:5000/" is there and it also tells, you can stop this server anytime pressing Ctrl + C.
Copy this address and paste inside a browser. Voila !!!!
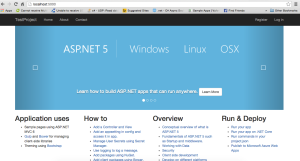
You just run a asp.net web application in Mac !!!!. Do whatever you like to change in the code. You will be happy to see the inteli-sense working nicely.
Conclusion
It was a basic overview. Will get back to you more on this later on. Bye for today. Will appreciate for any feedback. Cheers!
