In the last post tip #122, we discussed Merge transformation. Now in this tip, we are going to discuss Merge Join. Although, Merge & Merge Join might be confusing sometimes. So, let me explain it here.
As explained earlier, merge is like a union operation in which it just collects all the records from provided sources without any condition. Suppose we have Person & PersonPhones - two sources as shown below.
Below is Person table with two columns personId & Name:
| PersonId | Name |
1 | Ram |
2 | Shyam |
3 | Ghanshyam |
Below is PersonPhones table with two columns PersonId & Phone:
PersonId | Phone |
1 | 9999 |
2 | 3122 |
3 | 3422 |
Now if we talk about merge transformation, then the result would be as shown below:
Merge Transformation output:
| PersonId | Name | Phone |
1 | Ram | |
2 | Shyam | |
3 | Ghanshyam | |
1 | | 9999 |
2 | | 3122 |
3 | | 3422 |
Now, If we talk about Merge Join transformation for the above same inputs (Person, PersonPhones), then we will get the following output:
| PersonId | Name | Phone |
1 | Ram | 9999 |
2 | Shyam | 3122 |
3 | GhanShyam | 3422 |
So, Merge Join is basically a join like Inner join, Left outer join, Full outer join, etc.
I hope you got the context. Here, we go step by step to implement the Merge join transformation.
Step 1
Add the different sources which you want. For this example, I am taking two sources which have AdventureWorks database and one source has Person table & another one has PersonPhone as shown above in the example.
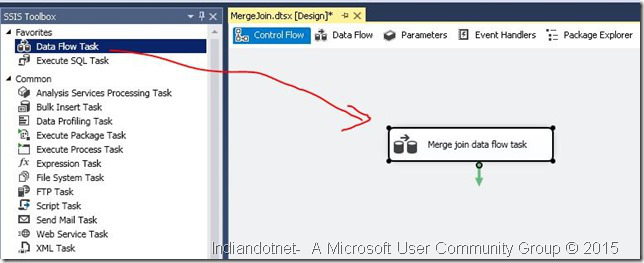
We added data flow task as shown in the below image and renamed it to Merge join data flow task.

Now, in this data flow task, we will add data sources, in the first source, we use person table and in the second source, we use PersonPhone.
From person table, we are choosing BusinessEntityId, FirstName, MiddleName, LastName, suffix as shown in the below figure:

In the other source, we are using BusinessEntityId & Phone number columns.

If you find any issue in the above steps, then please follow the previous articles of step by step SSIS on Indiandotnet.
Step 2
Now once the source is configured, we are going to drag drop merge control as shown in the below figure:

Step 3
Now to configure Merge join, we are going to drag drop inputs from the sources. When you try this at your end, then you will get the following screen. Here, you have to set left input and right input for the merge join.

Now, when you tried it, you might have found the following warning which means the provided inputs of datasource1 & datasource2 are not sorted.

Step 4
Here, you have the option to add a Sort transformation and then provide input to merge join transformation control which is fairly simple and we have discussed in previous tips. Here, I am sharing one more option.
In this, you have to right click on DataSource and choose option Advance Editor by which you will get the following screen. You have to select “OLEDB Source output” of “Input and output Properties” tab.
Here, we need to make the IsSorted property to True as highlighted in the below image.

Step 5
Once the above step is done, the next step is to click on output column’s BusinessEntityId value. Here, you have to set the SortKeyPosition to 1.
As highlighted in the below screen:

Step 6
Once you configured sorted input sources, then the next step is to configure the merge join. So when you click on Edit option of merge join, you will get the following screen.
Here if you see, we can configure join type like Inner join, Left outer join, Full outer join.
For the current example, we are choosing the option “Inner join” and joining key is BusinessEntityId which is primary key in Person table and foreign key in PersonPhone table.

Once the configuration is done, we can select what columns we need as an output.
Step 7
Now, the next step is to configure the output in Excel. For this, we drag & drop a destination source. In the current example, we are using Excel as a destination. We are mapping the columns of output to Excel as shown in the below figures.


Step 8
Once everything is configured, we run the package and if everything is working fine, then we will get the following screen:

To cross check the result, we open the Excel and we get the output which we expected as shown in the below figure:

I hope this article might help you to understand the Merge join.
Enjoy !!!
Filed under: CodeProject, Sql server, SQL Server Integration Service, SSIS, TIPS
Tagged: Learn SSIS, Merge Join, Merge Join Transformation, Step By Step, Zero to Hero in SSIS 
