Introduction
In this article I will walk through with you on how to set up WebRTC, using AngularFire2 library to communicate with the Firebase real time database as the signaling server.
Using the code
Follow the instructions available at https://github.com/mengwangk/webrtc-angularfire2 to download and set up the sample code.
The app is created using Angular CLI so do make sure you have NodeJS and Angular CLI installed.
The Firebase configuration is configured in environments.ts. You can easily change it to your own Firebase configurations.
In app.component.ts
import { Component, OnInit, ViewChild, Injectable } from "@angular/core";
import { Observable } from "rxjs/Observable";
import { RouterModule, Routes, ActivatedRoute, Router } from "@angular/router";

import {
  AngularFireDatabase,
  FirebaseListObservable
} from "angularfire2/database";
import { AngularFireAuth } from "angularfire2/auth";
import * as firebase from "firebase/app";

const SERVERS: any = {
  iceServers: [
    { urls: "stun:stun.services.mozilla.com" },
    { urls: "stun:stun.l.google.com:19302" }
  ]
};

const DEFAULT_CONSTRAINTS = {
  optional: []
};

declare let RTCPeerConnection: any;

@Component({
  selector: "app-root",
  templateUrl: "./app.component.html",
  styleUrls: ["./app.component.css"]
})
export class AppComponent implements OnInit {
  pc: any;
  channel: FirebaseListObservable<any[]>;
  database: firebase.database.Reference;
  user: firebase.User;
  senderId: string;

  @ViewChild("me") me: any;
  @ViewChild("remote") remote: any;

  constructor(
    public afDb: AngularFireDatabase,
    public afAuth: AngularFireAuth
  ) {}

  ngOnInit() {
    this.setupWebRtc();
  }

  setupWebRtc() {
    this.senderId = this.guid();
    var channelName = "/webrtc";
    this.channel = this.afDb.list(channelName);
    this.database = this.afDb.database.ref(channelName);

    this.database.on("child_added", this.readMessage.bind(this));
    this.pc = new RTCPeerConnection(SERVERS, DEFAULT_CONSTRAINTS);
    this.pc.onicecandidate = event =>
      event.candidate
        ? this.sendMessage(
            this.senderId,
            JSON.stringify({ ice: event.candidate })
          )
        : console.log("Sent All Ice");

    this.pc.ontrack = event =>
      (this.remote.nativeElement.srcObject = event.streams[0]); // use ontrack

    this.showMe();
  }

  sendMessage(senderId, data) {
    var msg = this.channel.push({
      sender: senderId,
      message: data
    });
    msg.remove();
  }

  readMessage(data) {
    if (!data) return;
    var msg = JSON.parse(data.val().message);
    var sender = data.val().sender;
    if (sender != this.senderId) {
      if (msg.ice != undefined)
        this.pc.addIceCandidate(new RTCIceCandidate(msg.ice));
      else if (msg.sdp.type == "offer")
        this.pc
          .setRemoteDescription(new RTCSessionDescription(msg.sdp))
          .then(() => this.pc.createAnswer())
          .then(answer => this.pc.setLocalDescription(answer))
          .then(() =>
            this.sendMessage(
              this.senderId,
              JSON.stringify({ sdp: this.pc.localDescription })
            )
          );
      else if (msg.sdp.type == "answer")
        this.pc.setRemoteDescription(new RTCSessionDescription(msg.sdp));
    }
  }

  showMe() {
    navigator.mediaDevices
      .getUserMedia({ audio: true, video: true })
      .then(stream => (this.me.nativeElement.srcObject = stream))
      .then(stream => this.pc.addStream(stream));
  }

  showRemote() {
    this.pc
      .createOffer()
      .then(offer => this.pc.setLocalDescription(offer))
      .then(() =>
        this.sendMessage(
          this.senderId,
          JSON.stringify({ sdp: this.pc.localDescription })
        )
      );
  }

  guid() {
    return (
      this.s4() +
      this.s4() +
      "-" +
      this.s4() +
      "-" +
      this.s4() +
      "-" +
      this.s4() +
      "-" +
      this.s4() +
      this.s4() +
      this.s4()
    );
  }

  s4() {
    return Math.floor((1 + Math.random()) * 0x10000).toString(16).substring(1);
  }
}
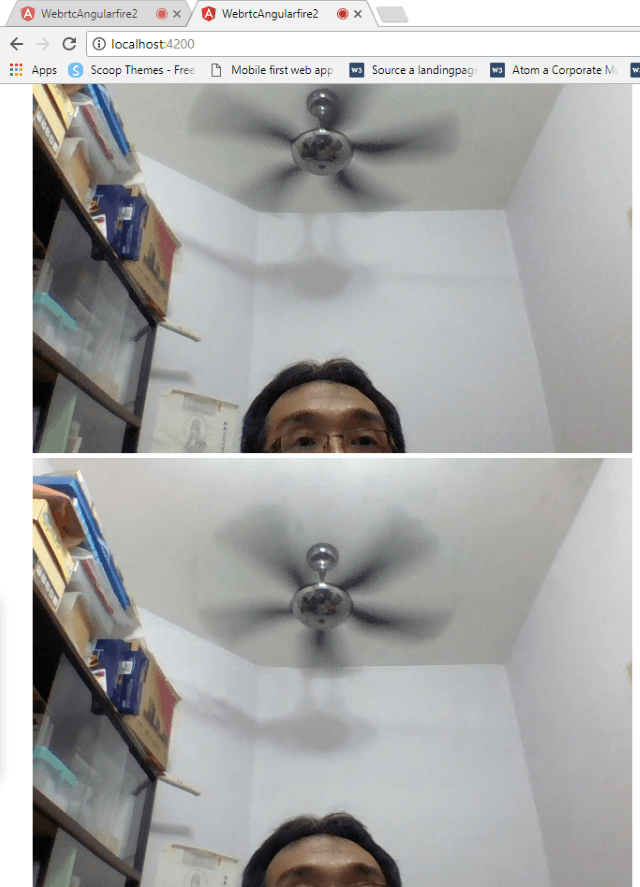
The results in Chrome.

WebRTC is open source. It will allow your IoT devices to communicate peer to peer via a common set of protocols. You can find out more information through the official site.
History
June 30th, 2017 - Initial relase.
