In Part 1, we created recycler view without any model or view holder. In this part, we will create data model and a view holder and bind both these to the recycler view.
Previous part: http://www.androidlearner.com/2017/07/android-recycler-view-tutorial.html
Now let's first create a simple data model: DummyModel.java
This class does nothing special, it just generates some dummy data.
public class DummyModel {
String textData = "not set yet !!";
public DummyModel() {
}
public DummyModel(String data) {
textData = data;
}
static public List<DummyModel> getDummyModel(int length) {
List<DummyModel> dummyModelsList = new ArrayList<>();
for (int i = 0; i < length; i++) {
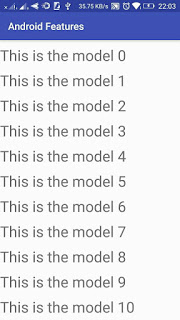
dummyModelsList.add(new DummyModel("This is the model "+i));
}
return dummyModelsList;
}
public void setText(String text) {
this.textData = text;
}
}
Now let's create our view holder which will set the data to the view: DummyVH.java
We are creating a separate class for our view holder. This enables to reuse the component with different recycler view or one recycler view to have different components.
public class DummyVH extends RecyclerView.ViewHolder {
TextView textView;
public DummyVH(View itemView) {
super(itemView);
textView = (TextView)itemView.findViewById(R.id.textView);
textView.setOnClickListener(new View.OnClickListener() {
@Override
public void onClick(View v) {
Toast.makeText(RecylerActivity.context,
"yooo "+textView.getText(), Toast.LENGTH_SHORT).show();
}
});
}
public void bindVH(DummyModel dummyModel)
{
textView.setText(dummyModel.textData);
}
}
Now let's create our adapter which will bind or view and the data model. RvDataAdpt2.java
This class is the same as the previous dataAdapter created in the previous tutorial. Recycler layout item is also the same. The view holder is just initiated from a different class.
public class RvDataAdpt2 extends RecyclerView.Adapter {
List<DummyModel> dummyModelsList;
public RvDataAdpt2(List<DummyModel> listDummyModels)
{
dummyModelsList = listDummyModels;
}
@Override
public RecyclerView.ViewHolder onCreateViewHolder(ViewGroup parent, int viewType) {
View view = LayoutInflater.from(parent.getContext()).inflate
(R.layout.recycler_item,parent,false);
return new DummyVH(view);
}
@Override
public void onBindViewHolder(RecyclerView.ViewHolder holder, int position) {
((DummyVH)holder).bindVH(dummyModelsList.get(position));
}
@Override
public int getItemCount() {
return dummyModelsList.size();
}
}
Now let's bind this adapter to the recycler view. I have used the project created in the previous tutorial.
public class RecylerActivity extends AppCompatActivity {
public static Context context;
RecyclerView recyclerView;
RecyclerView.Adapter mAdapter;
RecyclerView.LayoutManager mLayoutmanager;
protected void onCreate(Bundle savedInstanceState) {
super.onCreate(savedInstanceState);
context = this;
setContentView(R.layout.activity_recyler);
recyclerView = (RecyclerView)findViewById
(R.id.my_recycler_view);
mLayoutmanager = new LinearLayoutManager(this);
recyclerView.setLayoutManager(mLayoutmanager);
mAdapter = new RvDataAdpt2(DummyModel.getDummyModel(100));
recyclerView.setAdapter(mAdapter);
}
}
Get the source fromhttps://github.com/sapandang/AndroidFeatures.
CodeProject

