Introduction
The process of building large projects from source code has never been smooth. Build steps change from one version to another, also we need to deal with dependencies and code that is intended for UNIX systems. So the best thing I can do is to collect all pieces in one place and provide step by step instruction.
My goal is to write a series of articles that will show how to setup Apache server, create a simple site with login system (so we will also need PHP and SQL), and more importantly, investigate what happens on the C source code level. This understanding will help us to find a security hole (or manually create one) and investigate how we can get user information without knowing the actual login and password.
Each article will have a numeric index. The first article will be 1.0, the second will be 1.1 and so on. In order to avoid depression and frustration, I will proceed by small steps, so each step will not necessarily correspond to step dictated by the logic.
Step by Step Build
We will build Apache 2.4.33. Go to this link and download archive with source code. Unzip it and rename the extracted folder to httpd. Now, we need to download dependencies:
aprapr-iconvapr-utilexpatpcre (need to install cmake to build)
The first three can be downloaded from here. We will use Apr 1.6.3, Apr-util 1.6.1, and Apr-iconv 1.2.2. Download archives, unzip them and put extracted folders in httpd\srclib. Rename them to apr, apr-util, apr-iconv accordingly.
Download expat from here. We will use Expat 2.2.5. Download archive, unzip it, enter extracted folder and put nested expat folder to httpd\srclib.
Download pcre from here. We will use Pcre 8.42 (there is a newer version of the library named pcre2, however apache uses the older version). Download archive, unzip it and put the extracted folder to httpd\srclib. Rename it to pcre.
There are additional optional dependencies, we will add them in the next article. For now, we will go with minimum to satisfy build process.
Expat Build
Let's build expat. Go to httpd\srclib\expat folder and open expat.sln solution in Visual Studio. Solution expat will contain 7 projects:
elementsexpatexpat_staticexpatwexpatw_staticoutlinexmlwf
Since I use Visual Studio 2013, I have to go to < project properties -> Configuration Properties -> General > and set Platform Toolset to Visual Studio 2013 (v120). Now, right-click expat project and select Build - this will build single project expat.
Pcre Build
Now let's build pcre. It is a cmake-based project, so we need to download cmake binaries and install them from here. Go to httpd\srclib\pcre folder and create a subfolder named build. Launch console and cd to newly created build folder. Execute the following command:
cmake --help
In the output, you will see the available generators. To generate solution files for Visual Studio 2013, we need Visual Studio 12 2013 generator. Execute the following command:
cmake -G "Visual Studio 12 2013" ..
Open generated PCRE.sln solution in Visual Studio. Solution PCRE will contain 12 projects. Right-click pcre project and select Build - this will build 2 projects: pcre and ZERO_CHECK.
Apr Build
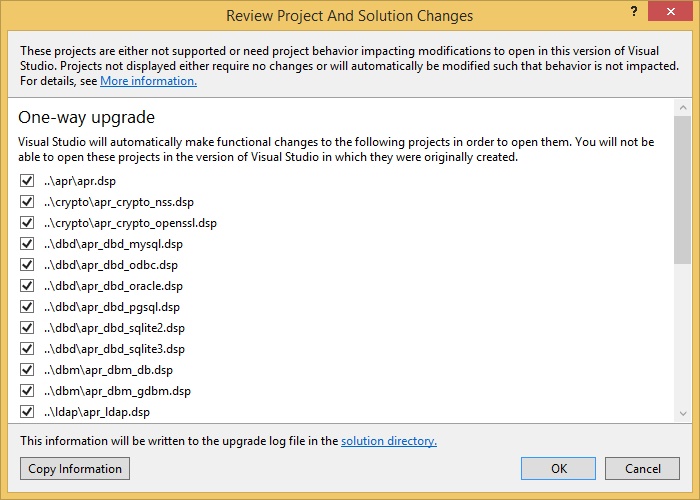
Now let's build apr, apr-iconv, apr-util. Go to httpd\srclib\apr-util folder and open aprutil.dsw file in Visual Studio. In older versions of Visual Studio, .sln files had .dsw extension and .vcxproj files had .dsp extension. Visual Studio will open the following upgrade window:

Click OK and wait until all 25 projects are upgraded. It will take a while to prepare the solution, so it might appear hanged, in the end, it will open migration report web page in your browser.
Right-click libaprutil project and go to project settings:
< Configuration Properties -> VC++ Directories -> Include Directories > : Add path to httpd\srclib\expat\lib directory (it contains header file)
< Configuration Properties -> Linker -> General -> Additional Library Directories > : Add path to httpd\srclib\expat\win32\bin\Debug directory (it contains import library file)
< Configuration Properties -> Linker -> Input > : Modify $(XML_PARSER).lib to libexpat.lib
Right-click aprutil project and go to project settings:
< Configuration Properties -> VC++ Directories -> Include Directories > : Add path to httpd\srclib\expat\lib directory (it contains header file)
Right-click libaprutil project and select Build - this will build 7 projects.
Apache Build
Now let's build apache itself. Go to httpd folder and open Apache.dsw. You will see the upgrade window again:

Click OK, in a while, you will see the following notification window:

Check Do this for all similar cases and click No. After conversion, go to libhttpd project settings:
< Configuration Properties -> VC++ Directories -> Include Directories > : Add path to httpd\srclib\pcre\build directory (it contains header file)
< Configuration Properties -> Linker -> General -> Additional Library Directories > : Add path to httpd\srclib\pcre\build\Debug directory (it contains static library file)
< Configuration Properties -> Linker -> Input > : Make sure we have pcred.lib
Open util_pcre.c file:

Add PCRE_STATIC macro before pcre.h header inclusion:
#include "httpd.h"
#include "apr_strings.h"
#include "apr_tables.h"
#define PCRE_STATIC
#include "pcre.h"

#define APR_WANT_STRFUNC
#include "apr_want.h"
Go to BuildBin project settings:
< Configuration Properties -> VC++ Directories -> Include Directories > : Add path to httpd\srclib\expat\lib directory (it contains header file)
Go to httpd\support\win32 folder and open ApacheMonitor.rc file. Comment the following line:
CREATEPROCESS_MANIFEST_RESOURCE_ID RT_MANIFEST "ApacheMonitor.manifest"
Now, right-click BuildBin project and select Build - this will build our web server (124 projects).
Afterword
Note that we compile debug configuration, because we will debug the running server in Visual Studio to see what's going on. In the next article, we will add openssl, zlib, and other optional libraries, and also fix config files so our server can run.
