Introduction
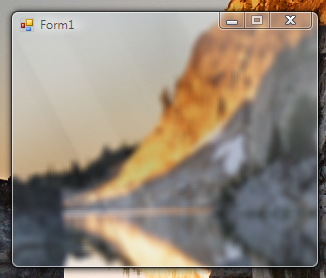
Windows Vista has a new aero theme that includes what we call the glass effect (powered by the Desktop Windows Manager). While the non-client area of all windows get glass for free, extending glass into the client area and drawing text or pictures on glass are things you have to work for, as a developer.
[This intro text is borrowed from Daniel Moth: Windows Vista: Get the glass effect in your C# applications <-You can go to this link and see more about Vista glass ^_^]
[Copyright Daniel Moth, Aug 22, 2006. All rights reserved.]
The demonstration is written in C#, and was tested on Windows Vista Beta 2.5472.
How to extend the frame into client area?
The Desktop Windows Manager (DWM) provides a group of APIs called DWM API, two of them can help us: DwmIsCompositionEnabled and DwmExtendFrameIntoClientArea.
DwmIsCompositionEnabled is used to check whether the glass is enabled by the user:
[System.Runtime.InteropServices.DllImport("dwmapi.dll")]
public extern static int DwmIsCompositionEnabled(ref int en ) ;
And DwmExtendFrameIntoClientArea is used to extend the frame into your window's client area:
[System.Runtime.InteropServices.DllImport("dwmapi.dll")]
public extern static int DwmExtendFrameIntoClientArea(IntPtr hwnd,
                         ref MARGINS margin ) ;
The second parameter of DwmExtendFrameIntoClientArea is a structure MARGINS, which indicates how far into the client area the frame should be extended. If you want to render the entire client and non-client area as a seamless sheet of glass, just set any margin to -1:
int en=0;
MARGINS mg=new MARGINS();
mg.m_Buttom = -1;
mg.m_Left = -1;
mg.m_Right = -1;
mg.m_Top = -1 ;
if (System.Environment.OSVersion.Version.Major >= 6)
{
DwmIsCompositionEnabled(ref en);
if(en>0)
{
DwmExtendFrameIntoClientArea(this.Handle, ref mg);
}else{
MessageBox.Show("Desktop Composition is Disabled!");
}
}else{
MessageBox.Show("Please run this on Windows Vista.");
}
If you run your app now, you can’t see any effect. Because the system will draw the client area with the window backcolor automatically. So we have to paint it with a solid black brush(it so happens that the bit pattern for RGB black (0x00000000) is the same as the bit pattern for the 100% transparent ARGB), or just set the TansparencyKey property into your form’s BackColor. Then run your app, there will be the desired effect.

Problems
But soon you will find some problems:
If there’s a Label on the glass area, or you draw some text using a Graphics object, you’ll see the text smoothing works “ugly”. Since it uses the form’s background to determine the color it should smooth against --- if you set the TansparncyKey,it’s the tansparncy key color, if you paint the area with a black brush, it is black, and, even worse, all the black area(usually the control’s text) is also transparent:


Solution
The solution to these problem is: do not use any Label, and draw the text by yourself. But don’t draw your text directly on the glass using the Graphics.DrawString() method for the ugly text smoothing. You have to “draw” your text into a GraphicsPath object first, then release the path to the glass surface by using the Graphics.FillPath method:
Graphics g = this.CreateGraphics();
GraphicsPath blackfont = new GraphicsPath();
SolidBrush brsh = new SolidBrush(Color.White);
blackfont.AddString("Hello Vista",
new FontFamily("Tahoma", (int)FontStyle.Regular, 26,
new Point(0, 0), StringFormat.GenericDefault);
g.SmoothingMode = System.Drawing.Drawing2D.SmoothingMode.HighQuality ;
g.FillPath(brsh, blackfont);
Here is the effect:

Or drawing some “glow” behind the text is also OK, the only thing to remember is to do this with the GraphicsPath object:
Graphics g = this.CreateGraphics();
Rectangle r = new Rectangle(pictureBox1.Left, pictureBox1.Top,
pictureBox1.Width, pictureBox1.Height);
GraphicsPath path = new System.Drawing.Drawing2D.GraphicsPath();
GraphicsPath fontpath = new GraphicsPath();
path.AddEllipse(r);
fontpath.AddString("Hello Vista", new FontFamily("Tahoma"),
(int)FontStyle.Regular, 26,pictureBox1.Location ,
StringFormat.GenericDefault );
PathGradientBrush pgb = new System.Drawing.Drawing2D.PathGradientBrush(path);
Color[] c ={ (Color.Transparent) };
g.SmoothingMode = System.Drawing.Drawing2D.SmoothingMode.HighQuality ;
pgb.CenterColor = Color.FromArgb(255, Color.White);
pgb.SurroundColors = c;
g.FillEllipse(pgb, r);
g.FillPath(Brushes.Black , fontpath);

And drawing a picture with the Alpha channel on the glass area is quite easy, if you make the form into glass by painting it black (that’s also why the demo project did not use the transparency key method to extend the glass). Just call the Graphics.DrawImage() method and it will work correctly.

Some Tips
By the way, don’t extend the glass area by using the transparency key method. Because this method has another problem – Click Transparent: When you click on the glass area, you just click something at the back of your window.
Using DrawThemeTextEx
The method above is simple, but not the standard way Windows Vista uses to draw text. Windows Vista provides an API DrawThemeTextEx for us to darw the glowing text on the Aero glass. It's a little complex to use this API.
First, we must create a memory DC by using the P/Invoke API CreateCompatibleDC. Second, you need to create a 32-bit bitmap by using the API CreateDIBSection. Third, select both the bitmap and the font into the memory DC you created before, and draw the text in the memory DC using DrawThemeTextEx. Fourth, draw the text to screen by using BitBlt. Fifth....there's no fifth now, that's all.

To see more details, please visit Vista Goodies in C++: Using Glass in Your UI or Aero Glass from Managed Code, or see the GlassText.cs in the code package.
History
- 08.29.2006 -- Initial post
- 07.10.2008 -- Source updated
