Several days ago, I was asked a question on this blog relating to using JavaScript in Sharepoint. It ended up with multiple questions and one was using jQuery in Sharepoint. As usual, I searched my own blog for answers because that is one of my main reasons of having this is to store information like this that I may need in the future, a reference for what I had done which I may be able to use again someday. Anyways, as I was searching and I found out that I haven't posted this article, I thought I have already made one before but no, so this will be my chance.
So how would you use jQuery in Sharepoint? You can follow this easy steps and you will be ready to go in minutes.
1. Download jQuery
Download the latest version of jQuery here.
2. Save It in An Accessible Location in Sharepoint
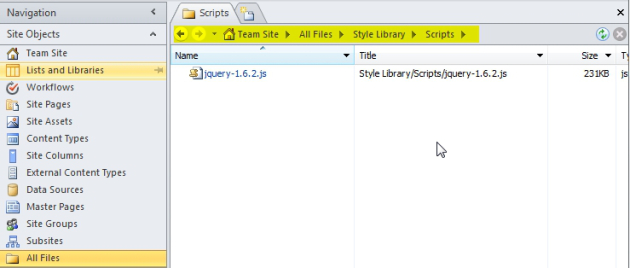
Using Sharepoint Designer, I added a folder called “Scripts” inside the “Style Library” of the root level of the site. I then added the latest jQuery File into that folder.

3. Place a Reference on that jQuery from Your Code
The best place for this will be your master page so that it can be used anywhere in your site, so open the master page (by default SharePoint 2010 uses v4.master) you are using in Advanced mode, then add your JavaScript reference like such.

<script src="/Style%20Library/Scripts/jquery-1.6.2.js" type="text/javascript"></script>
You place that inside the <head> tag:

Save that master page and you are ready to go.
4. Test If It's Working
If you are using FireFox, open up firebug or if you are using Internet Explorer, you can press F12. Go to the script tab to check whether your JavaScript reference is there, then on the console window, try whether that reference works by typing something like this:
$("#MSO_ContentTable").text("Welcome to Sharepoint jQuery")
You should get a result something like this:

