For updated information on this post, please see http://bit.ly/tfs2012
In this post, we will walk through the process of Installing & Configuring Team Foundation Server (TFS)2012 on a Windows 8 machine that has Visual Studio 2012.
If you are using TFS 2010 for the Scrum Process , see the blog post @ http://kishore1021.wordpress.com/2010/08/02/scrum-process-for-software-development-using-microsoft-visual-studio-scrum-1-0-process-template/ to configure TFS for Software Development using Microsoft Visual Studio Scrum 1.0 Process Template.
Following are the steps to Install & Configure Team Foundation Server 2012.
1. Download TFS by clicking on Install Team Foundation Server RC at http://www.microsoft.com/visualstudio/11/en-us/downloads#tfs-group. If you are a MSDN subscriber, go to Subscriber Downloads and search for Visual Studio Team Foundation Server 2012. Click on the Download button next to Visual Studio Team Foundation Server 2012 RC (x86 and x64) – DVD (English) as shown in Fig 1.
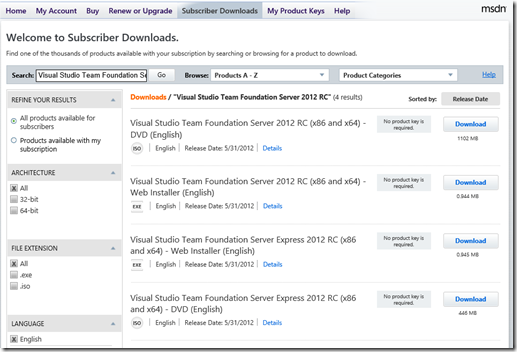
Figure 1: Visual Studio Team Foundation Server 2012 RC (x86 and x64) – DVD
This will download the ISO file to the download folder on the machine and the file name is en_visual_studio_team_foundation_server_2012_rc_x86_x64_dvd_865710
Note: System Requirements for Team Foundation Server : http://msdn.microsoft.com/en-us/library/tfs/dd578592(v=vs.110)
2. Right Click on en_visual_studio_team_foundation_server_2012_rc_x86_x64_dvd_865710 and click Mount as shown in Fig 2.

Figure 2: Mounting the VS TFS ISO File in Windows 8.
3. Click on the tfs_server.exe file to begin the installation as shown in Fig 3.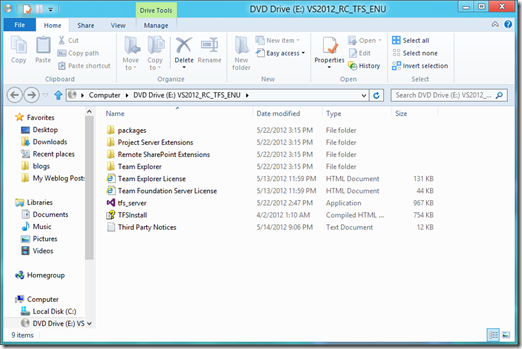
Figure 3: TFS 2012 Installation files mounted on Windows 8.
4. This launches the Team Foundation Server Setup as shown in Fig 4.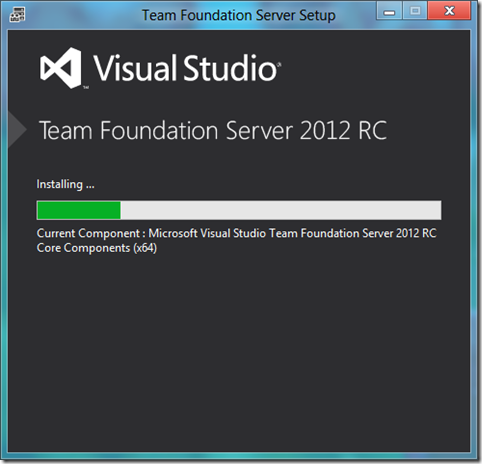
Figure 4: Team Foundation Server Setup Wizard
5. In the Team Foundation Server Configuration tool, choose Basic, click on Start Wizard as shown in figure 5.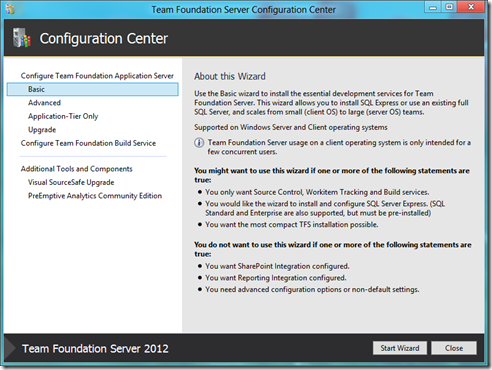
Figure 5: Team Foundation Server Configuration Center
Note: If you want to install Team Foundation Server with the least amount of preliminary work, use the basic configuration, which comes with SQL Server Express. This way, the installation wizard configures everything for you. With the basic configuration of Team Foundation Server, you can track bugs, tasks, and other work items. You can put files under version control, and use Team Web Access to log and resolve bugs. However, you will not be able to configure reporting or SharePoint with the basic configuration.
If you want to install Team Foundation Server on a single server with reporting and a team portal, use the standard configuration, which makes installation much simpler. With the standard configuration, you first install SQL Server and the report server, but Team Foundation Server can install SharePoint Foundation 2010 for you.
6. The Basic Configuration wizard appears as shown in Fig 6. Read the Welcome screen, and then choose Next.
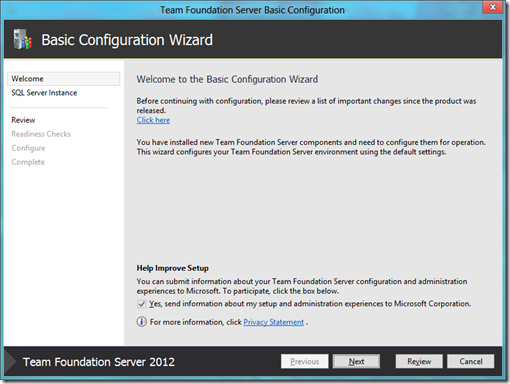 Fig 6: Team Foundation Server Basic Configuration wizard
7. Team Foundation Server requires SQL Server, but you have many options, including an option to let Team Foundation Server install SQL Server Express for you. Perform one of the following actions:
Choose Install SQL Server Express to host the configuration database on an instance of SQL Server Express, and then choose Next.
Choose Use an existing SQL Server Instance to host the configuration database on an existing instance of SQL Server, and choose Next. Then, in SQL Server Instance, type the name of the server that is running SQL Server or the named instance that will host the configuration database, and choose Next. Choose Test to test the connectivity to SQL Server.
I selected Choose Install SQL Server Express as shown in Fig 7. Review the information, and then choose Next.
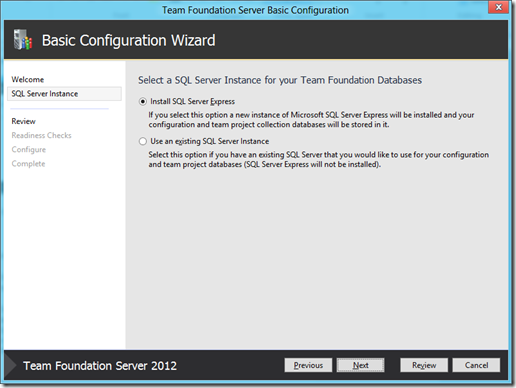
Figure 7: Install SQL Server Express selection
8. The wizard validates your configuration as shown in Figure 8. Click Next
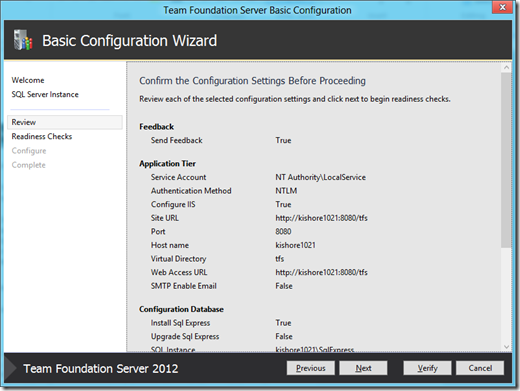
Figure 8: Validation of TFS configuration
8.1. The validation failed on my machine as shown in Fig 8.1. The good things about this wizard is that it also mentions the reason for validation failure. In my case, I just needed a system restart because I installed some updates earlier that needed a system restart.
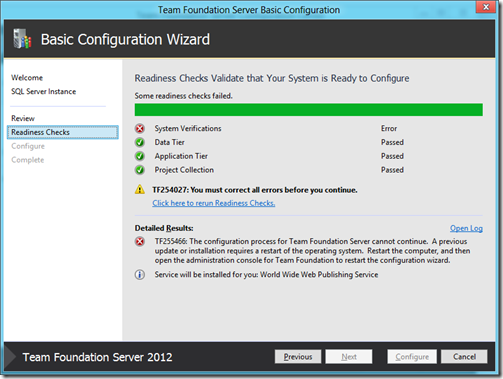
Figure 8.1: Validation failure
8.2. Restart the system and open the Team Foundation Server Administration Console from the start menu or to open the administration console at a command prompt, Type TFSMgmt.exe, and then press ENTER. The Team Foundation Server Administration Console appears as shown in Fig 8.2. Click on Configure Installed features

Figure 8.2: Team Foundation Server Administration Console
9. Click on Next as shown in Fig 9
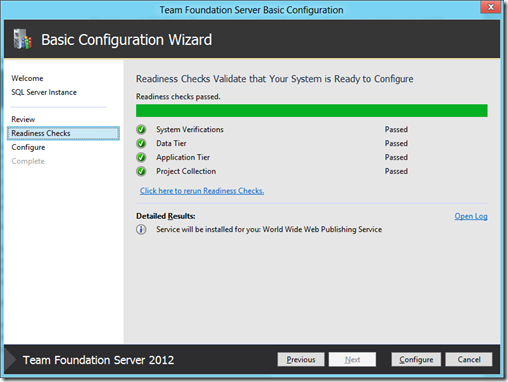
Figure 9: Readiness Checks.
10. Click on Next as shown in Fig 10.
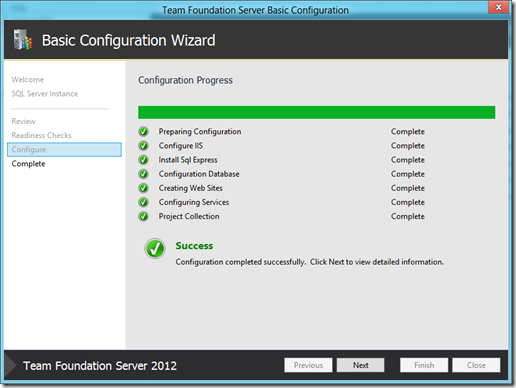
Figure 10: TFS Configuration Progress.
11. Click on Close as shown in Fig 11 and Restart the system.
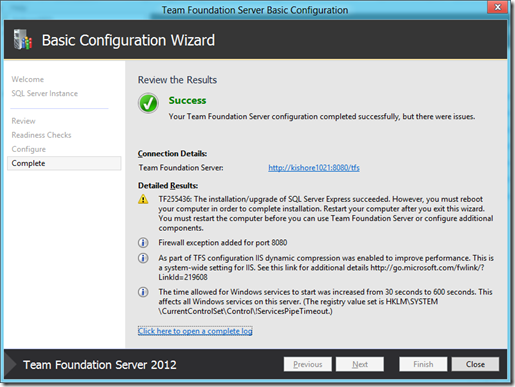
Figure 11: Installation status review.
12. Finally, the Team Foundation Server Administration Console appears as shown in Fig 12.
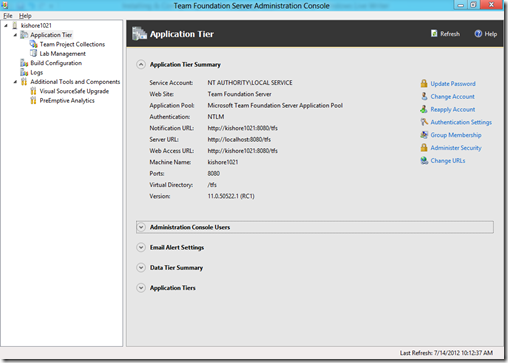
Figure 12: Team Foundation Administration Console after successful setup and configuration.
