This is the second installment of a multi-part series about getting your feet wet with Git for Windows developers. If this is your first time here, you may want to review Part I of the series.
If you have been following along so far, you likely have by now installed msysgit on your development machine, and performed the initial configuration necessary to begin using git to track changes in your source code. So, what next?
Well, before we can do much with Git, we need to make sure we have at least a token familiarity with using the Bash command prompt. To do this, we will walk through some basic commands related to navigating in bash, getting information about the file system and environment, and working with directories and files. All of these are necessary in order to work with Git using the Bash command line.
Since these posts can get long (due in large part to the large number of screen shots), this may span a few posts. It’s not as bad as it looks, really. Lots of pictures.
If you are already familiar with the concepts here, and mainly just need help with the proper syntax for performing these actions in Bash, refer to my Basic Git Command Line Reference Post which contains a listing of the most common git and Bash commands without all the narrative.
Otherwise, read on, and let’s get comfortable using the Bash command line in a Windows environment.
Get Acquainted with Bash
The Bash command line comes from a Unix heritage, and even if you are familiar with the Windows command line, or Powershell, using Bash is different.
First, we should get a little comfortable moving around our file system and performing basic tasks with files and directories.
When you first open the Bash command window, you should see something like this:
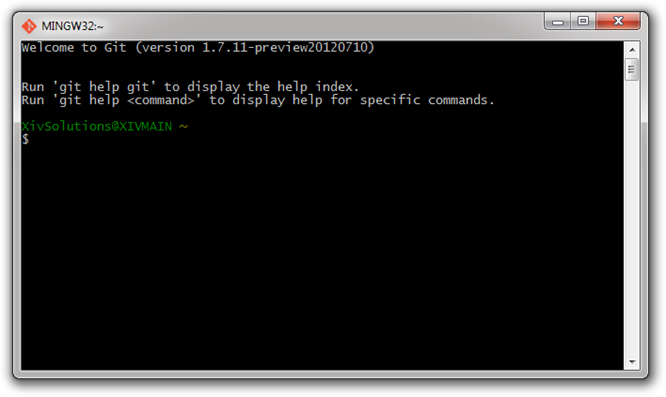
In the above, the text in green is the User Name and Computer Name, displayed using the convention UserName@ComputerName. The curlicue character following means that we are in our default directory (or folder), usually our Windows User Folder.
A line which begins with the default prompt (in this case, a $ symbol) is a line on which you will enter a command. Lines without the $ symbol will represent feedback from the system. Each time you type in a command and hit enter, Bash will execute the command, return whatever output (if any) and the leave you with a new prompt.
Note that many commands simply execute, and there is no output. It is a principle amongst Linux programming that a good program executes silently, and only provides feedback if requested, or if something has gone wrong. More on this momentarily.
List the Directories within the Current Folder
We can list other directories within our current folder using the ls command. Type ls into your Bash window and hit enter:
Use Bash to list the contents of the current directory:
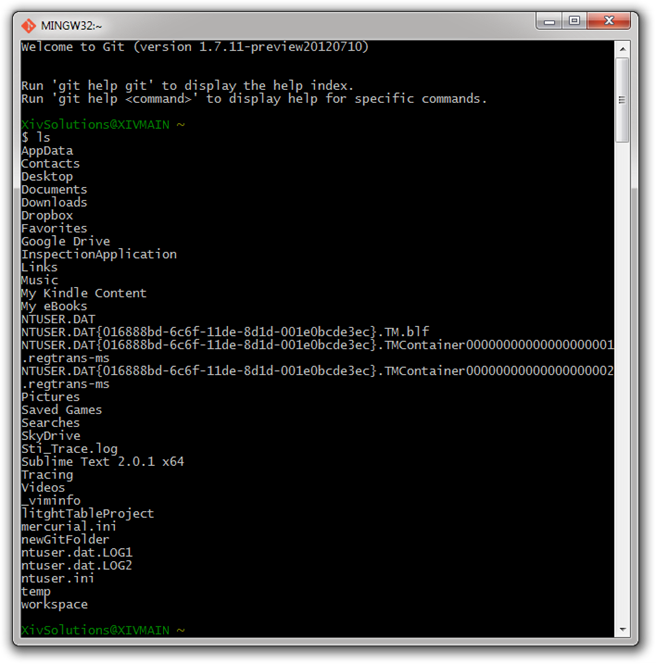
Huh. That’s a lot of stuff, and except for those items with file extensions, it is hard to tell what is a directory (folder) and what is a file of some sort. Wouldn’t it be nice to show just the folders, without the other stuff?
In a clear case of stating the obvious, the following will clear your Bash window. Type this and hit enter:
Clear the Bash window:
$ clear
Now, let’s try to examine the folders in our current directory again, and see if we can get a more useful view of the subfolders we are working with. Type the following command into the Bash window, and hit enter again:
Print a listing of all directories within the current directory:
$ ls -d */
The result should look like this:
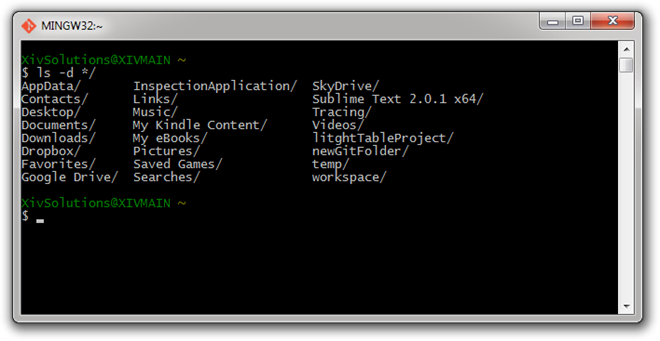
That’s a little more like it. Ok, so now we can see what folders exist within our current directory.
For a cleaner listing of the variations for the ls command, see the Show Directory Contents section of my Basic Git Command Line Reference Post.
Create a New Directory in the Current Directory
Next, let’s create a new folder. The command for creating a new directory is as follows:
Create a new directory within the current directory:
$ mkdir NewFolderName
Type that into your Bash window, substituting MyNewFolder for NewFolderName and hit enter. This is what you should see when you are done:
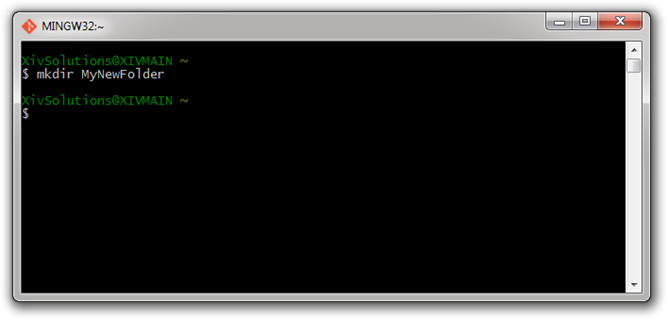
But hey - nothing happened, right? Wrong.
As mentioned above, when the mkdir command executed properly, the result is “silence.” In other words, Bash assumes YOU know that, lacking additional feedback, everything went fine. Let’s check and see. Type your new “Show me all the folders, but only the folders” command we discussed previously, and hit enter:
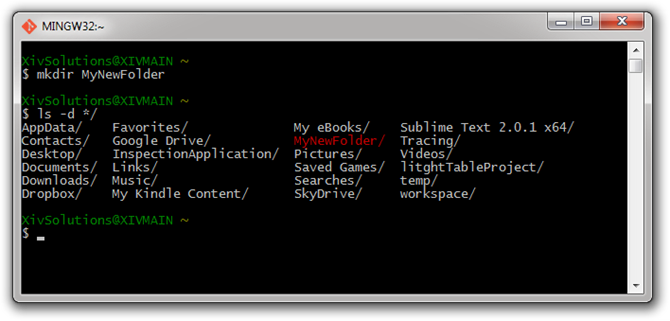
Well, what do you know. There is our new folder. But wait. What if we want spaces in the name of our folder? Let’s try THAT with a another new folder. Type the following and hit enter:
Create a folder named My Other New Folder:
$ mkdir My Other New Folder
When you hit enter, you should see something like this:
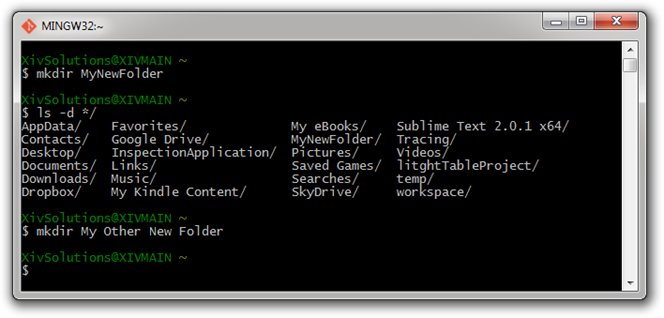
Hey, looks like everything worked! No complaints from Bash. Let’s see, using our “Show directory contents” command again:
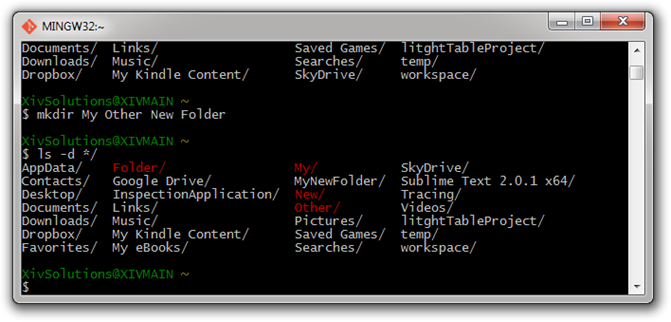
Uh-oh. Looks like things didn’t go quite the way we expected. As it turns out, we confused Bash, because the actual syntax of the mkdir command is:
The full syntax for the mkdir command:
$ mkdir Folder_1 Folder_2 . . . Folder_n
So when we typed in a folder name containing spaces, Bash thought we were creating a separate new folder for each word. As it turns out, most of the time when using Bash, we need to enclose text with spaces in quotes, so that Bash will know that the quoted text represents a single object or idea. Let’s try creating our new folder with spaces in the name again. This time, type the following into the Bash window:
Create a new folder with spaces in the name:
$ mkdir "My Other New Folder"
When you are done, you should see something like this:
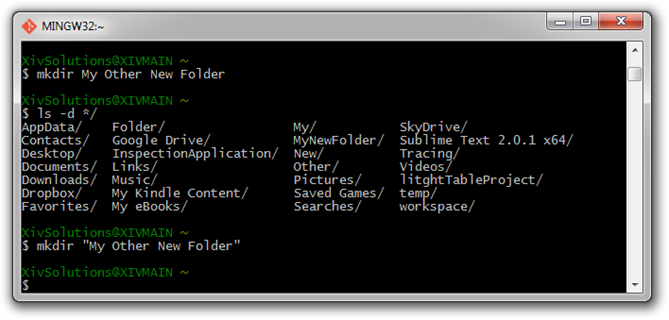
Again, we assume that nothing went wrong from a technical standpoint, because Bash executed the command and returned without complaint. If we check to see again, we find the following:
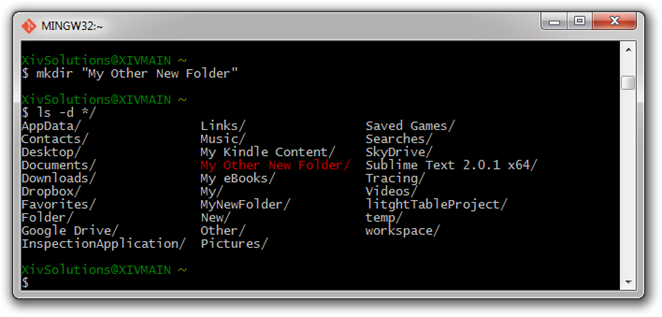
Yay! So now we can not only create folders, but with spaces in the names too, dammit!
For more on creating directories, see the Creating New Directories Section in my Basic Git Command Line Reference Post
Move to a Folder Within the Current Directory
Ok, so now let’s navigate ourselves into the first folder we created, MyNewFolder. First, though, let’s clear the bash window again, so we can get rid of all the clutter we have accumulated so far.
When we want to move to a new location using Bash, we use the cd command:
The correct syntax for this command is:
Change Directory Command Syntax:
$ cd [options] [<DirectoryName>]
In the above, the square brackets denote optional inputs, and the angle brackets denote user-supplied values. In both cases, we do not type the actual brackets into the command window.
Since Bash already knows the current directory we are in, we can specify a folder name which exists in the current directory, without the rest of the directory path. Type the following into the Bash window, and hit enter. You should see something similar to this:
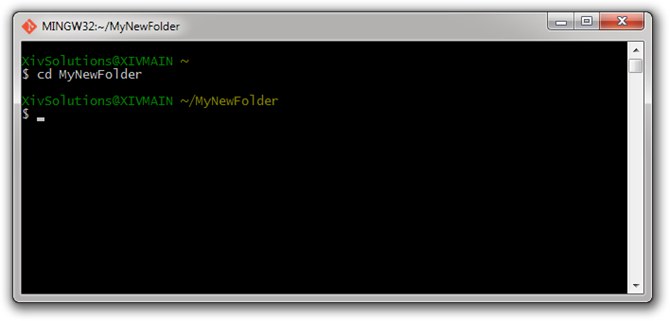
Note in the above that the line above our prompt has changed, and appears to indicate our current path as:
~/MyNewFolder
Remember that Bash uses the ~ symbol to denote our default (User) directory, so this is a relative reference within the user directory. From where we are right now, there are a number of ways we could return to the user directory.
The first is to simply enter the cd command with no additional input. Doing this will return us to the default directory from wherever we happen to be in the file system:
Return to the Default Directory (“Take Me Home”)
$ cd
Another option is to type cd - (that’s the cd command followed by a space, followed by a single dash). This tells bash to go back to the previous directory. In this particular case, the previous directory also happens to be our home user folder, but it really doesn’t matter what directory we came here from, cd - returns us there.
Return to the Previous Directory (“Take Me Back”)
$ cd -
The third option is to type cd .. (that is the cd command, followed by a space, followed by two periods in a row). This command tells bash to go up one level in the folder hierarchy.
Move Up One Level (“Take Me Up”)
$ cd ..
Considering that we are currently in a folder within our home directory, you can see why in the current situation, these three are all about the same in terms of returning to the home directory. At the moment, it is not only the last place we navigated from, but is also one level above our current location. And it is, indeed the home folder. So all three options work for us in this case. Try the “Take Me Up” command. Type it into your Bash window and hit enter. You should see something like this:
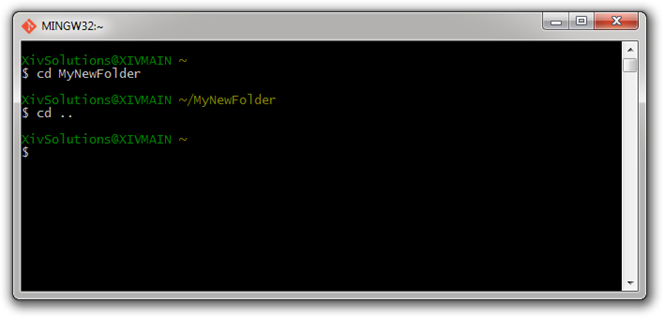
Note that we now appear to back in the “directory known as ~” or, our user folder.
Now type the “Take Me Back” Command (cd -) and hit enter:
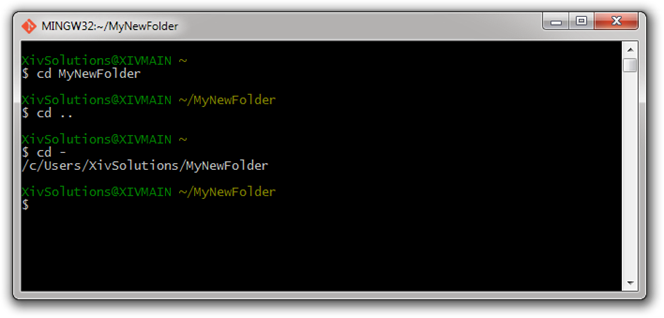
Now, here we are right back in the MyNewFolder directory. Note that Bash decided to tell us where it took us in long form:
A Linux-Style Directory Path
/c/Users/xivSolutions/MyNewFolder
But wait - what is with that funny directory syntax? That is the Linux directory style. In fact, when typing explicit directory paths into Bash, you will need to use that format, because Bash will not recognize the Windows directory style. It’s easy enough to follow though:
- Instead of using the forward-slash (\) character as a path delimiter, Bash (and Linux) uses the backslash (/)
- /c/ is the Linux way of expressing the familiar C:\
Move to a Specific Directory Using the Complete Directory Path
Knowing this, we can also use explicit paths for navigation. For example, let’s say I wish to move from the current directory to my Documents folder. I can type the following:
Move to a specific directory using the directory path:
$ cd /c/Users/CurrentUserFolder/Documents
Try that now, substituting your user folder, assuming that you have a standard Windows file structure, which includes a Documents folder in your user folder by default:
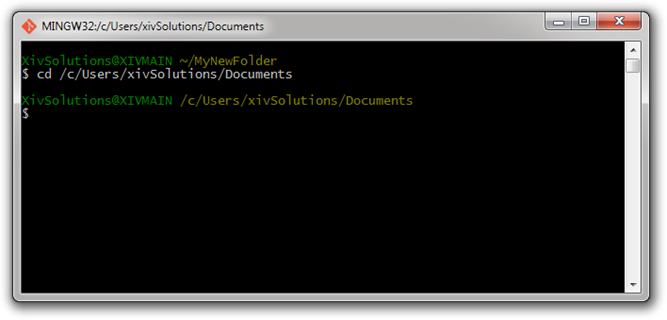
Ok. If all went well, you should now find yourself in your Documents folder. Note that even though you are within a subfolder of your user folder, Bash is now displaying the long form of the directory path, instead of the shorthand relative path.
Now try using the “Take Me Home” version of the cd command (simply type cd and hit enter):
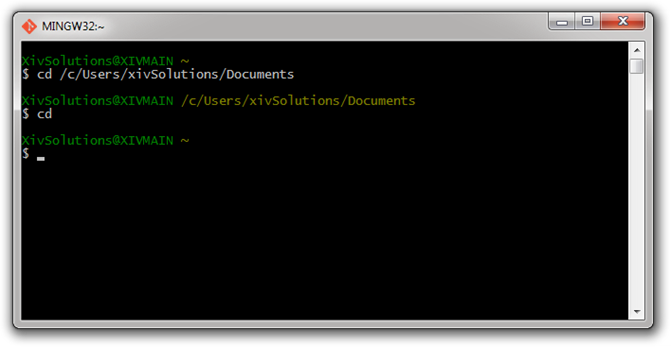
Presto - back in our home directory.
For more on directory navigation, see the Navigating the File System Section of my Basic Git Command Line Reference Post
Remove Directories
Ok, now what about those folders we “accidentally” created when we entered a multi-part directory name? You know, the folders named “My” and “Other” and “New” and “Folder”? Remember THIS:
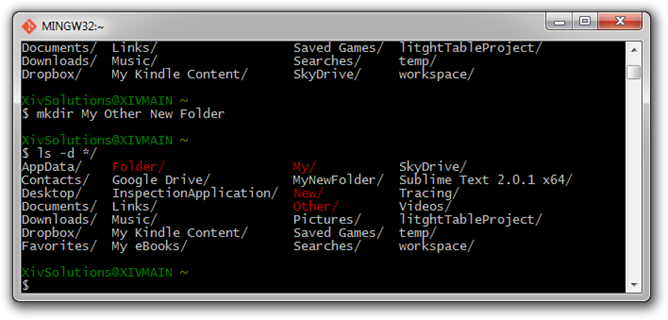
Since these folders are all empty, we can simply use the rmdir command:
Remove One or More Empty Directories:
$ rmdir Directory_1 Directory_2 . . . Directory_n
Type the rmdir command as follows and hit enter. When you are done, you should see something like this:
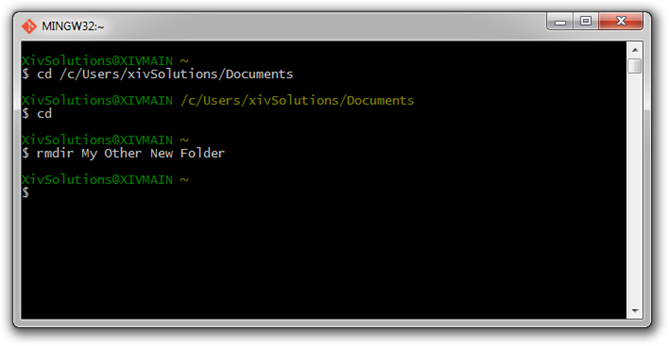
Then, if we check the directory contents again, we see that those extra directories no longer exist:
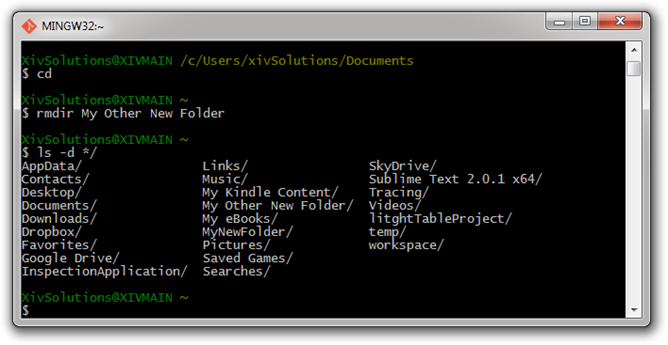
Removing an empty directory or directories is a simple undertaking. The process is a little different if the directory to be removed contains files or other directories. We’ll look at this in the next post.
Next: Creating and Working with Files using Bash
Additional Resources
