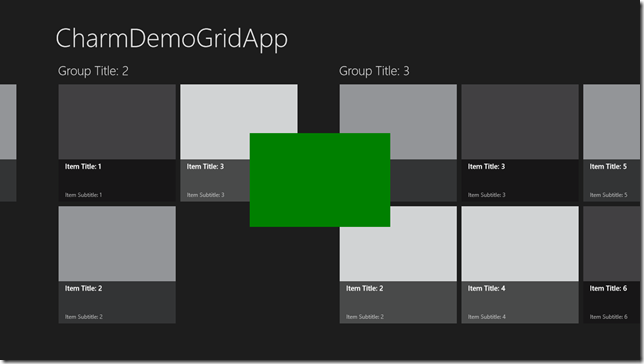
The whole point of CharmFrame is to allow the developer to add another user interface element (like a UserControl) that overlays the content in the application’s main Frame. To do this, I created a Frame-derived class called CharmFrame. It provides one additional property called CharmContent. Whatever is placed in CharmContent is overlayed with the frame’s normal content.
Posts in this series:
Below is the full source to CharmFrame and the associated style. It is self-explanatory.
CharmFrame.cs
using Windows.UI.Xaml;
using Windows.UI.Xaml.Controls;

namespace CharmFlyoutLibrary
{
    public sealed class CharmFrame : Frame
    {
        public CharmFrame()
        {
            this.DefaultStyleKey = typeof(CharmFrame);
        }

        public object CharmContent
        {
            get { return (object)GetValue(CharmContentProperty); }
            set { SetValue(CharmContentProperty, value); }
        }

        public static readonly DependencyProperty CharmContentProperty =
            DependencyProperty.Register("CharmContent",
            typeof(object), typeof(CharmFrame), new PropertyMetadata(null));
    }
}
Generic.xaml
<Style
   TargetType="local:CharmFrame">
    <Setter
       Property="HorizontalContentAlignment"
       Value="Stretch" />
    <Setter
       Property="IsTabStop"
       Value="False" />
    <Setter
       Property="VerticalContentAlignment"
       Value="Stretch" />
    <Setter
       Property="Template">
        <Setter.Value>
            <ControlTemplate
               TargetType="local:CharmFrame">
                <Grid>
                    <Border
                       BorderBrush="{TemplateBinding BorderBrush}"
                       BorderThickness="{TemplateBinding BorderThickness}"
                       Background="{TemplateBinding Background}">
                        <ContentPresenter
                           ContentTemplate="{TemplateBinding ContentTemplate}"
                           ContentTransitions="{TemplateBinding ContentTransitions}"
                           Content="{TemplateBinding Content}"
                           HorizontalAlignment="{TemplateBinding HorizontalContentAlignment}"
                           Margin="{TemplateBinding Padding}"
                           VerticalAlignment="{TemplateBinding VerticalContentAlignment}" />
                    </Border>
                    <ContentPresenter
                       Content="{TemplateBinding CharmContent}" />
                </Grid>
            </ControlTemplate>
        </Setter.Value>
    </Setter>
</Style>
To use CharmFrame, modify the code in App.xaml.cs to construct a CharmFrame instead of a Frame. Here, the CharmContent is a green rectangle that remains in the center of the display as the main content scrolls left/right.
App.xaml.cs
var rootFrame = new CharmFrame { CharmContent = new Rectangle
{ Width = 300, Height = 200, Fill = new SolidColorBrush(Windows.UI.Colors.Green) } };

Further Reading
This post explains how to use CharmFrame to host CharmFlyouts: CharmFrame – Adding CharmFlyout to Grid Apps.
