First of all, let me clarify that Git doesn’t need to specify the side for client and server. Your workstation can be both the client and server. That means you can get code from other computer, you’re the client; while others can also get code from your computer, you’re the server. That’s why Git is great.
In this post, the “Git server” means to make your computer available for others to pull/push code from/to.
The post is long because it’s step by step and with lots of screenshots. In fact, it just takes about 10 minutes to setup all.
Note: CopSSH is not open source any more, please buy it if you want to use it.
We need the following software:
Software required to setup a Git server:
CopSSH (install on the server side)
msysgit (install both on the server side and client side)
PuTTY (install both on the server side and client side)
Software required to integrate with Visual Studio:
GitExtensions (install both on the server side and client side)
Setup steps
1. Install msysgit.
a. When you installing the msysgit, please choose c:\Git as the installation directory, because the space in the directory name may cause issue in bash commands.

b. In the “Adjusting your PATH environment”, I recommend to select “Use Git Bash only”.

c. Other settings are default. After installation, you get the icon on your desktop. You can try it with git command, if you get the following screen, you’ve installed the msysgit successfully.

d. Add C:\Git\bin and C:\Git\libexec\git-core to Path. This step is very important.

2. Install CopSSH
a. Just like the msysgit, we don’t install the CopSSH in program files folder to avoid some space issues. We install it to c:\ICW

b. Just use the default account as CopSSH provides:

c. After installation, open COPSSH Control Panel

d. Click Add button in Users tab

e. Choose an existed user on your computer(You can create one in computer management). Here in my sample the user is jinweijie

f. Allow all the access:

g. After the user is activated, click the Keys… button in the Activated Users section:

h. Click Add:

i. Use default key settings:

j. Enter the Passphrase and File name:

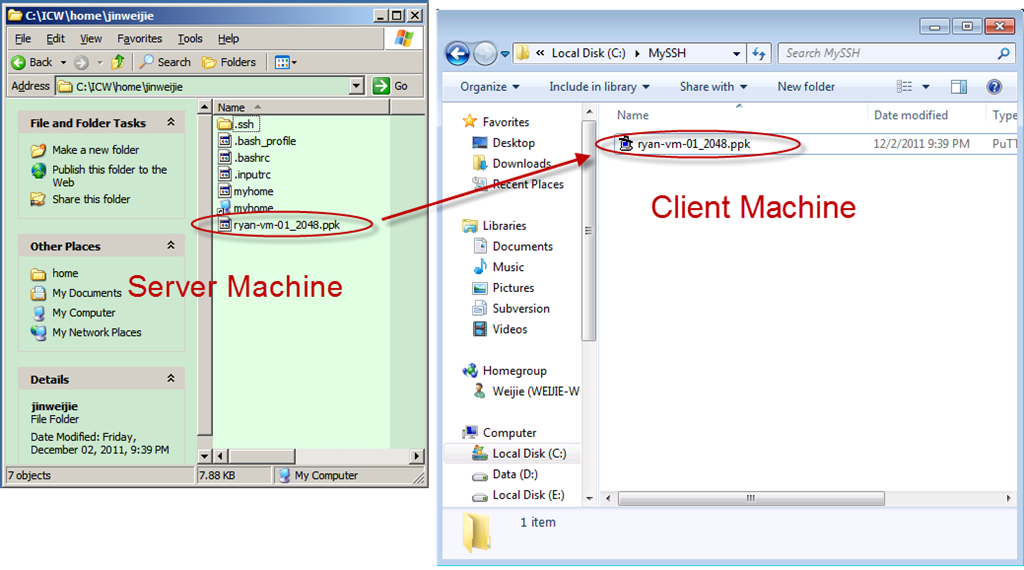
k. The private key will be save to c:\ICW\home\jinweijie\ryan-vm-01_2048.ppk

[test step]Now we try to use the activated user to log on through SSH, open Git Bash, enter commands:
ssh jinweijie@ryan-vm-01
enter “yes” to continue

[test step]After enter your passwords (the windows account’s password), then you try to run git as the ssh user, but it isn’t perform as you expected:

That’s because CopSSH cannot find the git.exe on the server, so we need to tell CopSSH the git path.
3. Config CopSSH with Git path.
a. Open C:\ICW\etc\profile with your favorite editor, add :/cygdrive/c/git/bin:/cygdrive/c/git/libexec/git-core (don’t forget the starting colon) to PATH , the whole line will be:
export PATH="/bin:$syspath:$winpath:/cygdrive/c/git/bin:/cygdrive/c/git/libexec/git-core"
Then Save.

b. Restart the CopSSH by click twice the big button in CopSSH Control Panel:

c. If we run Git Bash again, ssh jinweijie@ryan-vm-01, enter your password and run the git command, git should be found this time:

4. Configure private key on client
a. Copy the private key(we generated in step 1-k) from server to client.

b. On the client side, use puttygen.exe to load the key(if you set the password in 1-j, you need to enter the password while loading the key):

c. Click “Save private key” to save a copy of private key for plink.exe to recognize.

5. Create repository, integrate with Visual Studio
a. Install gitextensions on both server and client.

b. Since we have already install the msysgit in step 1-a, we skip the “Install MsysGit”. But if you haven’t install msysgit on the client machine, you can check the checkbox and install it.

c. Install to C:\GitExtensions\, Other settings are default.

d. On the server side, open Git Extensions, click “Create new repository”

e. Set the path to the project name under you CopSSH user’s home directory, select “Central repository, no working dir”(because we are the server), then “Initialize”:

f. On the client side, open Git Extensions, click “Clone repository”:

g. On the client side, the repository address should be ssh://jinweijie@ryan-vm-01/ICW/home/jinweijie/mydotnetproject Please be aware that, the repository should begin with c:\ on the server.

h. On the client side, click “Load SSH Key” and load the key which was saved in step 4-b:

i. On the client side, enter the password if you set password to the key, then click Clone:

j. On the client side, add ignore files:

k. On the client side, open Visual Studio, create a project to mydotnetproject folder(which is the cloned repository), you may find the files are already under git source control:

l. Click the “Commit” button on the menu bar, then click “Commit & Push”:

m. Push succeeded:

n. On the server side, you can find the new pushed files:

That’s all, happy GITTING! CodeProject
