In Getting started with a Team Explorer plug in for VS 2013 - Part 1, we setup a base to start extending Team Explorer. This post assumes you already have the base project setup.
Creating a New Team Explorer Navigation Item
Add a new const to the GuidList class (in the Guids file) like below:
public const string sampleTeamExplorerNavigationItem = "8C35B3DF-D7CC-45BC-B958-BFAE3E157A21";
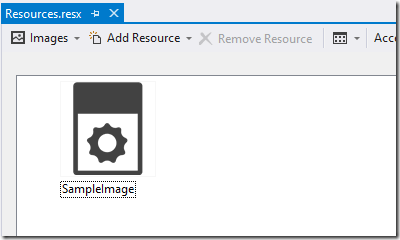
Add any image (to be used as the icon) to the Resources.resx file and call it SampleImage like below:

Create a class called SampleTeamExplorerNavigationItem and replace the contents with code below:
namespace Company.TeamExplorerSamplePlugin
{
    using System;
    using System.ComponentModel;
    using System.ComponentModel.Composition;
    using System.Drawing;
    using System.Windows.Forms;

    using Microsoft.TeamFoundation.Controls;
    using Microsoft.VisualStudio.Shell;

    [TeamExplorerNavigationItem(GuidList.sampleTeamExplorerNavigationItem, 100)]
    public class SampleTeamExplorerNavigationItem : ITeamExplorerNavigationItem
    {
        private Image image = Resources.SampleImage;

        private bool isVisible = true;

        private string text = "Sample Button";

        [ImportingConstructor]
        public SampleTeamExplorerNavigationItem
        ([Import(typeof(SVsServiceProvider))] IServiceProvider serviceProvider)
        {
            this.serviceProvider = serviceProvider;
        }

        private IServiceProvider serviceProvider { get; set; }

        public Image Image
        {
            get
            {
                return this.image;
            }
            set
            {
                this.image = value;
                this.FirePropertyChanged("Image");
            }
        }

        public bool IsVisible
        {
            get
            {
                return this.isVisible;
            }
            set
            {
                this.isVisible = value;
                this.FirePropertyChanged("IsVisible");
            }
        }

        public string Text
        {
            get
            {
                return this.text;
            }
            set
            {
                this.text = value;
                this.FirePropertyChanged("Text");
            }
        }

        public void Execute()
        {
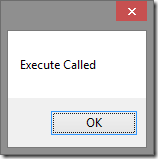
            MessageBox.Show("Execute Called");
        }

        public void Invalidate()
        {
        }

        public void Dispose()
        {
        }

        public event PropertyChangedEventHandler PropertyChanged;

        private void FirePropertyChanged(string propertyName)
        {
            if (this.PropertyChanged != null)
            {
                this.PropertyChanged(this, new PropertyChangedEventArgs(propertyName));
            }
        }

        public T GetService<T>()
        {
            if (this.serviceProvider != null)
            {
                return (T)this.serviceProvider.GetService(typeof(T));
            }
            return default (T);
        }
    }
}
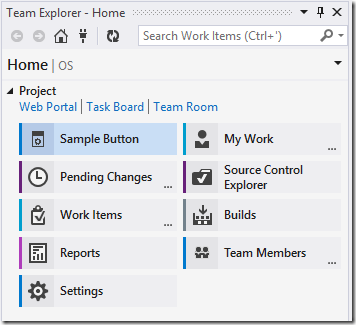
Note how we used the GuidList.sampleTeamExplorerNavigationItem guid string that we created in the TeamExplorerNavigationItem attribute, we also specified a priority of 100 saying that this navigation item should be high up on the list of navigation items. We specified in the Execute method that we want to see a message box to make sure our event is being fired. We'll change this at a later stage. We also set some basic properties for the display of our button including the image we added earlier. If you run the project, you will see in the Team Explorer that our Sample Button is visible.

Note when you click the button, the message box displays as expected.

In the Getting started with a Team Explorer plug in for VS 2013 - Part 3, we will be creating a new Team Explorer Page and then changing our Execute method to navigate to this page.
