As many of us know about ZF2 (Zend Framework 2), it is an open source, object oriented Framework designed for developing web applications and services using PHP 5.3+. So, in this post, we will go through the installation process for ZF2 Framework with a skeleton application so that it will be easier for the developer to continue developing the application directly :). First, we need to create a public folder to handle all projects. Open Terminal or ctrl+alt+t and type the following commands.
mkdir public
Now, we need to create project folder inside public folder.
mkdir public/zf2-demo
Now, we need to go inside our project folder.
cd public/zf2-demo
We required just 4 basic steps to install ZF2:
STEP 1
Now we have 2 options to install Zend Framework 2 in our project folder.
Option 1: Go here and download the zip file. Go here and download the tgz file. Simply unpack inside project folder.
Option 2: Use Composer to install Zend Framework 2. You can get composer from here. Here, you have the option to download and use composer or you click “getting started” and get details.
"repositories": [
    {
        "type": "composer",
        "url": "https://packages.zendframework.com/"
    }
],
You can then add any of our packages to your require list:
"name" : "ZF2 demo",
  "require" : {
    "zendframework/zendframework" : "2.3.*"
},
Run the install command to resolve and download the dependencies:
$php composer.phar install
Installed Zend Framework! It will be in a new folder called “vendor” this is where composer installs all dependent libraries.
STEP 2
Now we need to configure Apache server Setup to use Apache, setup a virtual host. Open terminal or ctrl+alt+t and type:
cd etc/apache2/sites-available
sudo vim 000-default.conf
Edit it and it should look like the following:
<VirtualHost *:80>
        ServerAdmin webmaster@localhost
        ServerName zf2.localhost.com
        ServerAlias zf2.localhost.com
        DocumentRoot /var/www/html/zf2-demo/public

   <Directory /var/www/html/zf2-demo/public>
       AllowOverride All
       Order allow,deny
       Allow from all
   </Directory>
</VirtualHost>
Or, if you are using Apache 2.4 or above:
<VirtualHost *:80>
   ServerAdmin webmaster@localhost
        ServerName zf2.localhost.com
        ServerAlias zf2.localhost.com
        DocumentRoot /var/www/html/zf2-demo/public

   <Directory /var/www/html/zf2-demo/public>
       AllowOverride All
       Require all granted
   </Directory>
</VirtualHost>
STEP 3
Open .htaccess file inside project/zf2-demo/public and override it with the following code:
RewriteEngine On
# The following rule tells Apache that if the requested filename
# exists, simply serve it.
RewriteCond %{REQUEST_FILENAME} -s [OR]
RewriteCond %{REQUEST_FILENAME} -l [OR]
RewriteCond %{REQUEST_FILENAME} -d
RewriteRule ^.*$ - [NC,L]
# The following rewrites all other queries to index.php. The
# condition ensures that if you are using Apache aliases to do
# mass virtual hosting, the base path will be prepended to
# allow proper resolution of the index.php file; it will work
# in non-aliased environments as well, providing a safe, one-size
# fits all solution.
RewriteCond %{REQUEST_URI}::$1 ^(/.+)(.+)::\2$
RewriteRule ^(.*) - [E=BASE:%1]
RewriteRule ^(.*)$ %{ENV:BASE}index.php [NC,L]
STEP 4
Open URL zf2.localhost.com.
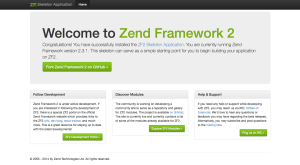
It will open like:

Now, you are now ready with ZF2. Enjoy coding!!!
CodeProject


