 Building up a lean, minimal Web Api application from scratch is a terrific way to become more familiar with how things work under the hood in a Web Api (or any other ASP.NET) project.
The ASP.NET team provides exceptional project templates that allow developers to get started easily building web applications. The templates are structured in a way which provides a basic, boilerplate functionality for getting up and running easily. The basic application infrastructure is all in place, and all the Nuget packages and framework references you might need are all there, ready to go.
Image by Ivan Emelianov | Some Rights Reserved
This is all great, but also creates a two-pronged problem, particularly for those still learning web development in general, and how to navigate the innards of ASP.NET MVC and Web Api Application development specifically.
First off, the generalized approach showcased in the VS project templates tends to include a good deal more "stuff" than any one application needs. In order to provide sufficient functionality out of the box to get devs up and running quickly, and to provide a starting point for a broad variety of basic application requirements, the templates in Visual Studio bring with them a good deal of infrastructure and libraries you don't need for your specific application.
Secondly, the templates knit together complete, ready-to-run applications in such a way that a whole lot appears to happen "by magic" behind the scenes, and it can be difficult to understand how these individual pieces fit together. This begins to matter when we want to customize our application, cut out unwanted components, or take a different architectural approach to building our application.
NOTE: In this post we will build out a simple Web Api example from scratch. The objective here is as much about understanding how ASP.NET components such as Web Api can plug into the OWIN/Katana environment, and how the various application components relate, as it is about simply "give me the codez." There are already plenty of examples showing how to cobble together a self-hosted web api application, "Hello World" examples, and such. In this post, we will seek to understand the "why" as much as the "how."
Understanding how these components fit together, and the notion of the middleware pipeline will become increasingly important as ASP.NET 5 ("vNext") moves closer and closer to release. While the implementation of the the middleware pipeline itself will change somewhat with the coming release, the concepts will apply even more strongly, and more globally to the ASP.NET ecosystem.
The source code for the example projects used in this post can be found in my Github repo. There are two branches for the self-hosted Web Api Application, one with the basic API structure in place, and one after we add Entity Framework and a database to the equation.
As of ASP.NET 4.5.1, Web Api can be used as middleware in an OWIN/Katana environment. In a previous post we took a look at how the OWIN/Katana middleware pipeline can form the backbone, so to speak, of a modern ASP.NET web application.
The OWIN specification establishes a distinction between the host process, the web server, and a web application. IIS, in conjunction with ASP.NET, acts as both the host process and the server. The System.Web library, a heavy, all-things-to-all-people library, is tightly coupled to IIS. Web Applications with components which rely on System.Web, such as MVC (for the moment, until MVC 6 "vNext") and Web Forms are the likewise bound to IIS.
In the standard ASP.NET Web Api project template, Web Api is configured as part of the IIS/ASP.NET processing pipeline, as is MVC and most of the other ASP.NET project components (Identity 2.0 is a notable exception, in that Identity uses the OWIN pipeline by default in all of the project templates). However, beginning with ASP.NET 4.5.1, Web Api (and SignalR) can also be configured to run in an OWIN pipeline, relieved of reliance upon the infrastructure provided by IIS and the monolithic System.Web library.
In this post, we will configure Web Api as a middleware component in a lightweight OWIN-based application, shedding the dependency on the heavy System.Web library.
Recall from our previous post the simple graphic describing the interaction of middleware components in the Katana pipeline, and how the Katana implementation of the OWIN specification facilitates the interaction between the hosting environment, the server, and the application:
The Simplified OWIN Environment:

If we review how this works, we recall that we can plug middleware into the pipeline in a number of ways, but the most common mechanism is by providing an extension method for our middleware to act as a "hook" or point of entry. Middleware is commonly defined as a separate class, like so:
Simplified Middleware Component:
public class MiddlewareComponent
{
AppFunc _next;
public MiddlewareComponent(AppFunc next)
{
_next = next;
}
public async Task Invoke(IDictionary<string, object> environment)
{
await _next.Invoke(environment);
}
}
Then, in order to plug a component into the middleware pipeline in Katana, we commonly provide an extension method according to a the convention:
Extension Method to Plug Middleware into the Katana Pipeline:
public static class AppBuilderExtensions
{
    public static void UseMiddelwareComponent(this IAppBuilder app)
    {
        app.Use<MiddlewareComponent>();
    }
}
This allows us to plug MiddlewareComponent into the Katana pipeline during the call to Configuration() in our OWIN Startup class:
Plugging a Middleware into Katana Using the Extension Method:
public void Configuration(IAppBuilder app)
{
    app.UseMiddlewareComponent();
}
When we want to use ASP.NET Web Api as a component in an OWIN-based application, we can do something similar.
When we want to use Web Api in an OWIN-based application instead of relying on System.Web, we can install the Microsoft.AspNet.WebApi.Owin Nuget package. This package provides a hook, similar to the above, which allows us to add Web Api to our Middleware pipeline. Once we do that, our diagram might look more like this:
OWIN/Katana Middleware Pipeline with Web Api Plugged In:

The Microsot.AspNet.WebApi.Owin package provides us with the UseWebApi() hook, which we will use to plug Web Api into a stripped-down, minimal application. First, we'll look at creating a simple self-hosted Web Api, and then we will see about using the Katana pipeline to use Web Api in an application hosted on IIS, but forgoing the heavy dependency on System.Web.
We'll start by creating a bare-bones, self-hosted Web Api using a Console application as its base. First, create a new Console project in Visual Studio, then pull down the Microsoft.AspNet.WebApi.OwinSelfHost Nuget package:
Install Web Api 2.2 Self Host Nuget Package:
PM> Install-Package Microsoft.AspNet.WebApi.OwinSelfHost -Pre
The Microsoft.AspNet.WebApi.OwinSelfHost Nuget package installs a few new references into our project, among them Microsoft.Owin.Hosting and Microsoft.Owin.Host.HttpListener. Between these two libraries, our application can now act as its own host, and listen for HTTP requests over a port specified when the application starts up.
With that in place, add a new Class named Startup, and add the following code:
The Startup Class for a Katana-based Web Api:
using Owin;
using System.Web.Http;
namespace MinimalOwinWebApiSelfHost
{
public class Startup
{
public void Configuration(IAppBuilder app)
{
var webApiConfiguration = ConfigureWebApi();
app.UseWebApi(webApiConfiguration);
}
private HttpConfiguration ConfigureWebApi()
{
var config = new HttpConfiguration();
config.Routes.MapHttpRoute(
"DefaultApi",
"api/{controller}/{id}",
new { id = RouteParameter.Optional });
return config;
}
}
}
As we can see, all we are really doing is setting up our default routing configuration here, similar to what we see in the standard VS template project. However, instead of adding the routes specified to the routes collection in the ASP.NET pipeline, we are instead passing the HttpConfiguration as an argument to the app.UseWebApi() extension method.
Next, lets set up the familiar ASP.NET Web Api folder structure. Add a Models folder, and a Controllers folder. Then add a Company class to the Models folder:
Add a Company Class to the Models Folder:
public class Company
{
    public int Id { get; set; }
    public string Name { get; set; }
}
Next, add a CompaniesController Class to the Controllers folder:
Add a CompaniesController to the Controllers Folder:
using System;
using System.Collections.Generic;
using System.Linq;
using System.Text;
using System.Threading.Tasks;
using System.Web.Http;
using System.Net.Http;
using MinimalOwinWebApiSelfHost.Models;
namespace MinimalOwinWebApiSelfHost.Controllers
{
public class CompaniesController : ApiController
{
private static List<Company> _Db = new List<Company>
{
new Company { Id = 1, Name = "Microsoft" },
new Company { Id = 2, Name = "Google" },
new Company { Id = 3, Name = "Apple" }
};
public IEnumerable<Company> Get()
{
return _Db;
}
public Company Get(int id)
{
var company = _Db.FirstOrDefault(c => c.Id == id);
if(company == null)
{
throw new HttpResponseException(
System.Net.HttpStatusCode.NotFound);
}
return company;
}
public IHttpActionResult Post(Company company)
{
if(company == null)
{
return BadRequest("Argument Null");
}
var companyExists = _Db.Any(c => c.Id == company.Id);
if(companyExists)
{
return BadRequest("Exists");
}
_Db.Add(company);
return Ok();
}
public IHttpActionResult Put(Company company)
{
if (company == null)
{
return BadRequest("Argument Null");
}
var existing = _Db.FirstOrDefault(c => c.Id == company.Id);
if (existing == null)
{
return NotFound();
}
existing.Name = company.Name;
return Ok();
}
public IHttpActionResult Delete(int id)
{
var company = _Db.FirstOrDefault(c => c.Id == id);
if (company == null)
{
return NotFound();
}
_Db.Remove(company);
return Ok();
}
}
}
In the above code, for the moment, we are simply mocking out a data store using a List<Company>. Also, in a real controller we would probably implement async controller methods, but for now, this will do.
To complete the most basic functionality of our self-hosted Web Api application, all we need to do is set up the Main() method to start the server functionality provided by HttpListener. Add the following usings and code the the Program.cs file:
Start the Application in the Main() Method:
using System;
using System.Collections.Generic;
using System.Linq;
using System.Text;
using System.Threading.Tasks;
using Microsoft.Owin.Hosting;
namespace MinimalOwinWebApiSelfHost
{
class Program
{
static void Main(string[] args)
{
string baseUri = "http://localhost:8080";
Console.WriteLine("Starting web Server...");
WebApp.Start<Startup>(baseUri);
Console.WriteLine("Server running at {0} - press Enter to quit. ", baseUri);
Console.ReadLine();
}
}
}
Most of the structure above should look vaguely familiar, if you have worked with a Web Api or MVC project before.
Now all we need is a suitable client application to consume our self-hosted Web Api.
We will create a simple Console application to use as a client in consuming our Web Api. Create a new Console application, and then add the Microsoft.AspNet.WebApi.Client library from Nuget:
Add the Web Api 2.2 Client Library from Nuget:
PM> Install-Package Microsoft.AspNet.WebApi.Client -Pre
Now, add a class named CompanyClient and add the following using statements and code:
Define the CompanyClient Class in the Web Api Client Application:
using System;
using System.Collections.Generic;
using System.Linq;
using System.Text;
using System.Threading.Tasks;
using System.Net.Http;
namespace MinimalOwinWebApiClient
{
public class CompanyClient
{
string _hostUri;
public CompanyClient(string hostUri)
{
_hostUri = hostUri;
}
public HttpClient CreateClient()
{
var client = new HttpClient();
client.BaseAddress = new Uri(new Uri(_hostUri), "api/companies/");
return client;
}
public IEnumerable<Company> GetCompanies()
{
HttpResponseMessage response;
using (var client = CreateClient())
{
response = client.GetAsync(client.BaseAddress).Result;
}
var result = response.Content.ReadAsAsync<IEnumerable<Company>>().Result;
return result;
}
public Company GetCompany(int id)
{
HttpResponseMessage response;
using (var client = CreateClient())
{
response = client.GetAsync(
new Uri(client.BaseAddress, id.ToString())).Result;
}
var result = response.Content.ReadAsAsync<Company>().Result;
return result;
}
public System.Net.HttpStatusCode AddCompany(Company company)
{
HttpResponseMessage response;
using (var client = CreateClient())
{
response = client.PostAsJsonAsync(client.BaseAddress, company).Result;
}
return response.StatusCode;
}
public System.Net.HttpStatusCode UpdateCompany(Company company)
{
HttpResponseMessage response;
using (var client = CreateClient())
{
response = client.PutAsJsonAsync(client.BaseAddress, company).Result;
}
return response.StatusCode;
}
public System.Net.HttpStatusCode DeleteCompany(int id)
{
HttpResponseMessage response;
using (var client = CreateClient())
{
response = client.DeleteAsync(
new Uri(client.BaseAddress, id.ToString())).Result;
}
return response.StatusCode;
}
}
}
We've written (rather hastily, I might add) a crude but simple client class which will exercise the basic API methods we have defined on out Web Api application. We're working against a mock data set here, so we take some liberties with Id's and such in order to run and re-run the client application without running into key collisions.
We see in the above, we created a convenience/factory method to provide an instance of HttpClient as needed, pre-configured with a base Uri matching the route for the ClientController in our Web Api. From there, we simply define a local method corresponding to each API method, which we can use in our console application.
We can get this thing into running order by adding the following code to the Program.cs file of the client application:
The Program.cs File for the API Client Application:
using System;
using System.Collections.Generic;
using System.Linq;
using System.Text;
using System.Threading.Tasks;
using System.Net.Http;
namespace MinimalOwinWebApiClient
{
class Program
{
static void Main(string[] args)
{
Console.WriteLine("Read all the companies...");
var companyClient = new CompanyClient("http://localhost:8080");
var companies = companyClient.GetCompanies();
WriteCompaniesList(companies);
int nextId = (from c in companies select c.Id).Max() + 1;
Console.WriteLine("Add a new company...");
var result = companyClient.AddCompany(
new Company
{
Id = nextId,
Name = string.Format("New Company #{0}", nextId)
});
WriteStatusCodeResult(result);
Console.WriteLine("Updated List after Add:");
companies = companyClient.GetCompanies();
WriteCompaniesList(companies);
Console.WriteLine("Update a company...");
var updateMe = companyClient.GetCompany(nextId);
updateMe.Name = string.Format("Updated company #{0}", updateMe.Id);
result = companyClient.UpdateCompany(updateMe);
WriteStatusCodeResult(result);
Console.WriteLine("Updated List after Update:");
companies = companyClient.GetCompanies();
WriteCompaniesList(companies);
Console.WriteLine("Delete a company...");
result = companyClient.DeleteCompany(nextId -1);
WriteStatusCodeResult(result);
Console.WriteLine("Updated List after Delete:");
companies = companyClient.GetCompanies();
WriteCompaniesList(companies);
Console.Read();
}
static void WriteCompaniesList(IEnumerable<Company> companies)
{
foreach(var company in companies)
{
Console.WriteLine("Id: {0} Name: {1}", company.Id, company.Name);
}
Console.WriteLine("");
}
static void WriteStatusCodeResult(System.Net.HttpStatusCode statusCode)
{
if(statusCode == System.Net.HttpStatusCode.OK)
{
Console.WriteLine("Opreation Succeeded - status code {0}", statusCode);
}
else
{
Console.WriteLine("Opreation Failed - status code {0}", statusCode);
}
Console.WriteLine("");
}
}
}
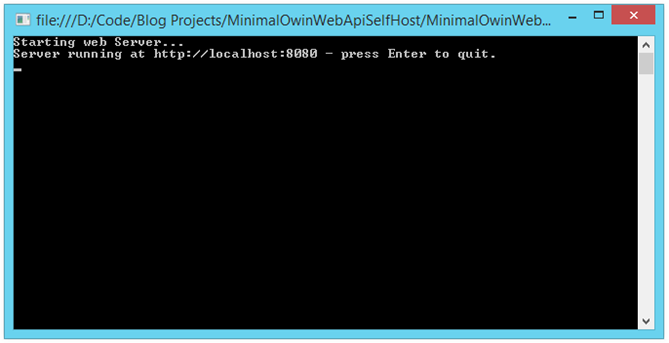
Now, if we run the Self-Hosted Web Api, we should see the following console output after it has started up:
Console Output from the Self-Hosted Web Api Startup:

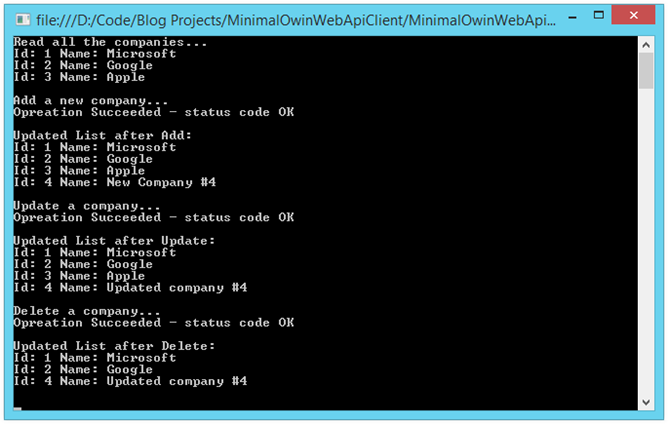
And then, when we run our client application, we should see the following:
Console Output from the Web Api Client Application:

We see just about what we expect, given the code we have written. We query our Web Api for a lit of companies. We then add a new company, and refresh the list. Then we update the company we just added, review the list yet again. Finally, we remove the company just before the new company in the list, and review the list one last time.
So far so good. However, a Web Api (even a small, self-hosted one) is of little use without some mechanism to persist and retreive data. We can add a database, and use Entity Framework in our self-hosted Web Api.
Since we are self-hosting, we may (depending upon the needs of our application) want to also use a local, in-process database as well (as opposed to a client/server solution) to keep our Web Api completely self-contained. Ordinarily I would go to SQLite for this, but to keep things simple we will use SQL CE. There is an Entity Framework provider for SQLite, however, it does not play too nicely with EF Code-First.
You can use SQLite with Entity Framework if you don't mind creating your database manually (or employing some work-arounds to get things working with code first), but for our purposes, SQL CE will do.
We don't HAVE to use a local database, of course. Depending upon your application, you may very well want to connect to SQLServer, or some other external database. If so, most of the following will work just as well if you pull down the standard Entity Framework package and work against SQL Server
To add a SQL Server Compact Edition database, we can simply go to Nuget again, and pull in the EntityFramework.SqlServerCompact Nuget package:
Add the Entity Framework SQL CE Nuget Package to the Web Api Application:
PM> Install-Package EntityFramework.SqlServerCompact
With that done, let's do a little housekeeping in order to pave the way for our new database.
First, we need to add an a data context class. Also, we will want to use a database initializer we can call when the application runs to apply any changes. Also, for this particular case, we will set things up so that the database is recreated and re-seeded with data each time:
If we did not want to drop and re-create each time, we would derive from DropCreateDatabaseIfModelChanges instead of DropCreateDatabaseAlways
Add an ApplicationDbContext and Initializer Classes to the Models Folder:
using System;
using System.Collections.Generic;
using System.Linq;
using System.Text;
using System.Threading.Tasks;
using System.Data.Entity;
namespace MinimalOwinWebApiSelfHost.Models
{
public class ApplicationDbContext : DbContext
{
public ApplicationDbContext() : base("MyDatabase")
{
}
public IDbSet<Company> Companies { get; set; }
}
public class ApplicationDbInitializer : DropCreateDatabaseAlways<ApplicationDbContext>
{
protected override void Seed(ApplicationDbContext context)
{
base.Seed(context);
context.Companies.Add(new Company { Name = "Microsoft" });
context.Companies.Add(new Company { Name = "Google" });
context.Companies.Add(new Company { Name = "Apple" });
}
}
}
Now we need to set things up so that the database initializer runs each time the application starts (at least, during "development").
Update the Program.cs file as follows. Note you need to add a reference to System.Data.Entity as well as your Models namespace in your using statements:
Update Program.cs to Run the Database Initializer:
using System;
using System.Collections.Generic;
using System.Linq;
using System.Text;
using System.Threading.Tasks;
using Microsoft.Owin.Hosting;
using System.Data.Entity;
using MinimalOwinWebApiSelfHost.Models;
namespace MinimalOwinWebApiSelfHost
{
class Program
{
static void Main(string[] args)
{
Console.WriteLine("Initializing and seeding database...");
Database.SetInitializer(new ApplicationDbInitializer());
var db = new ApplicationDbContext();
int count = db.Companies.Count();
Console.WriteLine("Initializing and seeding database with {0} company records...", count);
string baseUri = "http://localhost:8080";
Console.WriteLine("Starting web Server...");
WebApp.Start<Startup>(baseUri);
Console.WriteLine("Server running at {0} - press Enter to quit. ", baseUri);
Console.ReadLine();
}
}
}
Last, let's add a [Key] attribute to the Id in our Company class, so that EF will know we want the to be an Auto-incrementing int key. Note that you need to add a reference to System.ComponentModel.DataAnnotations in your using statements:
Update the Company Class with a [Key] Attribute:
using System;
using System.Collections.Generic;
using System.Linq;
using System.Text;
using System.Threading.Tasks;
using System.ComponentModel.DataAnnotations;
namespace MinimalOwinWebApiSelfHost.Models
{
public class Company
{
[Key]
public int Id { get; set; }
public string Name { get; set; }
}
}
Now we need to make some changes to our CompaniesController. Previously, we were working with a list as a mock datastore. Now let's update our controller methods to work with an actual database. Also, we will now use async methods.
Note that we need to add a reference to System.Data.Entity in our using statements.
Update Controller Methods to Consume Database and Use Async/Await:
using System;
using System.Collections.Generic;
using System.Linq;
using System.Text;
using System.Threading.Tasks;
using System.Web.Http;
using System.Net.Http;
using MinimalOwinWebApiSelfHost.Models;
using System.Data.Entity;
namespace MinimalOwinWebApiSelfHost.Controllers
{
public class CompaniesController : ApiController
{
ApplicationDbContext _Db = new ApplicationDbContext();
public IEnumerable<Company> Get()
{
return _Db.Companies;
}
public async Task<Company> Get(int id)
{
var company = await _Db.Companies.FirstOrDefaultAsync(c => c.Id == id);
if (company == null)
{
throw new HttpResponseException(
System.Net.HttpStatusCode.NotFound);
}
return company;
}
public async Task<IHttpActionResult> Post(Company company)
{
if (company == null)
{
return BadRequest("Argument Null");
}
var companyExists = await _Db.Companies.AnyAsync(c => c.Id == company.Id);
if (companyExists)
{
return BadRequest("Exists");
}
_Db.Companies.Add(company);
await _Db.SaveChangesAsync();
return Ok();
}
public async Task<IHttpActionResult> Put(Company company)
{
if (company == null)
{
return BadRequest("Argument Null");
}
var existing = await _Db.Companies.FirstOrDefaultAsync(c => c.Id == company.Id);
if (existing == null)
{
return NotFound();
}
existing.Name = company.Name;
await _Db.SaveChangesAsync();
return Ok();
}
public async Task<IHttpActionResult> Delete(int id)
{
var company = await _Db.Companies.FirstOrDefaultAsync(c => c.Id == id);
if (company == null)
{
return NotFound();
}
_Db.Companies.Remove(company);
await _Db.SaveChangesAsync();
return Ok();
}
}
}
Last, we need to make a couple minor changes to our client application, since we are now working with a database which will insert auto-incrementing integer Id's.
We only need to change a single line here, where we previously provided a new Id value when adding a new company. Change the highlighted line as follows:
Don't Pass a Value for the new Id when Adding a Record:
Console.WriteLine("Add a new company...");
var result = companyClient.AddCompany(new Company
    {
        Name = string.Format("New Company #{0}", nextId)
    });
WriteStatusCodeResult(result);
Now all we are doing is using the next Id as part of a hacked together naming scheme (and this is NOT a good way to get hold of the next Id from your database, either . . .).
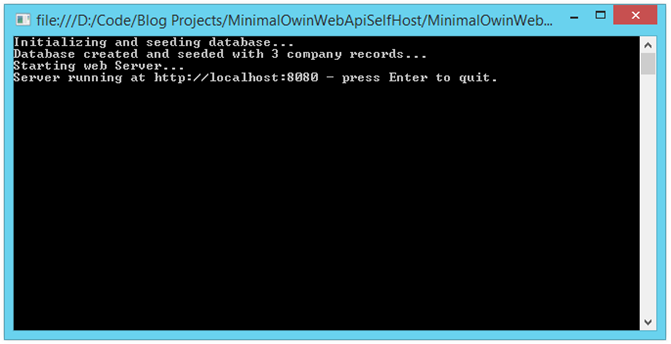
If we have done everything correctly, we can spin up the Web Api application, and then run the Client application, and see what happens. If all went well, our console output should be basically the same as before:
Console Output from Starting the Web Api Application:

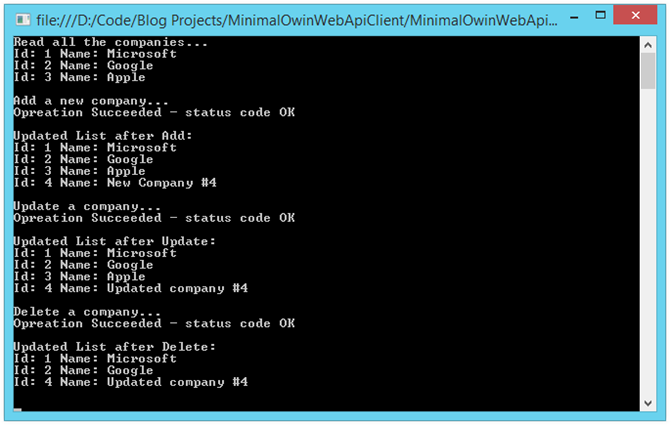
Likewise, when we run the client application, our console output should be essentially the same as before, except this time the Web Api is fetching and saving to the SQL CE database instead of an in-memory list:
Console Output from the Web Api Client Application at Startup:

In this post, we've seen how to assemble a very simple, and minimal ASP.NET Web Api application in a self-hosted scenario, without IIS, and without taking a dependency on the heavy weight System.Web library. We took advantage of the OWIN/Katana middleware pipeline, and we saw how to "hook" the Web Api components into the host/server interaction.
Next, we will investigate how we can apply these same concepts to build out a minimal footprint Web Api while still hosting in an IIS environment, and we will see how to bring ASP.NET Identity in to add some authentication and authorization functionality to the picture.
Next: ASP.NET Web Api: Understanding OWIN/Katana Authentication/Authorization Part I: Concepts
John on GoogleCodeProject

