CodeProjectiTextSharp is the most popular PDF Library to create, modify and do some additional manipulation with PDF files. In this article, I’m going to explain how to convert a text file to PDF while uploading.
Ground Work
Before starting, we need to download the iTextSharp PDF library from this url. Alternatively, we can download the same from NuGet Gallary, into your project solution by using the “NuGet Package Manager”, if you are using Visual Studio. This can be depicted below with screen shots.


Code
For the sake of simplicity, I have designed the webform with an upload control and a button. So the markup looks like this:
<!DOCTYPE html>

<html xmlns="http://www.w3.org/1999/xhtml">
<head runat="server">
    <title></title>
</head>
<body>
    <form id="form1" runat="server">
        <div>
            <asp:Label ID="lbl" runat="server"
            Text="Select a file to upload:"></asp:Label>
            <asp:FileUpload runat="server" ID="fu" /><br />
            <asp:Button runat="server" ID="btnUpload"
            Text="Upload" OnClick="btnUpload_Click" />
        </div>
    </form>
</body>
</html>
Also the code behind contains the below code:
protected void btnUpload_Click(object sender, EventArgs e)
{
if(fu.HasFile)
{
HttpPostedFile pf = fu.PostedFile;
Int32 fileLen;
fileLen = fu.PostedFile.ContentLength;
Byte[] Input = new Byte[fileLen];
System.IO.Stream myStream;
myStream = fu.FileContent;
myStream.Read(Input, 0, fileLen);
Document doc = new Document();
PdfWriter writer = PdfWriter.GetInstance(doc, new FileStream
(string.Concat(Server.MapPath("~/Pdf/PdfSample"),
".pdf"), FileMode.Create));
doc.Open();
doc.Add(new Paragraph(System.Text.Encoding.Default.GetString(Input)));
doc.Close();
}
}
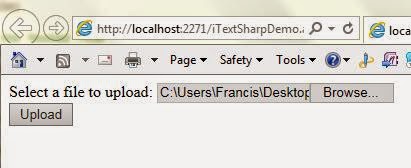
When you run the application, it will display an upload control and a button to upload.
After the conversion, the PDF file stored under the “PDF” folder. As per the code, it is necessary to create the folder named “PDF” before you run the application, within your solution.


Happy coding!!!

