Introduction
Have you ever heard of Text to Speech engine? “Yes” I think. Yes, it is not a new thing in the Computer World. It was available since Windows 98 (as much as I can recall) but it is completely new in Silverlight. You can now use the Silverlight application to give an API call to the SAPI Engine which will convert the text to voice. Sounds good? This is achievable using the COM APIs only.
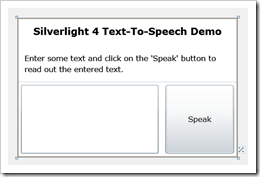
Here I will describe how to use COM API to give a TTS call to the SAPI Engine. After reading this topic here, you will be able to write your own code to develop your own application having the Text to Speech functionality in Silverlight 4.
Prerequisite
To develop this application, you need the following tools:
- Microsoft Visual Studio 2010
- Silverlight Tools for Visual Studio 2010
Once you set up your development environment, create a Silverlight project. If you are new to the Silverlight application development and want to know about Silverlight and want to learn how to create a new Silverlight application, read the Silverlight Tutorial.
Setting up the Project for OOB
Before doing anything, you need to set up some configuration. Yes, because the COM API only works in Silverlight Out-of-Browser application, you need to change the project settings for that.
- Right click on the Silverlight project and open the Properties.
- Click the CheckBox “Enable running application out of the browser” as shown below and then click on the “Out-of-Browser Settings” button.

- Once the Settings page has been opened, set the desired options from the screen. Be sure that you checked “Show install menu” and “Require elevated trust when running outside the browser”.
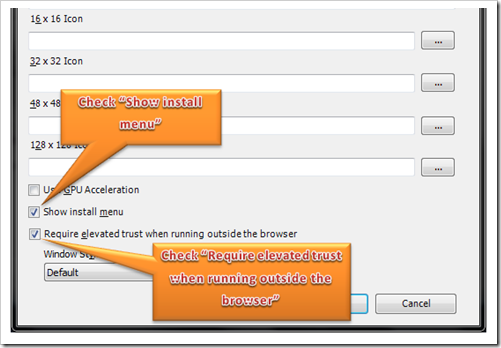
Once you done with these settings, you will be able to install this web version as an Out-of-Browser application.
Setting up the Project for dynamic Keyword
Now you have to add a DLL assembly reference to your project. As we will use dynamic keyword in our example, we need to add the “Microsoft.CSharp” assembly reference.
- To do this, right click on the Silverlight project and chose “Add Reference” from the menu.
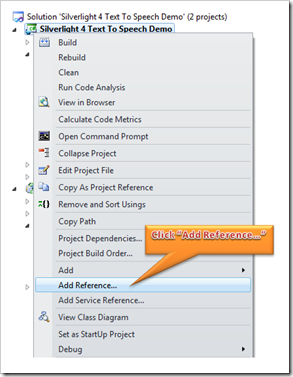
- Now from the “Add Reference” dialog, find “
Microsoft.CSharp”, select it and click Ok. This will add the assembly reference to the project.

Designing the UI
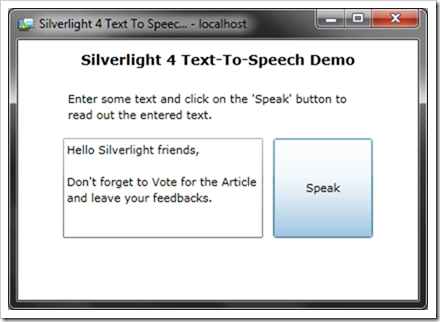
Once all the settings are done, it is time to design our UI. Add a TextBox and a Button inside the MainPage.xaml file and set name to those. In our example, I am using “txtMessage” as the name of the TextBox and “btnSpeak” as the name of the Button.
Here is my XAML code for you:
<UserControl x:Class="Silverlight_4_Text_To_Speech_Demo.MainPage"
        xmlns="http://schemas.microsoft.com/winfx/2006/xaml/presentation"
        xmlns:x="http://schemas.microsoft.com/winfx/2006/xaml"
        xmlns:d="http://schemas.microsoft.com/expression/blend/2008"
        xmlns:mc="http://schemas.openxmlformats.org/markup-compatibility/2006">
    <StackPanel x:Name="LayoutRoot" Orientation="Vertical" Width="320">
        <TextBlock FontWeight="Bold" FontSize="14"
		Text="Silverlight 4 Text-To-Speech Demo"
                    Margin="10" TextAlignment="Center" />
        <TextBlock Text="Enter some text and click on the 'Speak'
			button to read out the entered text."
                    Margin="10" TextWrapping="Wrap" />
        <StackPanel Orientation="Horizontal">
            <TextBox x:Name="txtMessage" Width="200" Height="100" Margin="5"
                     AcceptsReturn="True" TextWrapping="Wrap" />
            <Button x:Name="btnSpeak" Content="Speak" Width="100" Height="100"
                    Margin="5" Click="btnSpeak_Click" />
        </StackPanel>
    </StackPanel>
</UserControl>
If you run this, it will look like the below snapshot:
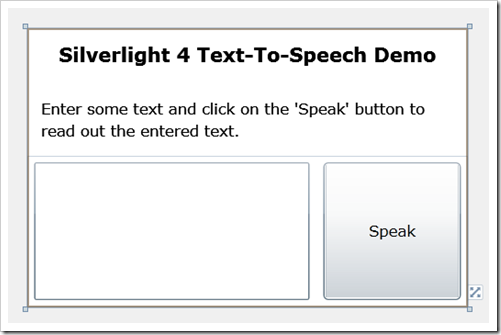
Here, we will use the TextBox to enter some text inside it and once we click on the “Speak” button, it will start reading out the entered text. To do this, register the button click event and go for implementing the Text-to-Read functionality in our code behind file.
Playing with the Code
Let's start playing with the code now. Open MainPage.xaml.cs and inside the button click event, first create an object of Sapi.SpVoice from the AutomationFactory and assign it to a dynamic variable.
dynamic textToSpeech = AutomationFactory.CreateObject("Sapi.SpVoice");
Set the Volume for the readout text by setting the Volume property of the Sapi object instance to 100. This will produce a full volume. Then call the Speak() method by passing the inserted text as a parameter to it.
Here is the full code snippet:
private void btnSpeak_Click(object sender, RoutedEventArgs e)
{
    if (App.Current.IsRunningOutOfBrowser && App.Current.HasElevatedPermissions)
    {
        dynamic textToSpeech = AutomationFactory.CreateObject("Sapi.SpVoice");
        textToSpeech.Volume = 100;
        textToSpeech.Speak(txtMessage.Text);
    }
    else
    {
        MessageBox.Show("Please install it as Trusted Out-of-Browser application.");
    }
}
 Hoho, our application is ready to run now. Build your solution for any errors. If succeeded, run the application by pressing CTRL + F5. Install the application as Silverlight Out-of-Browser application first. To do this, right click on the Silverlight UI and click “Install” from the context menu. Now follow the steps mentioned in the setup UI.
Once successfully installed as Out of Browser, it will open the installed one from your local drive. Enter some text inside the TextBox and click on the “Speak” button. You will hear the text readout by someone. Yes, that’s it. Your application now supports text to speech.
If you like this feature, download the sample application and run in your local machine to see the live demo. The source code for this article is also available.
Don’t forget to vote this article up and leave your feedback. Enjoy working with the new features of Silverlight 4.
History
- 2nd July, 2010: Initial post
