Visit the Ultimate Toolbox main page for an overview and configuration guide to the Ultimate Toolbox library.
Contents
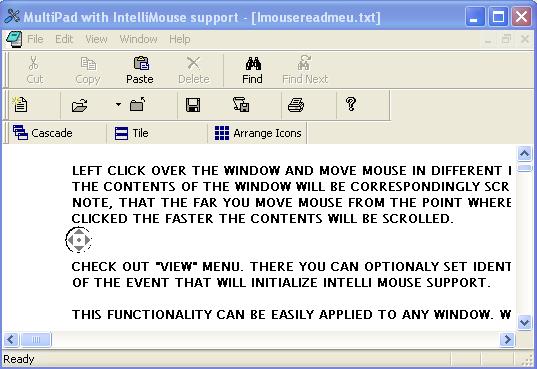
You can customize any window in you application to support IntelliMouse functionality with the Ultimate Toolbox IntelliMouse classes.

The Intellimouse sample can be found in the
samples\gui\IntelliMouse dir of the samples download.
Intellimouse support can be added to any MFC based window through the use of the COXIntelliMouse and COXIntelliMouseOrganizer classes.
COXIntellimouse
COXIntelliMouse is derived from COXHookWnd and uses COXSplashWnd internally. Also, in order to visually display the direction of the scrolling when Intelli Mouse Support is on, COXIntelliMouse class uses a set of cursors that is defined in include\OXIntelliMouse.rc.
The following steps can be used in order to provide IntelliMouse Support in your application using the COXIntelliMouse class (defined in OXIntellimouse.h and OXIntellimouse.cpp):
- Instantiate one object of the
COXIntelliMouse class for each window class for which you are going to provide IntelliMouse Support.
class CMyView : public CView
{
. . .
protected:
COXIntelliMouse m_IntelliMouse;
. . .
}
- In your
OnCreate function call COXIntelliMouse::Attach in order to register it with the COXIntelliMouse object and to set up the start event that will be interpreted as a trigger to launch IntelliMouse Support:
int CMyView::OnCreate(LPCREATESTRUCT lpCreateStruct)
{
. . .
m_IntelliMouse.Attach(this,WM_LBUTTONDOWN,KEYPRESSED_CONTROL);
. . .
}
The Detach function can be used in order to remove IntelliMouse Support.
The following functions can be used to specify the appearance of the splash window and cursors that show the scrolling direction:
HCURSOR GetScrollCursor(const SCROLLDIRECTION scrollDirection) const
void    SetScrollCursor(const SCROLLDIRECTION scrollDirection,
    const HCURSOR hCursor)
BOOL    LoadSplashWndBitmap(LPCTSTR lpszResourceName,
    const COLORREF crBorder = CLR_DEFAULT, const LPPOINT pStartPoint = NULL,
    const BYTE nTolerance = 0)
BOOL    LoadSplashWndBitmap(const UINT nIDResource,
    const COLORREF crBorder = CLR_DEFAULT, const LPPOINT pStartPoint = NULL,
    const BYTE nTolerance = 0)
And, finally, there are functions that let you to request and change the settings that have to do with the way IntelliMouse Support is launched:
UINT    GetStartEventID() const
UINT    GetKeyPressedState() const
void    SetStartEventID(const UINT nStartEventID, const DWORD dwKeyState=0)
COXIntellimouseOrganizer
This class provides functionality similar to COXIntelliMouse - the difference being the added functionality for IntelliMouse support of multiple windows. It uses one COXIntelliMouse object for each specified window.
To attach a single window to a COXIntelliMouse object use the Attach function. To detach a single window call the Detach function.
To attach a main window and all of its child windows call AttachAllWindows.
COXIntelliMouse objects can also be specified for all windows belonging to a particular thread using the GetAttachedThread, IsAttachedAllInThread, AttachAllInThread, and DetachAllInThread functions.
Initial CodeProject release August 2007.
