Introduction
I've been writing stuff here for a while, and every time I do it I end up spending more time faffing about and swearing at the Article Editor than I do actually writing text: and my major problem is getting code samples into the document as code blocks. So lets start by looking at that.
Code blocks
It just hates me, I'm sure.
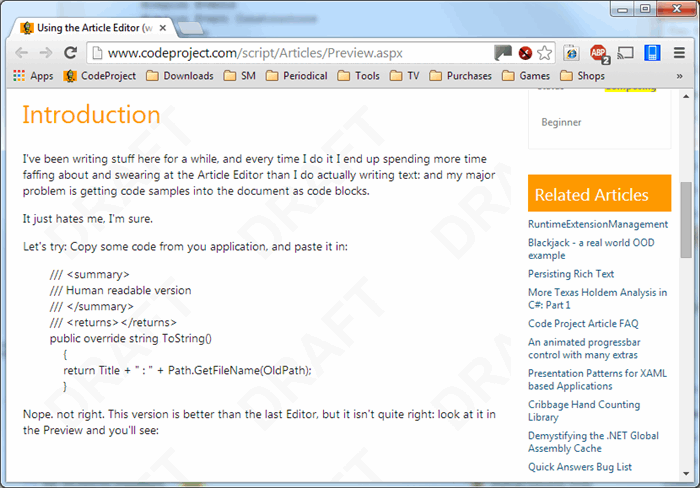
Let's try: Copy some code from your application, and paste it in:
/// <summary>
/// Human readable version
/// </summary>
/// <returns></returns>
public override string ToString()
    {
    return Title + " : " + Path.GetFileName(OldPath);
    }
Nope. not right. This version is better than the last Editor, but it isn't quite right: look at it in the Preview and you'll see:

What we want is:
public override string ToString()
{
return Title + " : " + Path.GetFileName(OldPath);
}
Fortunately, that isn't as hard to do as it was - in the previous version I ended up switching to HTML mode, pasting the code, then manually adding the <pre> tags:
<pre lang="cs">        /// <summary>
        /// Human readable version
        /// </summary>
        /// <returns></returns>
        public override string ToString()
            {
            return Title + " : " + Path.GetFileName(OldPath);
            }</pre>
Which was clumsy, and a nightmare if you forgot and pasted it into the text, as it applied the code formatter information, but not the code block - and to fix that you had to manually remove all the span tags it had added...and it normally ate all the VS Intellisense parts in comments, sicne they looked like HTML tags to it... :sigh:
This version is easy:
1) Paste the code:
/// <summary>
/// Human readable version
/// </summary>
/// <returns></returns>
public override string ToString()
{
return Title + " : " + Path.GetFileName(OldPath);
}
2) Highlight it:
 3) Go to the toolbar, and click the "Remove Format" button (strictly, you don't have to do this, but just in case:
 4) Highlight the code again, and use "Paragraph Format" dropdown to select "Formatted":


 5) Use the "Language" drop down to select the appropriate language highlighter:


6) Now, your code looks like this:

And in the preview it looks like this:
 Which is what we wanted.
Images
You noticed the images, yes? They are really easy to insert, particularly if you have DropBox installed on your PC. If you do, then whenever you take a screenshot, it is automatically saved to the Dropbox/Screenshots folder for you, so you don't even need a Paint program to include screenshots. Handy...
If you don't have dropbox:
This is more cumbersome: Take the screen shot using the ALT and PRINTSCREEN buttons, and paste it into a new image in your paint program (I use Paint Shop Pro 9 which causes it's own problems, since it disables Aero for compatability, so I have to keep opening and closing it to get consistant looking images). ALT and PRINTSCREEN copys the current window, so if you re-size it to just what you want, you are ready.
Save the file.
If you do have drop box.
Use the ALT and PRINTSCREEN buttons to save the current window. This saves the current window as is, so if you re-size it to just what you want, your file is ready.
Add it to your "Current Files" list:
Easy way: Drag the files from the folder and drop them on the "Target":
 This adds them to the "Current Files" list, so all you have to do is place the cursor where you want the image, and click the "Insert image into article" button:

Done!
Adding a download
Start by creating a ZIP file of your project, then upload it to CodeProject and insert it into your document.
The process for this is the same as for an image: use the "Upload Files" box on the right hand side of the screen:
Except this time you get a "special" insert area at the top of the list:
Make sure the checkbox is ticked - it is by default - and click on "Add selected zip files to article"
This creates the download link in it's normal position at the top of the article:
History
2014-06-17 Original Version
2014-06-17
- Typo corrected: "teh" became "the".
- Heading corrected on "History" section.
2016-05-28
- Download added (for download adding demo only)
- Section added on providing a download.
