One of the most annoying things that I'm sometimes get stuck with is to install my machine with the latest components. Trying to grab all the installation packages for every application or library that I need can be a very painful thing and also consumes a lot of time.
This is the reason that a tool like Web Platform Installer was very welcome to my arsenal of tools. In the post, I'll describe what the Web Platform Installer is and show a scenario of installation.
Web Platform Installer
As I wrote at the beginning of the post, installation can be a very painful thing. The Web Platform Installer is a tool provided by Microsoft to ease this process when we install Microsoft Web Platform. You can download it from here.
So what is this tool?
Taken from Microsoft’s site - “The Microsoft Web Platform Installer 2.0 (Web PI) is a free tool that makes getting the latest components of the Microsoft Web Platform, including Internet Information Services (IIS), SQL Server Express, .NET Framework and Visual Web Developer easy. The Web PI also makes it easy to install and run the most popular free web applications for blogging, content management and more with the built-in Windows Web Application Gallery.” The current version of the tool is 2.0.
Using the Web Platform Installer
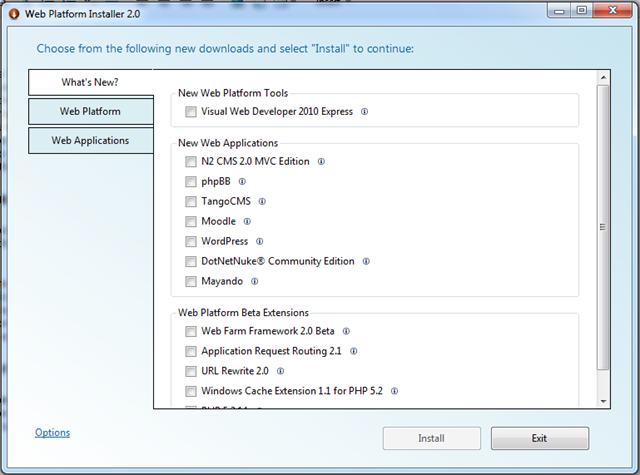
After you install the Web Platform Installer, you can run it and install your desired components. You should have a connection to the internet in order to use the installer. When first started, the Web Platform Installer will go to the web and check for the latest Web Platform products. Then the main screen will be opened:

In the screen, you can choose the relevant components that you like. You can use the following tabs to choose components by categories:
- What’s New? – shows all the new components available
- Web Platform – enables the installation of web servers, frameworks and runtime, databases and tools
- Web Applications – enables the installation of web applications such as DotNetNuke, WordPress, BlogEngine.Net and many more web applications
You only need to select the components and then press the Install button in order to install them. You also have the ability to customize your installation. For example, go to the Web Platform tab:

In the Web Server, press the Customize link:

Now you can customize the server that will be installed.
After choosing the components, press the Install button and that is it! The products will be installed.

In some components, you will need to configure things. For example, I installed the BlogEngine.Net and after the installation inside the Web Platform Installer, I had to configure the web site for the BlogEngine.Net. So you get help from the platform even in these parts.
Summary
If you haven’t installed the Web Platform Installer, go and grab it from here. This tool is very useful and helpful and it can help you save a lot of time and headaches.
