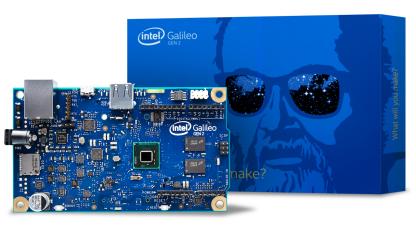
Get access to the new Intel® IoT Developer Kit, a complete hardware and software solution that allows developers to create exciting new solutions with the Intel® Galileo and Intel® Edison boards. Visit the Intel® Developer Zone for IoT.

Requirements
These instructions are for using the Intel Galileo board with the Intel® XDK IoT Edition or the Eclipse* IDE, looking for instructions on how to use it with the Arduino* IDE?
For Gen 2, follow these steps.
- Download the FTDI driver for Windows (Source:http://www.ftdichip.com/Drivers/D2XX.htm)
- Right-click the .exe file you downloaded, which should be called "CDM…" and select Run as Administrator:

- Click Extract.
- Click Next.
- Click Finish.
- You should see a new USB Serial Port entry in the "Ports (COM & LPT)" section of the Device Manager.
For Gen 1, install the drivers that should have been provided with your serial to USB converter from the manufacturer.
A common serial to USB converter is the Prolific type, and the drivers can be found on their site http://www.prolific.com.tw/US/ShowProduct.aspx?p_id=225&pcid=41.
- Download the PuTTY terminal emulator: http://the.earth.li/~sgtatham/putty/latest/x86/putty.exe.
- Double-click the putty.exe file you downloaded to run it.
- Configure the PuTTY menu as follows
- Under Connection type, select Serial.
- In the Serial line field, type your COM# (the COM port of your FTDI or 3.5mm to DB-9 adapter).
- In the Speed field, type
115200.

- When you see a blank screen, press the Enter key twice. You should see a login screen.

- At the login prompt, type
root and press Enter. - Press Enter when prompted for a password. You should see a terminal prompt.

- Ensure that your data is recorded correctly by checking the internal date and time on your board. Enter the following command:
date - To update the date to the current time, enter the following command:
date -s "YYYY-MM-DD HH:MM:SS"
For example, to set the time to January 29, 2015 at 16:54 UTC time, enter the following command:
date -s "2015-01-29 16:54:00" - Create a bootable micro SD card with the latest Yocto* image for your board, then reboot the board. For steps, see Making a bootable micro SD Card with Windows*
Congratulations! You’ve set up the terminal communication to your Intel Galileo board. To get familiar with the system, you can try out some common Linux commands by searching "basic linux commands" in your web browser.
Continue with your IDE
Arduino*
Eclipse*
Intel® XDK IoT Edition
Not sure which to choose? Then start with Arduino*
Troubleshooting
Resources
Intel® Developer Zone for IoT
Start inventing today with the Intel® IoT Developer Program which offers knowledge, tools, kits and a community of experts to quickly and easily turn your innovative ideas into IoT Solutions.
Dream it, Build it with the Intel® IoT Developer Kit for Intel® Edison and Intel® Galileo platforms. These kits are versatile, performance-optimized and fully integrated end-to-end IoT solutions supporting a variety of programming environments, tools, security, cloud connectivity and hardware.
For more resources and to learn how the new Intel® IoT Developer Kit v1.0 can help streamline your IoT projects:
