Arch Linux Overview
Arch Linux is by far my favorite Linux distribution to date. It is a simple, lightweight distribution that is also a rolling release system. Meaning that you install Arch once and upgrade your system by issuing one command via Arch's package manager pacman -Syu.
CodeProject
The Arch Linux installation process is equivalent to somebody dumping a bunch of Lego's in front of you and saying build whatever you want; that being said, no two installations are the same.
Arch Linux Series
Since the installation process can be pretty "lengthy" I've decided to split it up into a series so that it'll be easier for the reader to bookmark/go to the sections of the series that they need. Don't worry, once you get through the installation process the hard part will be over.
Prerequisites
Before we get started with the first part of this series you must download the two following things:
Virtual Machine Setup
- Open up VirtualBox and click new.
- Type in the name of your virtual machine.
- Select Linux for the type and Arch Linux (32 or 64-bit) for the version.
- Follow the next couple of prompts and enter the values you would like your virtual machine to have.
- Once your virtual machine is set up, select it and click settings.
- Click on storage.
- Inside the storage tree click on the Controller: IDE and add the GParted Live ISO to it.
- After GParted is added click ok then start the virtual machine.
Installation Part One - Partitioning
Once GParted has booted a prompt will ask you if you would like to change your keymap. Just press enter. Next, a second prompt will ask what language settings to load, press enter here as well. Lastly, a third prompt will ask which video mode you want; press enter again. Once you've done that the GParted GUI will come up.
Disclaimer
Depending on how your machine is set up you might see more than one partition. I assume that you've backed up all of your files that you need and I take no responsibility in you accidentally deleting/formatting your drive(s)
Continuing on
Note - My VM has 160gb of storage space
- Click Device -> Create Partition Table then click apply
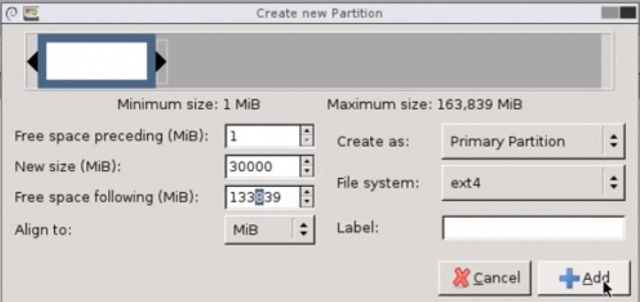
- Once the partition table has been created click new and set your setting for your new root partition.
Here are my root partition settings:

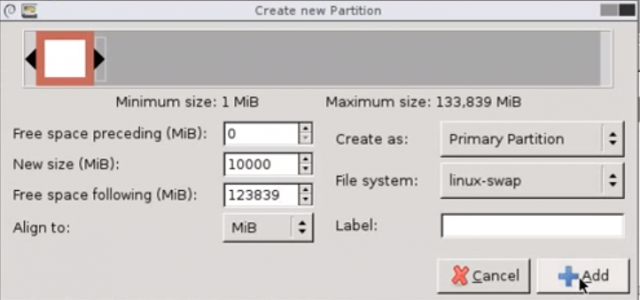
Do steps 1 & 2 again but this time the partition you'll be creating will be for the linux swap.
Here are my linux swap settings:

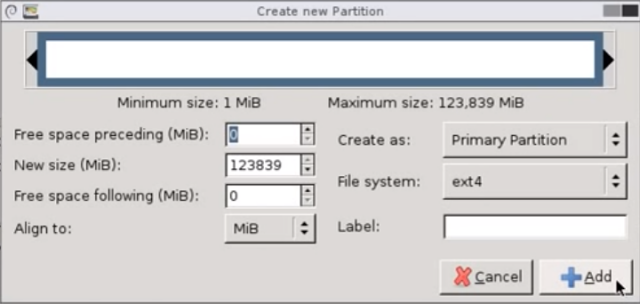
Then lastly create a partition for the remainder of the storage space
Here is my final partition settings:

Now that the disk is completely partitioned click apply then apply again. GParted will carry out our partitioning wishes and once it's done close gparted by double clicking the exit button then shut down the vm.
Wrap up
We've successfully set up the partitions! Congratulations, the grunt work is done. In the next part I'll dive into the installation of Arch Linux. If you have any questions be sure to post them in the comments below!
Additional Resources
The Arch Linux wiki help you go beyond the scope of the stuff I didn't cover in this post.
Series Links
