Get access to the new Intel® IoT Developer Kit, a complete hardware and software solution that allows developers to create exciting new solutions with the Intel® Galileo and Intel® Edison boards. Visit the Intel® Developer Zone for IoT.
Before you begin connecting your Intel® Edison board to Azure, you will need to ensure the latest OS image has been installed. To do that, follow the getting started instructions on Intel’s official documentation portal. After following the standard Intel® Edison setup instructions, you will need to establish a serial connection to your device from your machine. Once you have established a serial connection (command line) to your Intel® Edison board, you can proceed to install Azure IoT SDK using the below instructions.
Before you begin…
- Make sure you have run the configure_edison --setup command to set up your board
- Make sure your Intel® Edison board is online via your local Wi-Fi network (should occur during configure_edison setup)
Installing Git on your Intel® Edison
Git is a widely used distributed version control tool, we will need to install Git on the board in order to clone the Azure IoT SDK and build it locally. To do that, we must first add extended packages which include Git. Intel® Edison’s build of Yocto Project Linux uses the opkg manager which doesn’t, by default, include Git support.
- First, on your Intel® Edison board command line, use
vi to add the following to your base-feeds:
$ vi /etc/opkg/base-feeds.conf - Add the following lines to the base-feeds.conf file:
src/gz all <a href="http://repo.opkg.net/edison/repo/all" rel="nofollow">http:
src/gz edison <a href="http://repo.opkg.net/edison/repo/edison" rel="nofollow">http:
src/gz core2-32 <a href="http://repo.opkg.net/edison/repo/core2-32" rel="nofollow">http:
- Exit by hitting esc, type SHIFT+: and then type
wq, and press Enter. If you are unfamiliar with vi editing, read this. - Next, update and upgrade your opkg base-feeds on your command line:
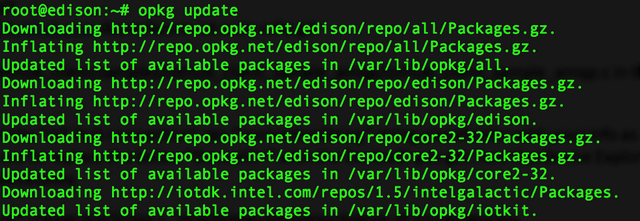
$ opkg update - You should see the following:

Downloading the Azure IoT SDK to your Intel® Edison board
- On your Intel® Edison board, use Git and clone the Azure SDK repository directly using the following commands. We recommend using the default folder located in /home/root:
$ opkg install git
$ git clone <a href="mailto:git@github.com" rel="nofollow">git@github.com</a>:Azure/azure-iot-suite-sdks.git - You may be prompted to add an RSA key to your device, respond with yes.
Alternate Deploy Method
- If for any reason you are unable to clone the Azure IoT SDK directly to your board, you can clone the repository to your PC / Mac / Linux desktop and then transfer the files over the network to your Intel® Edison board using FileZilla or SCP.
- For FileZilla, run
wpa_cli status on your Intel® Edison to find your IP address, then use "sftp://your.ip.address", use password "root" and your Intel® Edison password to establish an SFTP connection via FileZilla. Once you have done that, you can drag and drop files over the network directly.

Building the Azure IoT SDK on Intel® Edison
We want to prove to ourselves that we have successfully built the Azure IoT SDK. To do that, we will build a sample application which relies on the SDK. To do that we need to update the credentials in the sample AMPQ app to match those of our Azure IoT Hub application. When we build the Azure IoT SDK, the sample C applications are automatically built by default, we need to include our credentials into the sample app while we build the SDK so that they are ready to function after we build.
- Edit "/c/iothub_client/samples/iothub_client_sample_amqp/iothub_client_sample_amqp.c" in the following way using vi or other text editor:
- In the terminal, enter /c/build_all/linux and execute the following steps:
$ opkg install util-linux-libuuid-dev

$ ./build_proton.sh

$ ./build.sh
Update the ldconfig cache
While building the Azure IoT SDK, we needed to first build a dependency called Qpid Proton. However, we need to register the resulting library with ldconfig before we can proceed to testing and building our C-language samples. To do that, we need to first locate where the Proton lib is and then copy it into the /lib folder in Yocto.
- Add libqpid-proton.so.2 to shared libs by running the following terminal commands:
$ find -name 'libqpid-proton.so.2'
Copy the directory you are given by this command to your clipboard. $ cp [directory_to_libqpid-proton.so.2] /lib
Replace [directory_to_libqpid-proton.so.2] with the result of the find command from the first step.$ ldconfig
This will automatically update the cache; it’s a one-line command.$ ldconfig -v | grep "libqpid-p*"
If you completed the operation correctly, you will see "libqpid-proton.so.2" listed.- Now that we have added Qpid Proton to our ldcache, we are able to build the sample C project which relies on Proton:
- Navigate back to: /c/iothub_client/samples/iothub_client_sample_amqp/iothub_client_sample_amqp/linux
- Run "make -f makefile.linux"
- Run "./iothub_client_sample_amqp"
- The result should be the following:
# ./iothub_client_sample_amqp

hub_client/samples/iothub_client_sample_amqp/linux#

Starting the IoTHub client sample AMQP...

IoTHubClient_SetNotificationCallback...successful.

IoTHubClient_SendTelemetryAsync accepted data for transmission to IoT Hub.

IoTHubClient_SendTelemetryAsync accepted data for transmission to IoT Hub.

IoTHubClient_SendTelemetryAsync accepted data for transmission to IoT Hub.

IoTHubClient_SendTelemetryAsync accepted data for transmission to IoT Hub.

IoTHubClient_SendTelemetryAsync accepted data for transmission to IoT Hub.

Press any key to exit the application.

Confirmation[0] received for message tracking id = 0 with result =

IOTHUB_CLIENT_CONFIRMATION_OK

Confirmation[1] received for message tracking id = 1 with result =

IOTHUB_CLIENT_CONFIRMATION_OK

Confirmation[2] received for message tracking id = 2 with result =

IOTHUB_CLIENT_CONFIRMATION_OK

Confirmation[3] received for message tracking id = 3 with result =

IOTHUB_CLIENT_CONFIRMATION_OK

Confirmation[4] received for message tracking id = 4 with result =

IOTHUB_CLIENT_CONFIRMATION_OK
