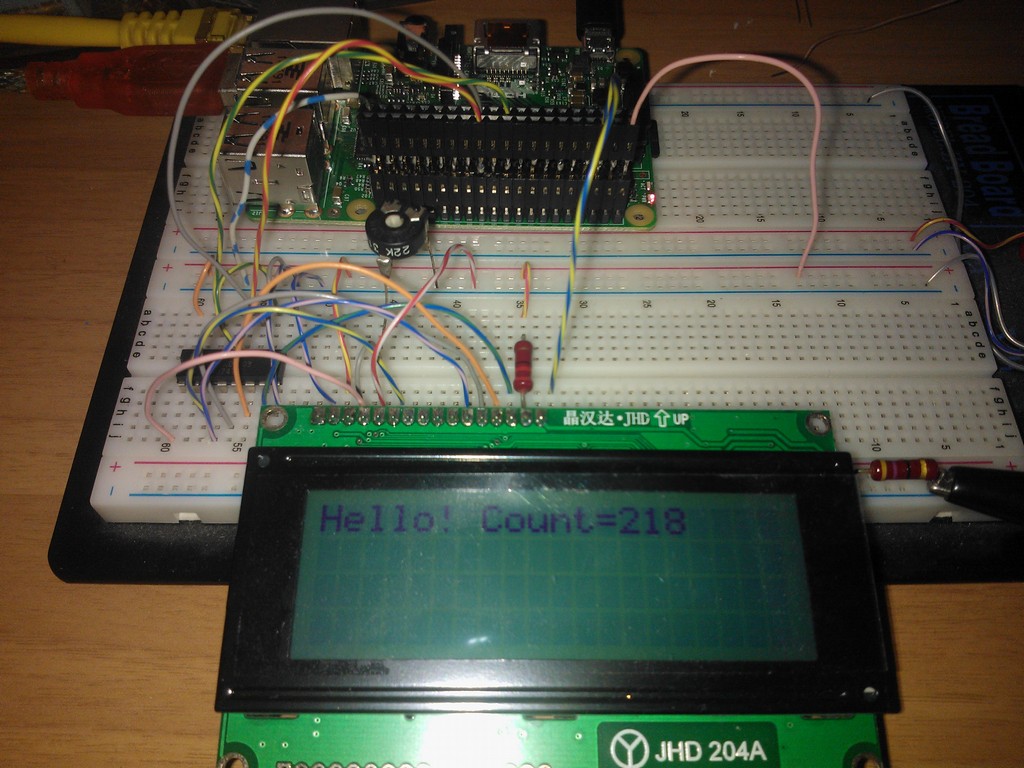
This is my first post about Windows 10 IoT and small computers (embedded) after some experiences in the past with the .NET MicroFramework (Netduino, in essence).
I must say that this Windows 10 is finally a small masterpiece, or “everything you ever asked and none never responded you”. The programming way is easy but very flexible, although still many bricks are missing (in development).
Here is a very simple experiment, a bit vintage, of driving a common alphanumeric LCD module (HD44780-based) with a Raspberry PI 2 and Windows 10 IoT.

The project isn’t anything new, but rather kinda “refresh” of another of mine where the Netduino board was used (see below). Some of you may wonder “why” I am still using such an old LCD module when several graphics are available on the market. Well, my first answer is: “why not?”. As said, this project hasn’t any specific purpose (although many of you may dig into their “miracles box” and pull out an “almost useless” LCD module). The aim is to test how hard it is to drive something that is well known.
The Hardware
All you need is very easy to find:
- Raspberry PI2 (with Windows 10 IoT installed)
- Any suitable HD44780 LCD display module (mine is a 4×20)
- 74HC595 shift-register
- 220 Ohms resistor, only if you need the backlight
- 10kOhms trimpot (22k or 47k are fine the same)
For the sake of simplicity, I won’t detail how to set up the Raspberry, but there are many articles which describe that very well. I followed the Microsoft site and everything went fine, except for the suggested SD minimum size: I found that a 8GB won’t work. Simply consider a 16GB.


The Software
I wanted to publish the project keeping the sources simpler as possible. A similar application won’t have sense in a complex hardware (full-featured TFT displays and HDMI monitors perform way better than this module). The general guideline is: if you find it convenient to connect a LCD module to a RPI, then make it work in minutes.
Since the LCD module’s capabilities are very limited, I embraced the idea to expose the APIs as it were a kind of “Console”. Just a “write” and something more, where a background task should manage the physical transfer by itself.
The project contains two different demos:
- A basic one, where some
strings’ content is reflected on the display; - A slightly more complex demo, which gets a bunch of RSS news from the BBC.uk channel, and rotates the titles on the screen.
Basic Demo
class BasicDemo
{
public async Task RunAsync()
{
DriverHD44780.Instance.DrawString(
"This is a basic demo",
new Point(0, 0)
);
int n = 0;
while (true)
{
DriverHD44780.Instance.DrawString(
$"Counting...{n}",
new Point(0, 1)
);
var now = DateTime.Now;
DriverHD44780.Instance.DrawString(
now.ToString("T") + " ",
new Point(0, 2)
);
DriverHD44780.Instance.DrawString(
now.ToString("M") + " ",
new Point(0, 3)
);
n++;
await Task.Delay(1000);
}
}
}

RSS Demo
class RssDemo
{
public async Task RunAsync()
{
DriverHD44780.Instance.DrawString(
"Getting RSS...",
new Point(0, 0)
);
var http = new HttpClient();
var endpoint = new Uri("http:
var srss = await http.GetStringAsync(endpoint);
var xrss = XDocument.Parse(srss);
var xnews = xrss.Root
.Element("channel")
.Elements("item")
.OrderByDescending(_ => (DateTime)_.Element("pubDate"))
.ToList();
int n = 0;
while (true)
{
var dt = (DateTime)xnews[n].Element("pubDate");
DriverHD44780.Instance.DrawString(
dt.ToString("g"),
new Point(0, 0)
);
var title = (string)xnews[n].Element("title");
title = title + new string(' ', 60);
for (int row = 0; row < 3; row++)
{
DriverHD44780.Instance.DrawString(
title.Substring(row * 20, 20),
new Point(0, row + 1)
);
}
n = (n + 1) % xnews.Count;
await Task.Delay(3000);
}
}
}

Performance
You may wonder how well the driver performs. Well, there are two stages involved in the displaying process:
- The calls from the main application to the driver
- The physical data transfer
Any invocation by the main app always involves the cache: no matter how many calls are made, because everything is hosted in memory. For this reason, any manipulation is irrelevant in terms of performance impact. However, a fixed rate (typically 200ms) there’s a cache dump to the LCD screen, that is: the physical data transfer though the SPI.
How Long Does the Entire Screen Dump Take via SPI?
The circuit is very simple, thus there’s no way to take the transfer faster than the machine execution speed. Even adjusting the SPI clock rate, the resulting duration won’t change notably. Please bear in mind that a SPI clock rate that is too high could face signal degradation due to the wire length. I used a perfect 1 MHz value, and you can see from the below screenshot that the total transfer duration is less than 30ms.

If you are interested in a faster way to dump the data via SPI, I suggest you read the following section which requires a decent knowledge about electronics.
The Old “LCD Boost” Library
The original project was tailored for the .NET MicroFramework (Netduino) and many things were optimized for speed reasons. Moreover, the NetMF had some leaky problems mostly due to the super squeezed CLR, thus many solutions were solved as it were a low-level device.
Here are some links to the original articles of mine:


