The (Hortonworks Sandbox)[http://hortonworks.com/sandbox/] is designed to be a self contained learning platform for HDP, and runs in a VM, with all the components on HDP installed in a very small environment. Obviously, there are some compromises inherent in pushing a powerful clustered computing system into a single environment on a VM on your laptop, but it remains a powerful tool for trying out the functionality that HDP has to offer.
Hortonworks Data Flow is a new tool which provides a simple means of ingesting data to the HDP platform and others. In this tutorial, I’m going to show you how to hook up an instance of HDF running locally, or in some VM, to a remote instance of HDF running within the sandbox. This instance will then have easy access to HDFS, HBase, Solr and Kafka for example within the sandbox.
Why not just go direct to these services? In VM environments, there are often a range of port forwarding and routing issues that you need to fix to get access to these services. You would also have to download client configurations to link your machine up to the sandbox machine, which can over-complicate the learning process.
So let's start by putting HDF onto the Sandbox. (Ali Bajwa)[https://github.com/abajwa-hw] provides an excellent Nifi Service for Ambari, along with (instructions to install this on the sandbox)[https://github.com/abajwa-hw/ambari-nifi-service]. There are also some great first step tutorials on building Flows with the newly installed NiFi on your sandbox.
Enabling Remote Connections (site-2-site)
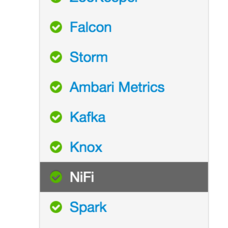
Now let’s looks at how you would connect up a NiFi running outside the sandbox. First, we need to enable the remote port for our sandbox instance. To do this, use Ambari, find the nifi service on the left:

Then find the Advanced nifi-properties-env section:

In this section, enable remote site-2-site by specifying a port for the nifi.remote.input.socket.port property. For now, we’re also going to turn off the encryption of the site-2-site, since we’re just using a sandbox, by setting nifi.remote.input.secure=false.

Don’t forget to restart your NiFi service in Ambari to apply these changes.
What this does is to establish the port for the data channel used by the NiFi site-2-site protocol, this is separate from the API control channel which we use to run the NiFi GUI on (9090 by default).
We will now need to forward the remote data port on our sandbox VM if you’re using NAT networking (for example with the VirtualBox sandbox). To do this, go to the network settings on your virtual machine:

And add two port forwarding rules for port 9090 (the default NiFi GUI and API port) and 9091 (the data channel for the NiFi site-2-site protocol).
Once we’ve got the configuration in place, we can create a flow on the sandbox with and input port for the remote connection, and a PutHDFS processor to write out the data. Of course, if we were doing this properly, we would include MergeContent before the PutHDFS to ensure we’re not writing too many small files to HDFS, but for the purposes of this demonstration, this will do fine.

Setting Up the Remote Collector
Now let’s go to another NiFi instance running directly on our host machine (you could of course use another VM, as long as you have VM to VM networking enabled). For this one, we’re just going to put together a simple flow to demonstrate the remote link.
Drag a remote process group onto the canvas, and give it the URL of the sandbox nifi interface (note this is exactly as you would type it into a web browser, NOT the port you set in the remote settings).

Right click on this to Enable Transmission, and let the processor grab a list of the input ports on the other side.

We can now connect data into one of those ports:
Before data will flow, we also need to turn on the remote port. Right-click on the remote process group, and bring up the remote ports dialog. Here, you should have a switch to be able to turn out the remote port that will be receiving data.

Note you can also tune the number of connections between the two. Between one and four usually makes sense.
You should now be able to see data flowing from your local NiFi on the laptop, into the NiFi instance running in the Sandbox. The Sandbox instance will also be accepting that data an writing it into HDFS.
This provides a simple example of how the remote site-2-site protocol is setup. The pattern proves extremely powerful when collecting data from remote sites, or servers, and as a means of communicating between different HDF instances. Remember, HDF is a two-way data flow engine afterall. The protocol also provides the means to configure secure two-way authenticated SSL, supports compression on the wire, and transfers both the data payload and the flow file attributes between NiFis.
