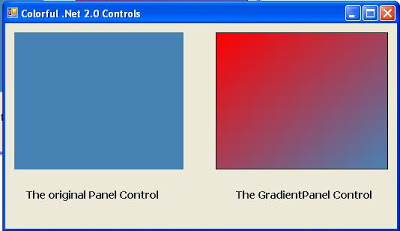
Get bored with the static appearance of Windows Forms 2.0 controls?! What about adding some exciting features for them in order to enhance the UI of our applications!
In this tutorial, I’ll show you how to create gradient colors as a background for those controls, let’s make our target as the Panel Control.

- Create a new “Class Library” project from Microsoft Visual Studio 2005 and name it as
GradientPanelLibrary. - Add a
CustomControl item to the current solution and name it as GradientPanel. - Switch to the code of the
GradientPanel class and change the inherited class to be Panel instead of Control. - Now let’s add some properties for the fancy panel control, we’ll need the following properties:
private Color Color1;
public Color BackColor1
{
get { return Color1; }
set { Color1 = value; this.Invalidate(); }
}
public Color BackColor2
{
get { return Color2; }
set { Color2 = value; this.Invalidate(); }
}
private LinearGradientMode Mode;
public LinearGradientMode FillMode
{
get { return Mode; }
set { Mode = value; this.Invalidate(); }
}
- All we’ve to do now is overriding the
OnPaint method in order to draw the Panel with the gradient colors. Here’s the code:
if (this.ClientRectangle.Height == 0 || this.ClientRectangle.Width == 0) return;
Graphics g = pe.Graphics;
LinearGradientBrush brush = new LinearGradientBrush(this.ClientRectangle,
BackColor1, BackColor2, FillMode);
g.FillRectangle(brush, this.ClientRectangle);
Now we can build the solution in order to generate the DLL for our fancy Panel, then add this generated DLL to the ToolBox, and then you can drag the GradientPanel Control from the toolbox and drop it into any Windows Forms to enhance your UI. Note that you can apply this technique to any control, so you’ll have special controls that make your UI as the best one.
