I’ll walk you through the process of associating a custom domain with your Azure website and then configure a SSL certificate with that site.
The process itself is quite straight forward, but I ran across a few gotchas that I had to wrestle with, but hopefully if you follow these steps, then it should save you a few hours of having to struggle with the issue(s).
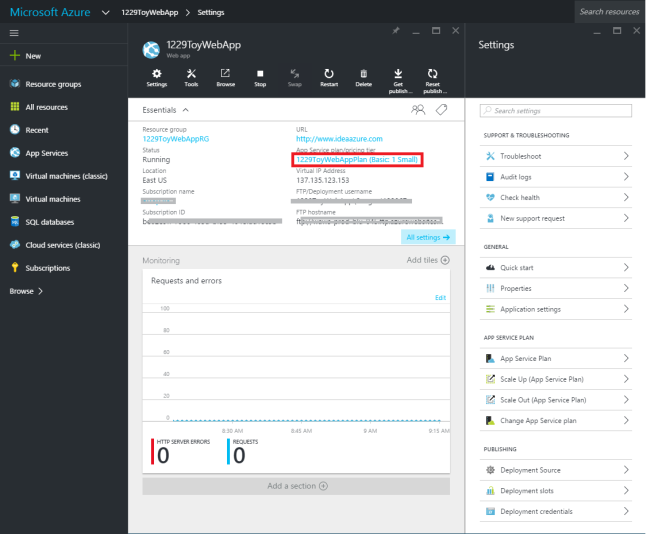
Create a Website in Azure – To configure SSL, you need to have at least a basic plan, though you can configure custom domain is a Shared plan. Since I have already associated the 1229ToyWebApp with my custom domain www.ideaazure.com, the URL lists my custom domain, but initially, this URL will point to http://1229toywebapp.azurewebsites.net/.
Next, search for domains in the Settings blade and select the bring external domains to display the bring external domains blade. Copy the IP address – as it says, this is the IP address we’ll use to configure the A record in GoDaddy.

Let’s head over to Godaddy to configure DNS zone files – our record should look like this:
Notice the ‘Points To’ IP address in the image above is the same as the IP address that Azure generated for us and we bought this over from the ‘Bring External Domains’ blade – this is the IP address of our website 1229toywebapp.azurewebsites.net/
Next, add the following CNAME record, this one maps the custom domain name, in our case http://www.ideaazure.com to the 1229toywebapplication.azurewebsites.net subdomain.
So, the above two records create the following mappings:
Keep in mind that in the first CNAME record, the @ symbol refers to the root domain, i.e., ideaazure.com, and in the second CNAME record.
We now need to configure one additional CNAME record and this should look like this, and this is to let Azure know that you do indeed have control over your domain. So, the mapping below should be read as awverify.ideaazure.com points to awverify.1229toywebapp.azurewebsites.net.
Propagation of DNS entries can take up to 48 hours though you rarely have to wait that long, in my case it took about 10 minutes.
Let’s now verify if the DNS entries have propagated successfully by heading over to the http://www.digwebinterface.com/.
As you can see in the image the first A record and then the subsequent CNAME records all map correctly.
Next, go back to your azure portal and add the custom domain as shown in the image below. If you are able to save successfully, then everything has gone according to plan and if you now type your custom domain in the address bar, then your Azure website should pull up.
Next, let’s configure an SSL cert, there are a couple of different options. One is to use the makecert.exe and here’s a great article on how to do this, or you could go the route of using openssl. I chose to go with StartSSL .
Start with ‘Start Now for Free SSL Certificate’, click on authenticate and this takes you to a page where you can ‘Get the new Login Authentication Certificate’ and you are prompted to enter your email id. Once you do that, a verification code is sent to your email. Take that verification code and enter it as shown in the figure below and then click on the ‘Get the New Certificate’.
This is where things get a little interesting, on my Chrome version Version 49.0.2623.87 browser, the certificate could not be installed automatically and it then presents me with a couple of options, I chose the first option and entered the private key password.
This takes you to a page that allows you to download the client site certificate and you should then be able to simply click on the downloaded certificate and install it in the browser. But on clicking on the downloaded certificate, chrome would present me with a dialog saying ‘This file is invalid for use as the following: PKCS #7’. Remember, here all that StartSSL is attempting to do is load a client certificate which can then be used to authenticate the user rather than entering username and password.
I then fired up my Opera browser and tried authenticating by following the steps listed above. Luckily, here Opera was able to install the client certificates transparently. Remember, you will have to go through all the steps listed above, starting first with ‘Get the new Login Authentication Certificate’ and entering your email Id. The client certificates are browser specific.
Now that you are registered for a free account and successfully logged in, head over to the Validation wizard tab and select the option for Domain Validation
Enter the domain root that has to be validated:
Next, you are presented with a few email addresses where the verification code can be sent, these are domain related email addresses or the email address recorded in the domain registration record.
Select the email address you want the verification code to be sent to and then put that code you receive in the verification code box and select validation.
Now head over to the Certification Wizard tab, you are presented with a couple of options. Web server certs is what we want, so select that option.
StartSSL supports the Subject Alternate Name X.509 extension, this allows us to set the common name to the fully qualified domain name, i.e., http://www.ideaazure.com and the alternate name set to ideaazure.com.
Next use the click on the StartComTool.exe, this will download the StartComTool executable. Run this executable and you should be presented with a dialog as shown below:
Click on generate CSR, it will prompt you to give a name to the generated key file, do so and save it.
Next, copy the CSR content that you see in the StartCom tool and paste it in the box as shown below:
On clicking submit, you should be presented with an option to see a list of certificates that have been generated.
and, selecting the certificate list above should show a display similar to this:
On selecting retrieve a zip file will be downloaded, extract its contents. You’ll notice 4 folders – otherserver.zip, NginxServer.zip, IISServer.zip and ApacheServer.zip. Obviously, we’re after the IIServer.zip. Extract this file – you should see two files – 1_Intermediate.crt and 2_your_domain.com.crt.
Now, select the ‘Create PKCS#12 (PFX) file’ option. This should take you here.
If you recall, a little earlier, we saved the private.key file while using the StartComTool.exe. Copy the contents from that file and paste it in the ‘Enter private key’ box and paste the contents of 2_your_domain.com.crt file in the ‘Enter Certificate’ box. And also, provide a password and select submit.
You should see the following screen, select download and rename the extension of the downloaded file to .pfx.
Head back to the Azure portal and in the ‘Custom domains and SSL’ blade, select the Upload Certificate option. This should display the Upload Certificate blade. Upload the recently saved pfx file and enter the password you used while creating the pfx file. Once you click on save, you should see a ‘Successfully updated web app settings’ message.
You should now be seeing the newly uploaded pfx certificate in the list of certificates:
All that is left is to associate that certificate with our custom domain in the ‘SSL bindings’ section.
When you click on save, you’ll be given a warning that ‘Adding SSL bindings may have a pricing impact. Continue?’ And, then on selecting ‘OK’ you should see a ‘Successfully updated SSL bindings’ message.
That’s it! On navigating to your site using the https protocol, you should see the green lock.

