In my article, TFS tools for managing SQL Server development, I covered several Team Foundation Server (TFS) client tools that can be used to manage SQL Server-related development. Some of the feedback I received from the article was the issue of tagging items in Excel. This article illustrates how TFS work items can be multi-tagged using Microsoft Excel.
Understanding TFS Tagging
The usage of tags in TFS is no different to other platforms whereby tags are used for providing additional metadata about a given item. In TFS, tags can provide an additional mechanism for searching and retrieval of related items. The default list columns in Excel does not include Tags – for that to happen, you will have to click Choose Columns and include the Tags column as part of the selected columns that you may want to view, as shown below:

After I added the Tags column, I then tagged my task as SQL Server, as shown below:

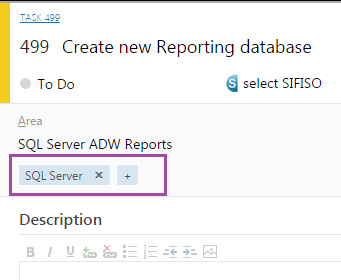
The below image shows how my task looks like in the Web Access view of TFS. You can already notice the highlighted SQL Server tag.

So what if you want to add multiple tags against the same TFS work item? Well, the key to multiple tagging is separating your tags with a semi-column. The below image shows that in addition to SQL Server, I have added T-SQL and DB as new tags.

Once you have committed your changes (by clicking the Publish button), your tags will immediately get rearranged in an alphabetically order as shown below:

Finally, when we refresh our Web Access view, we can now see all our tags against our task number 499.

That’s all, folks. Till next time.
Cheers!
CodeProject

