Get access to the new Intel® IoT Developer Kit, a complete hardware and software solution that allows developers to create exciting new solutions with the Intel® Galileo and Intel® Edison boards. Visit the Intel® Developer Zone for IoT.
You can view a list of sensors supported in the UPM sensor library, access relevant documentation on each sensor, and quickly add a sensor to your selected project. For steps, see the appropriate section below:
Requirement
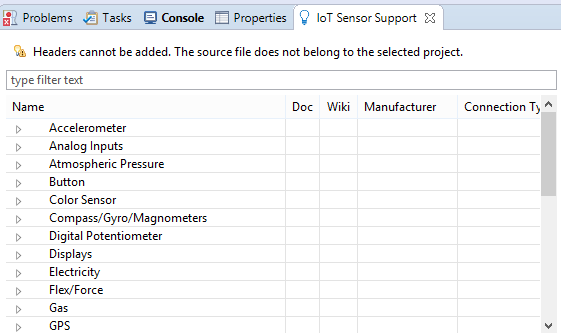
- Choose Intel® IoT > Sensor Support View. The IoT Sensor Support tab displays.

The supported sensors are displayed in categories, such as Analog Inputs or Displays. You can expand a category to see the list of supported sensors in the category. You can also type a search term in the type filter text field to search for a specific sensor. Information on each sensor includes a description, manufacturer, and connection type, such as I2C or SPI.

- You can view the UPM sensor library documentation for the sensor. To do so, click the icon for the sensor under the Doc category.
- You can view relevant wiki information for the sensor, if available. To do so, click the icon for the sensor under the Wiki category.

You can add a sensor to your project. Note that the sensor is added to the selected project only, not to every project in the Project Explorer tab.
- In the Project Explorer tab, click the name of the project to select it. The word [selected] is displayed next to the project name.
- On the IoT Sensor Support tab, navigate to the sensor and select the check box next to its name. This sets all the options you need to use the sensor in your project, such as the linker flag.

- A message is displayed asking you if you want to add the header for the sensor library to the project source file. Click Yes.

The header file for the sensor is added to the main project file in an include statement. The header is added to the selected project.

You can quickly add the header files for selected sensors to the currently selected project.
- Right-click the main project file, then point to Add Sensor Header.
- Select the headers to add.

