Get access to the new Intel® IoT Developer Kit, a complete hardware and software solution that allows developers to create exciting new solutions with the Intel® Galileo and Intel® Edison boards. Visit the Intel® Developer Zone for IoT.
This article provides a step-by-step guide to show you how to set up a connection to Amazon* Web Services* (AWS*) IoT using MQTT*, as well as command and code samples for additional setup and ease of use.
AWS* IoT initial setup
-
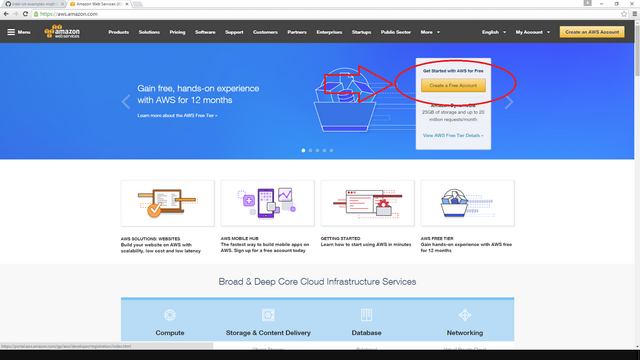
Create an account on https://aws.amazon.com, if you do not yet have one. 
-
Install the AWS* CLI by following the instructions at http://docs.aws.amazon.com/cli/latest/userguide/installing.html.
Adding the AWS* CLI path to environment variables on Windows*
-
Go to Control Panel and click System. 
-
Click Advanced system settings. 
-
On the Advanced tab, click Environment Variables.
-
In the User variables for me box, double-click PATH. 
-
Click New, add the full path to the AWS* CLI installation directory, and click OK. 
-
In the System variables box, double-click Path. 
-
If the AWS* CLI installation directory is not listed, repeat the actions from step 5. 
-
In the Environment Variables window, click OK. 
-
In the System Properties window, click OK.
Note: For ease of use on Windows*, while using the AWS* CLI, follow the subsequent steps of this tutorial in the directory where you cloned this repository (for example, C:\Users\me\Documents\GitHub\intel-iot-examples-mqtt\support\aws).
Verify the setup by running this command:
aws iot help
You should see the output like this:

Create a new device
To create a new device, use the create-thing command as follows:
aws iot create-thing --thing-name "edison1"
You should see the output like this:

Get the list of devices
To list your devices, use the list-things command as follows:
aws iot list-things
You should see the output like this:

Obtain and configure a certificate for device use
-
Provision a certificate:
aws iot create-keys-and-certificate --set-as-active --certificate-pem-outfile cert.pem --public-key-outfile publicKey.pem --private-key-outfile privateKey.pem
You should see the output like this:
-
Create/attach policy:
aws iot create-policy --policy-name "PubSubToAnyTopic" --policy-document file:
You should see the output like this:
-
Attach the certificate to a device (you need certificate-arn from step 1):
aws iot attach-principal-policy --principal "certificate-arn" --policy-name "PubSubToAnyTopic"
Determine the AWS* endpoint
You can obtain the host to use by running the following command:
aws iot describe-endpoint
You should see the output like this:

Installing certificates to the Intel® Edison board
From your computer, run the following commands:
scp -r cert.pem USERNAME@xxx.xxx.x.xxx:/home/root/.ssh
scp -r publicKey.pem USERNAME@xxx.xxx.x.xxx:/home/root/.ssh
scp -r privateKey.pem USERNAME@xxx.xxx.x.xxx:/home/root/.ssh
where USERNAME@xxx.xxx.x.xxx is the username and IP address you set for your board.
Installing certificates to the Intel® Edison board (Windows* only)
We'll be using WinSCP* for the next steps. For installation instructions, refer to https://github.com/intel-iot-devkit/how-to-code-samples/blob/master/docs/cpp/using-winscp.md.
-
Log into your device using WinSCP*. 
-
Make sure your host machine is in the directory where you ran your previous AWS* CLI commands. 
-
Copy cert.pem, privateKey.pem, and publicKey.pem to your /home/root directory on your Intel® Edison board. 
Summary
If you have followed all the steps above, you should have all the information that your program needs to connect to the MQTT* server:
MQTT_SERVER - use the host value you obtained by running the aws iot describe-endpoint command, along with the ssl://(for C++) or mqtts:// protocol (for JavaScript*)
MQTT_CLIENTID - use \<Your device name\>
MQTT_TOPIC - use devices/\<Your device name\>
MQTT_CERT - use the filename of the device certificate as described above
MQTT_KEY - use the filename of the device key as described above
MQTT_CA - use the filename of the CA certificate (/etc/ssl/certs/VeriSign_Class_3_Public_Primary_Certification_Authority_-_G5.pem)
Additional setup for C++
When running your C++ code on the Intel® Edison board, you need to set the MQTT* client parameters in Eclipse*. To do that:
-
Go to Run configurations and, in the Commands to execute before application field, type the following:
chmod 755 /tmp/<Your app name>; export MQTT_SERVER="ssl://<Your host name>:8883"; export MQTT_CLIENTID="<Your device ID>"; export MQTT_CERT="/home/root/.ssh/cert.pem"; export MQTT_KEY="/home/root/.ssh/privateKey.pem"; export MQTT_CA="/etc/ssl/certs/VeriSign_Class_3_Public_Primary_Certification_Authority_-_G5.pem"; export MQTT_TOPIC="devices/<Your device ID>"
-
Click the Apply button to save these settings.
-
Click the Run button to run the code on your board.
Additional setup for JavaScript*
When running your JavaScript* code on the Intel® Edison board, you need to set the MQTT* client parameters in the Intel® XDK IDE. Add the following entries to the config.json file:
{
"MQTT_SERVER": "mqtts://<Your host name>:8883",
"MQTT_CLIENTID": "<Your device ID>",
"MQTT_CERT": "/home/root/.ssh/cert.pem",
"MQTT_KEY": "/home/root/.ssh/privateKey.pem",
"MQTT_TOPIC": "devices/<Your device ID>"
}
