In my previous post, I touched on how to create a simple Azure Function and invoke it through a web request.
In this post, I want to do something more interesting that has not yet been covered in any of the templates provided.
My objective is to insert a record into SQL Azure Database every time I receive a request.
For this post, we are going to assume you already have Azure SQL database up and running and already have a function app created.
Prerequisites
- Create an Azure SQL Database from the portal.
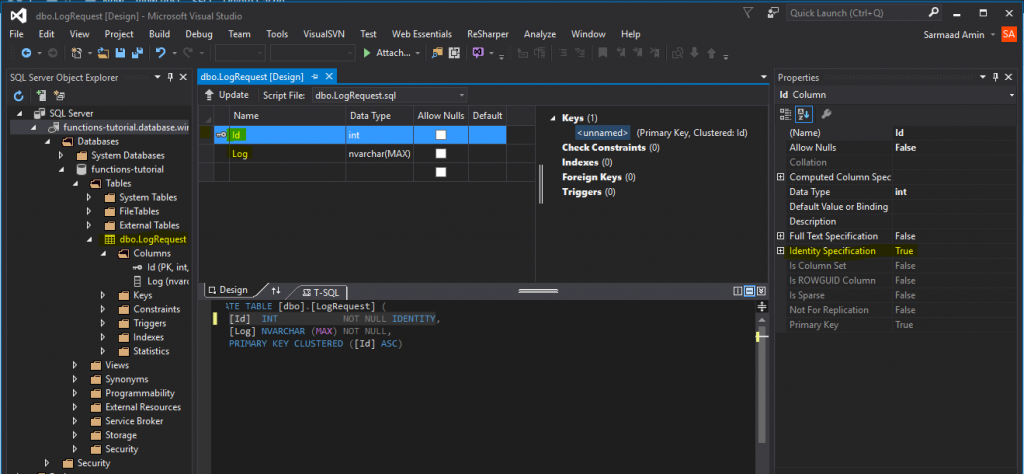
- Create a table called
LogRequest with two columns (Id [PK, int, identity] , Log [nvarchar(max)]
I used Visual Studio 2015 community to connect to SQL database can create the new table.

Function Code and Database Configuration
- Click on “New Function“, then select “HttpTrigger – C#“, Name your function “
HttpTriggerSqlDatabase” to make it easy to locate. - Once you get the default code view, find the small link down the bottom of the code text box called “View files“.
- Click on the “+” sign to add new file, name the file “project.json”. We are going to use this file to add all required nuget packages.
Copy and paste the json content below and hit save.
{
  "frameworks": {
    "net46":{
      "dependencies": {
        "Dapper": "1.42.0",
        "System.Data.SqlClient":"4.1.0",
        "Microsoft.WindowsAzure.ConfigurationManager":"3.2.1"
      }
    }
   }
}
You should start seeing the logs restoring all missing nuget packages, then compile the code.
- Associate your database connection string to the Function App. To do that, click on the top link “Function app settings” then click the button “Go to App Service Settings”

It will open your Function App settings page, then click on Data Contentions, Add.

Once you successfully added a connection called “SqlConnection“, close the views and navigate back to your function using the breadcrumbs.
- Click on your function named “
HttpTriggerSqlDatabase”, copy the snippet below.
using System.Net;
using Dapper;
using System.Data.SqlClient;
using System.Configuration;
public static async Task<HttpResponseMessage> Run(HttpRequestMessage req, TraceWriter log)
{
log.Info($"C# HTTP trigger function processed a request. RequestUri={req.RequestUri}");
var successful =true;
try
{
var cnnString = ConfigurationManager.ConnectionStrings["SqlConnection"].ConnectionString;
using(var connection = new SqlConnection(cnnString))
{
connection.Open();
var rLog = await req.Content.ReadAsAsync<LogRequest>();
connection.Execute("INSERT INTO [dbo].[LogRequest] ([Log]) VALUES (@Log)", rLog);
log.Info("Log added to database successfully!");
}
}
catch
{
successful=false;
}
return !successful
? req.CreateResponse(HttpStatusCode.BadRequest, "Unable to process your request!")
: req.CreateResponse(HttpStatusCode.OK, "Data saved successfully!");
}
public class LogRequest
{
public int Id{get;set;}
public string Log{get;set;}
}
Now save the code and ensure the logs show the function compiled successfully.
Testing the Function
Scrolling down the page to the Run section, you can invoke your API.

I used LinqPad to retrieve the record from the database to verify that my data was actually saved successfully.

Conclusion
It was relatively easy to have my Azure Function connect to a database and insert a record triggered by a web request.
Using nuget to download packages and reference them in the function is extremely useful, given that most of the .NET framework and 3rd party are available as packages.
This scenario gives us the opportunity to design solutions that store request’s data into a relational database which is a step closer to real business application’s requirement.
In future posts, we will take this a step further and emit events to trigger other Functions to perform other actions meaningful to the data received.

