Areas in ASP.NET MVC allows us to separate a Web Application into smaller modules and organize the code. For example, if you have a blog feature in your application, you can create that as a separate area and that gives flexibility to maintain the blog code separately.
Steps for Creating an Area in ASP.NET MVC Project
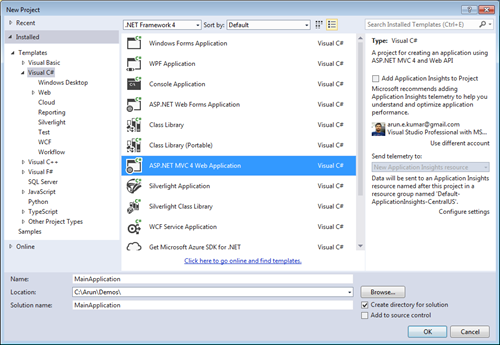
- Create a new ASP.NET MVC Web Application.

- Choose empty template to start with and click on OK.

- Now you should be able to see a solution with ASP.NET MVC web application project.

- Right click on the project, click Add and click on Area.

- Enter the Area name and click Add.

- Area gets created and your solution looks something like below:

- Build your project, right click on Controllers folder of
MainApplication, click on Add and then click on controller.

- Enter the Controller name and click on Add.

- Similarly, add Controller to Areas > Blog > Controllers. Your solution should look like below:

- As you can see, I have two Controllers, one in the Main Application and one in the Area called Blog with the same name
HomeController. This is possible because both the Controllers have different NameSpaces, i.e., MainApplication.Controllers and MainApplication.Areas.Blog.Controllers respectively. - Now that we have Controllers created, right click on Index action and click Add View.

- Similarly Add View, to the Blog areas
HomeController Index action. Your solution should look like below:

- Build your application hitting Ctrl + Shift + B and then hit Ctrl + F5 to run it. When you run it, if you are using the Controller with the same name like I did, i.e.,
HomeController, you should get the below error.
Multiple types were found that match the controller named 'Home'. This can happen if the route that services this request ('{controller}/{action}/{id}') does not specify namespaces to search for a controller that matches the request. If this is the case, register this route by calling an overload of the 'MapRoute' method that takes a 'namespaces' parameter.
- To fix the above, go to RouteConfig.cs in
App_Start and Add the namespace as shown below:
public static void RegisterRoutes(RouteCollection routes)
{
  routes.IgnoreRoute("{resource}.axd/{*pathInfo}");

  routes.MapRoute(
      name: "Default",
      url: "{controller}/{action}/{id}",
      defaults: new { controller = "Home",
      action = "Index", id = UrlParameter.Optional },
      <font style="background-color: #ffff00">namespaces: new string[] { "MainApplication.Controllers" }</font>
  );
}
- Similarly go to BlogAreaRegistration.cs in Areas > Blog and add namespace as shown below:
public override void RegisterArea(AreaRegistrationContext context)
{
  context.MapRoute(
      "Blog_default",
      "Blog/{controller}/{action}/{id}",
      new { action = "Index", id = UrlParameter.Optional },
      <font style="background-color: #ffff00">new string[] { "MainApplication.Areas.Blog.Controllers" }
</font>  );
}
- By adding namespace to both
RouteConfig and BlogAreaRegistration, the error will get fixed, now run the application again and you should see the below output.

- Now try to navigate to Blog Home by typing http://localhost:<port>/blog/home in the address bar of the browser.

- For navigating from Main Application to Blog Home, add the below ActionLink in the Main Application > Views > Home > Index.
@Html.ActionLink("Blog Home", "Index", "Home", new { area = "Blog" }, null)
- The above line should render a hyperlink as shown below, by clicking on it will navigate to Blog/Home.

- Similarly for navigating from Blog Home to Main Application, add the below
ActionLink in the Main Application > Areas > Blog > Views > Home > Index.
@Html.ActionLink("Home", "Index", "Home", new { area = "" }, null)
- The above line should render a hyperlink as shown below, by clicking on it will navigate to Main Application Home.

You can get the source code from https://github.com/arunendapally/BasicMVCArea.
