Introduction and Background
For quite a while by now, I wasn't doing any mobile development and I never considered myself to be a mobile developer either. Until a few days back when I realized that I should look into a few of the familiar and amazing stuff, such as database development, or writing database programs in Android. Working with the stuff on Android, I learnt a few basics about SQLite databases and how they actually work, plus I really enjoyed a huge performance they provide for the applications by providing the data in a very fast manner, yet maintaining resilience. That was not the most important part that I learnt in the previous weeks, the most important part I learnt was the use of Xamarin APIs for SQLite programming in Android. And, just personally saying, Xamarin provided even a better interface at programming the databases as compared to Java APIs for this task.
I don’t want you to have any background knowledge of SQLite, or whether you have previously worked in SQLite or Android database system or management. Because, in this post I will start by the basics and then build on top of them. Secondly. however I do want and expect you to have a basic understanding of Xamarin and C# programming language because we are going to heavily use C# programming for building Xamarin applications. So, I believe we should start by now.
Understanding database systems
In database theories, did you ever hear about words like, “database servers”? I am sure you did… The database servers are assigned a task to manage the data sources on a machine. They provide input/output channels to clients, or other processes to save or read the data from the data sources. It is the responsibility of the database server, or also known as database engine, to take care of the communication, data caching, data storage and data manipulation and it only returns the data as it is required and requested — nothing more, nothing less. But as we know, database engine is just a general terminology here. The actual product, will look something like, “MySQL”, “SQL Server”, “Oracle Database”, “mariaDB”, etc. All of these engines are installed on the machine, and then they allow the developers (or IT experts) to create the database on the machines, and only then can someone access data, or insert the data to the system. There were various reasons to use those engines,
- They provided an abstracted means to manage the data — in other words, data layer was managed by them and the rest of the layers were programmed independent of managing internal and physical layers of storage.
- They provided an easier way to manage the data. You just install the server, and you just execute commands to manipulate the data, or read the data. SQL language was developed for this.
- You can have multiple customer devices, all of them connected to a central server to share and fetch the data.
- Authentication problems were solved. Only one machine, or program needed to know the authentication, or the mechanisms to retrieve the data and how to store the data. Other machines were agnostic as per this information. However, you can always use tokens, or account systems to allow them to perform some administrative tasks.
But as the world progressed, there were changes to the way applications were developed. Software developers wanted to develop application software, that would run on the machines themselves and store the data locally; instead of having to build a large server processing and storing the data. The problem with older database systems was that they were installed at a location and a network connection was required to retrieve or store the data. If we skip out all of the problems of network based data instances, such as, security vulnerabilities etc, even then we are left out with other issues such as, what application will do when the network is down? Or what happens to all customers, if server goes down, or server is upgrading and many other similar issues.
In such cases, it was a good approach to have the server installed with the application. But the size was an issue, servers really contain a lot of services, task managers, data handlers, connection managers, authentication managers and so on and so forth. So in those cases, either the data was stored in the form of files, or structured data. That gave birth to embedded databases. The databases were embedded, in other words, they were just files and a script code to work with them. Every embedded database works in this way, they are just simple files containing the data and then there are APIs or libraries, or simple program scripts that are executed to fetch the data or write the data, and the script updates the data sources. The benefit is, that you can have this script installed with the application with no extra cost or dependency at all.
Thus, SQLite was brought into action
SQLite, as mentioned above, like all other embedded database systems, was written in C language as a script that managed the data sources. There were various benefits of having SQLite service instead of the large database servers on a remote machine.
- It provided similar SQL language syntax for data manipulation and data extraction.
- It can be used with every popular language nowadays. It has the library written in languages such as C++, Java, C#, Python and even Haskell for function programming.
- There is an optional support for Unicode character sets as well. You can turn it off for ASCII coding, or map your own data.
- It is a relational database model. Everything gets stored in a table.
- There is support for triggers as well.
- It is dynamically typed column typing system. Which means, it can be easily programmed with any data type you have, it will internally map the types to the ones you want and the ones that column is expecting; such as, converting the string data to integer when you pass “5”.
- You can find it in most widely used operating systems too:
- On mobile environments, Android is on the top.
- On desktop: Windows 10 provided a built in support for this.
- Since this is an embedded server, you can have it on anywhere.
So with these things and benefits in mind, Android also focused on providing the SQLite databases as their primary databases for applications. So in this article, we will look forward to understanding and then using the databases for our own benefit; storing the data and retrieving the user data when they need it in the application. Almost every application in Android uses this database provider, for its speed, and more-than-enough benefits.
Understanding SQLite system in Android
SQLite systems play an integral role in Android APIs for app development. The reason behind this is that SQLite were added to Android system ever since API 1.

FIgure 1: Android API and SQLite API level.
This is the default database provided and supported natively in the API, and with every update in the Android API, an update for SQLite version is also provided, so that latest bug fixes and performance issues can be easily addressed with every updated.

Figure 2: Android and SQLite logo.
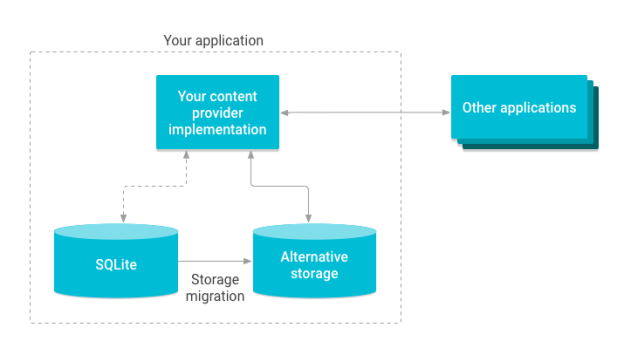
And even if you are building an application that provides data for other applications installed, either for your own organization, or for other vendors, you can use SQLite as the backend of your data layers.

Figure 3: Content providers structure as captured from Content Providers documentation on Android Developer website.
In Android, it is just a matter of objects and their function that you can write to implement full feature data storage API and the models in your data. There might be support for some object-relational mappers out there, but I want to talk about the native libraries out there.
In Android API sets, the providers for SQLite library are available under, “android.database.sqlite” package. The most prominent types in the package are,
SQLiteOpenHelper: This is the main class that you need to inherit your classes from, in order to handle the database creation, opening or closing events. Even the events such as create new tables, or deleting the old tables and upgrading your databases to a latest version (such as upgrading the schema), are all handled here in this class-derived classes of yours.SQLiteDatabase: This is the object that you get and use to either push the data to the database, or to read the data from the database.SQLiteCursor: This is the cursor implementation for working with the data records that are returned after “Query” commands.
Their connection is very much simple, one depends on the other object and they all communicate in a stream to provide us with the services that we require of them.

Figure 4: Structure of the system communication with SQLite database.
I hope the purpose of these is a bit clear as of now. The way they all communicate is that, your main class for the data manipulation first of all inherits from SQLiteOpenHelper to get the functions to handle, then later has a field of type SQLiteDatabase in it to execute the functions for writing or reading the data. The final object (SQLiteCursor) is only used when you are reading the data, in the cases of writing the data, or updating the data, that is not required. But in the cases where you need to fetch the data, this acts as a pivot point to read the data from the data sources. As we progress to program the APIs, you will understand how these work.
Wrapping up the basics
This wraps us the basics of SQLite with Android and now we can move onwards to actually write an application that lets us create a database, create tables for the data that we are going to write down to it, and then write the objects and their functions that we will use to actually store data in the tables — CRUD functions.
Writing the Xamarin application
Unlike my other posts, I do expect you to create the application because this is one simple task that, every post about Xamarin or any other Visual Studio based Android project will have in common so I will not waste any of my time on this. For a good overview and how-to, please go through this basic “Create an Android Project” post on Xamarin documentation website itself. It gives you a good overview and step-by-step introduction to creating a new project in either Visual Studio or Xamarin Studio, anyone that you are using as per your choice or need.
Background of our models and data storage
So, like every data layer developer we would first define our structure for the data to be saved in the databases. These are just simple classes, with the columns presented as a property of the object, and a type associated with it that makes sense. So we will first of all define that, and then we will move onward. The purpose is to make sure that we are both on the same track and level of understanding how our application should work and process the data.
In the form of class, our data structure would look like the following,
public class Person {
    public int Id { get; set; }
    public string Name { get; set; }
    public DateTime Dob { get; set; }
}
Rest of the stuff is not important, and just to keep things a lot simple, I just added 3 columns — properties of the object. We will simply get these values and then show them to the users in a Toast message in the same activity, just to keep things a bit simple as of now. So now we need to create the database, tables and the columns inside the tables to represent our objects.
For that, it is my general approach to write the code in a different folder and name it generally; such as a “DataStore” file inside the “Services” folder, or “DbHelper” file inside the “Model” folder etc. These are a few good approaches that help you to write good codes in the applications. You are allowed to use any of these approached, I used the first one. The basic structure for the class is,
public class DataStore : SQLiteOpenHelper {
private string _DatabaseName = "mydatabase.db";
public DataStore (Context context) : base (context, _DatabaseName, null, 1) {
}
public override void OnCreate(SQLiteDatabase db)
{
db.ExecSQL(PersonHelper.CreateQuery);
}
public override void OnUpgrade(SQLiteDatabase db, int oldVersion, int newVersion)
{
db.ExecSQL(PersonHelper.DeleteQuery);
OnCreate(db);
}
}
This is the default syntax for your basic database handler, that handles everything about the database creation and deletion. One thing you might have noticed, I did not include “PersonHelper” object here. There are a few things I want to talk about this object, before sharing the code.
- This is not the model itself. It is merely the helper we will use.
- This class is the class-base representation of the table in our database. This class contains the query that will be executed to create the table, including any constraints to be set such as PRIMARY KEY etc.
- It will help us to store the “Person” objects, retrieve the “List of Person” objects. Even update or delete them as well.
Let us have a look at the class itself,
public class PersonHelper
{
    private const string TableName = "persontable";
    private const string ColumnID = "id";
    private const string ColumnName = "name";
    private const string ColumnDob = "dob";

    public const string CreateQuery = "CREATE TABLE " + TableName + " ( "
        + ColumnID + " INTEGER PRIMARY KEY,"
        + ColumnName + " TEXT,"
        + ColumnDob + " TEXT)";


    public const string DeleteQuery = "DROP TABLE IF EXISTS " + TableName;

    public PersonHelper()
    {
    }

    public static void InsertPerson(Context context, Person person)
    {
        SQLiteDatabase db = new DataStore(context).WritableDatabase;
        ContentValues contentValues = new ContentValues();
        contentValues.Put(ColumnName, person.Name);
        contentValues.Put(ColumnDob, person.Dob.ToString());

        db.Insert(TableName, null, contentValues);
        db.Close();
    }

    public static List<Person> GetPeople(Context context)
    {
        List<Person> people = new List<Person>();
        SQLiteDatabase db = new DataStore(context).ReadableDatabase;
        string[] columns = new string[] { ColumnID, ColumnName, ColumnDob };

        using (ICursor cursor = db.Query(TableName, columns, null, null, null, null, null))
        {
            while (cursor.MoveToNext())
            {
                people.Add(new Person
                {
                    Id = cursor.GetInt(cursor.GetColumnIndexOrThrow(ColumnID)),
                    Name = cursor.GetString(cursor.GetColumnIndexOrThrow(ColumnName)),
                    Dob = DateTime.Parse(cursor.GetString(cursor.GetColumnIndexOrThrow(ColumnDob)))
                });
            }
        }
        db.Close();
        return people;
    }

    public static void UpdatePerson(Context context, Person person)
    {
        SQLiteDatabase db = new DataStore(context).WritableDatabase;
        ContentValues contentValues = new ContentValues();
        contentValues.Put(ColumnName, person.Name);
        contentValues.Put(ColumnDob, person.Dob.ToString());

        db.Update(TableName, contentValues, ColumnID + "=?", new string[] { person.Id.ToString() });
        db.Close();
    }

    public static void DeletePerson(Context context, int id)
    {
        SQLiteDatabase db = new DataStore(context).WritableDatabase;
        db.Delete(TableName, ColumnID + "=?", new string[] { id.ToString() });
        db.Close();
    }
}
This is a simple, yet very simple, CRUD-based-table-structure-class for our application.  We will be using this class for any of our internal purposes, of mapping the objects from the database to the code itself. The code itself is pretty much simple, the most important objects used in the code above are,
SQLiteDatabase
This is the database file, that we get from the helper object (our own DataStore object), one different primarily in Java and C# code is that C# code looks shorter — (yes, a personal line). For example, have a look below,
SQLiteDatabase db = new DataStore(context).WritableDatabase;
SQLiteDatabase db = new DataStore(context).getWritableDatabase();
To understand the difference, you should understand the encapsulation in Object-oriented programming languages and properties in C#. To an extent that does not make any difference, but if you come from Java background and start programming Xamarin, you will require to understand the best of both worlds and then implement them in your own areas.
Heads up: Entity Framework Core can be used as well in Xamarin applications. Thanks to .NET Standard.
ContentValues
In Android APIs, this was the wrapper used to wrap the column values for each of the insert, or update for the records. The same object is provided here and you can add the values here, that SQLite engine would use and push the values to the database.
ICursor
The basic cursor object, used to iterate over the collection. In Android API using Java, you can get the following code,
Cursor cursor = db.query(...);
And in the C# code, you get a bit different version, but that does not matter at all as you can always implement the ICursor object and create your own handlers for the data. That helps in many ways,
- You get the validate the data before generating the list itself.
- You can build your own data structures and load them in one go.
- You can use and implement other services as well and then consume them as well in the same cursor object — but in many cases, this is not required at all.
Create and Delete queries
If you pay attention to the initials of the helper class, you will find that there are constant string values. Those are used to create and delete the tables. For their usage, please see the OnCreate and OnUpdate functions in the DataStore class above.
One more thing, in SQLite when you create a record that is assigned, “INTEGER PRIMARY KEY“, that column automatically starts to point at the ROWID, that is the similar to AUTO INCREMENT in most database systems. That is why, we don’t need to manage anything else and SQLite itself will make sure that our records are all unique by incrementing the row id. Of course there are a few problems with this as well, because the value doesn’t guarantee to always “increment“, but it guarantees to “be unique“.
Building the UI
On final step in this application would be actually create the UI of the application’s main activity. What I came up with, for this simple application was the following interface. I hope no one is offended. 

Figure 5: Interface Design in Xamarin, in Visual Studio 2015.
A few configuration on the top left corner may also help you to understand and build the similar interface if you want to have the similar interface in your own application as well.
="1.0"="utf-8"
<LinearLayout xmlns:android="http://schemas.android.com/apk/res/android"
android:orientation="vertical"
android:layout_width="match_parent"
android:layout_height="match_parent">
<TextView
android:text="Enter the details of a person."
android:textAppearance="?android:attr/textAppearanceMedium"
android:layout_width="match_parent"
android:layout_height="wrap_content"
android:id="@+id/textView1"
android:layout_marginTop="10dp" />
<EditText
android:layout_width="match_parent"
android:layout_height="wrap_content"
android:id="@+id/name"
android:hint="Enter the name"
android:layout_marginTop="25dp" />
<DatePicker
android:layout_width="match_parent"
android:layout_height="wrap_content"
android:id="@+id/datePicker1"
android:layout_marginBottom="0.0dp" />
<Button
android:text="Save"
android:layout_width="match_parent"
android:layout_height="wrap_content"
android:id="@+id/button1" />
</LinearLayout>
So, now we are ready to run and test our application in the emulator.
Running the Application in Emulator
At this point, we may walk away on our own paths because I personally like to use the native Android SDK emulators, instead of the Xamarin’s Android emulator or Visual Studio’s Emulator for Android. There are many reasons for this choice of mine, and I will share that in a later post sometime.
But for now, you can run the application in any of your own favorite emulator, even on your own mobile device.

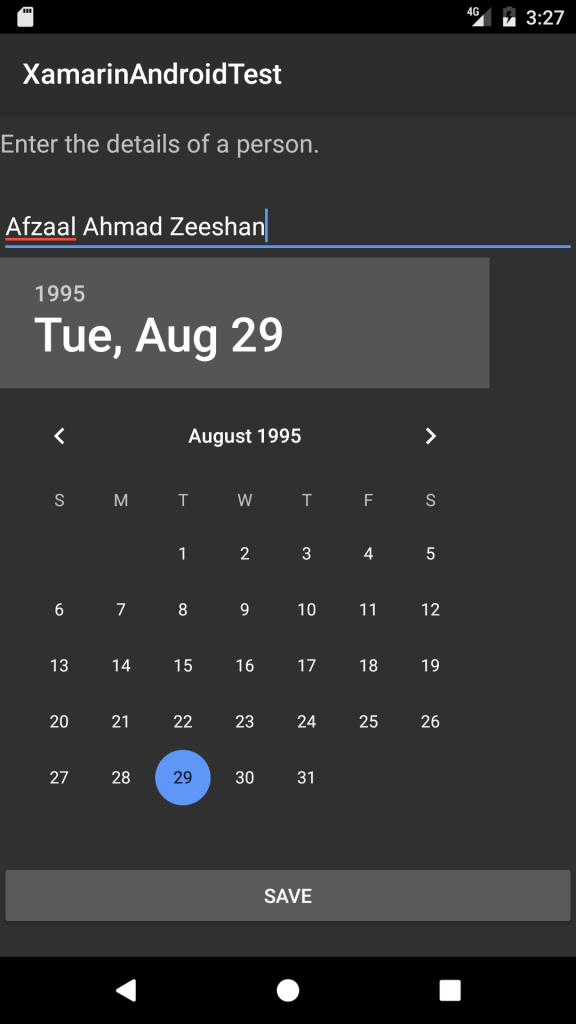
Figure 6: Application running in emulator.
I have already filled the UI with the required information, and now I will be writing the backend code — because I am that awesome.
protected override void OnCreate(Bundle bundle)
{
base.OnCreate(bundle);
SetContentView(Resource.Layout.Main);
Button button = FindViewById<Button>(Resource.Id.button1);
button.Click += Button_Click;
}
private void Button_Click(object sender, EventArgs e)
{
EditText nameField = FindViewById<EditText>(Resource.Id.name);
DatePicker picker = (DatePicker)FindViewById(Resource.Id.datePicker1);
string nameStr = nameField.Text;
DateTime dob = picker.DateTime;
if (string.IsNullOrEmpty(nameStr))
{
Toast.MakeText(this, "Name should not be empty.", ToastLength.Short).Show();
return;
}
Person person = new Person
{
Name = nameStr,
Dob = dob
};
DataStore.PersonHelper.InsertPerson(this, person);
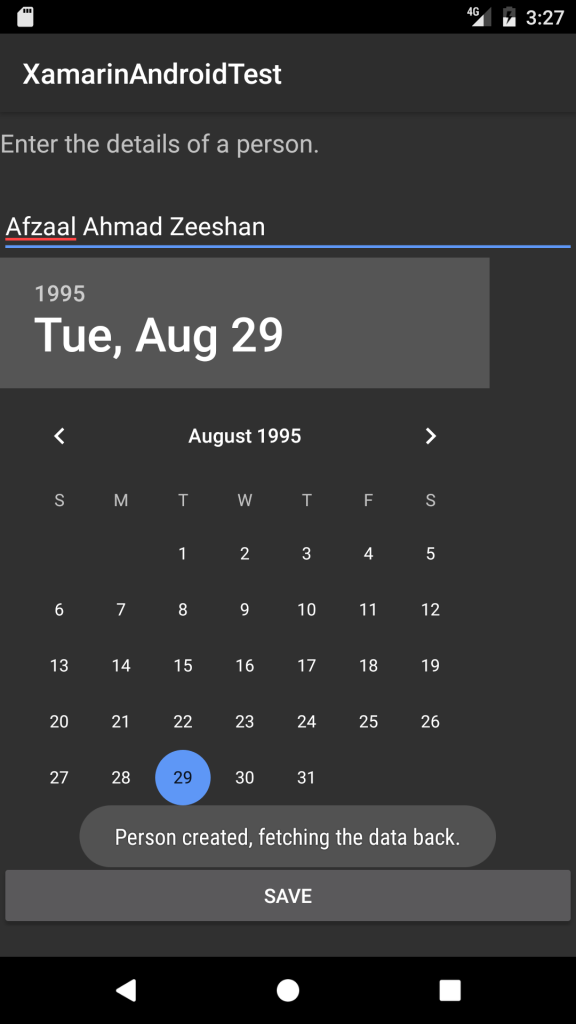
Toast.MakeText(this, "Person created, fetching the data back.", ToastLength.Short).Show();
var people = DataStore.PersonHelper.GetPeople(this);
person = people[people.Count - 1];
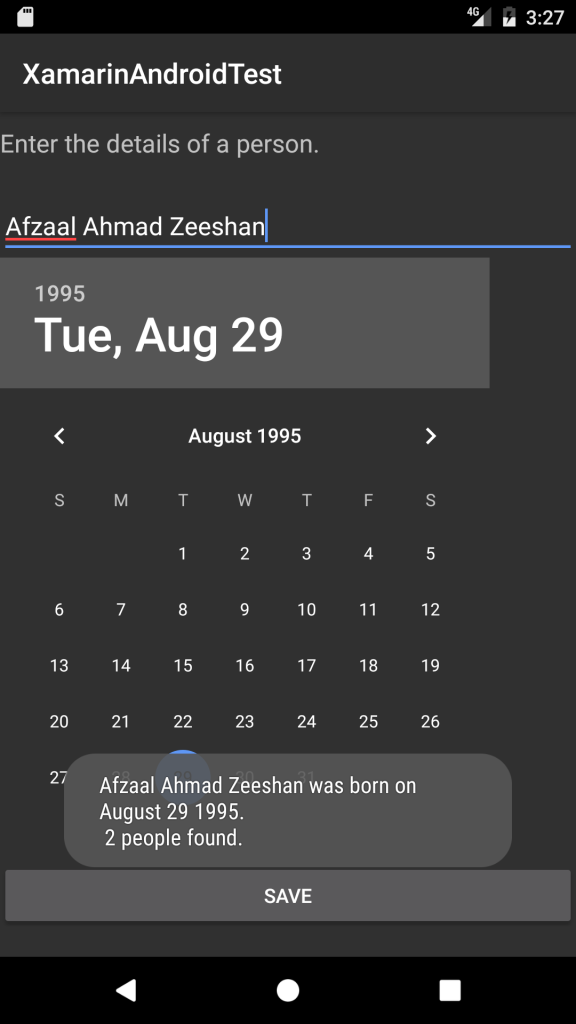
Toast.MakeText(this, $"{person.Name} was born on {person.Dob.ToString("MMMM dd yyyy")}. \n {people.Count} people found.", ToastLength.Short).Show();
}
The outputs, after having this code applied to the UI was the following,

Figure 7: Person created toast message.Â

Figure 8: Person details shown on the screen using Toast.
And, it works perfectly just the way we expect it to. You may have noticed that we convert the Date object to the standard string object, and then we parse that same string back to the Date object. Then using SImpleDateFormat we format the data properly.
Final words
Finally, in this post we tackled the problem of SQLite databases in Android using Xamarin APIs. The process itself is pretty much simple and straight-forward, and you don’t need to go through a lot of pain. Just remember these three steps:
- Inherit your main data layer class from
SQLiteOpenHelper. - Handle the OnCreate and OnUpgrade (and other) functions to create the tables.
- Write the CRUDs and you are done.
Also, remember that you should execute the Delete function on the database object, because writing a native SQL query will have a few problems.
DELETE query does not release the underlying storage space — nor does Delete function.- Your new items would anyways come up in the free space, but that free space will not be released to operating system for other data and stuff.
- To release the space, you will need to execute
VACUUM command. It repackages the database file, with taking only the space it needs. - However, Delete function will help you to overcome SQL Injection problems by passing the parameterized queries. Food for thought: Can you figure out the parameter in the queries above?
So, that will be it for this post. 
