You've got a React app, and an API server written in Express or something else. Now how do you deploy them both to production?
There are a few ways to do this:
- Keep them together - Express and React files sit on the same machine, and Express does double duty: it serves the React files, and it also serves API requests.
- e.g., a DigitalOcean VPS running Express on port 80
- Split them apart - Host the Express API on one machine, and the React app on another.
- e.g., React app served by Amazon S3, API server running on a DigitalOcean VPS
- Put the API behind a proxy - Express and React app files sit on the same machine, but are served by different servers
- e.g., NGINX webserver proxies API requests to the API server, and
also serves React static files
This article will cover how to keep them together. Well, build the Express server to serve Reacts static files in addition to providing an API, and then deploy it to Heroku. Heroku is easy to deploy to and free to get started with.
Make a Heroku Account
If you don't have one already, go here and sign up. It's free.
Heroku comes with a commandline command they call a toolbelt. Follow the instructions here to install it. (On a Mac with Homebrew, just brew install heroku).
The App
We'll build a password generator. Every time you load the app or click Get More, you'll get 5 random paswords.
Create the Express App
Make a parent directory to contain everything. Call it rando or whatever you want.
$ mkdir rando; cd rando
Initialize the project with Yarn or NPM:
$ yarn init -y
  # or npm init -y
We need 2 packages: Express itself, and a password generator. Install those now:
$ yarn add express password-generator
Create a file called index.js, which will be the Express app, and type this in:
const express = require('express');
const path = require('path');
const generatePassword = require('password-generator');
const app = express();
app.use(express.static(path.join(__dirname, 'client/build')));
app.get('/api/passwords', (req, res) => {
const count = 5;
const passwords = Array.from(Array(count).keys()).map(i =>
generatePassword(12, false)
)
res.json(passwords);
console.log(`Sent ${count} passwords`);
});
app.get('*', (req, res) => {
res.sendFile(path.join(__dirname+'/client/build/index.html'));
});
const port = process.env.PORT || 5000;
app.listen(port);
console.log(`Password generator listening on ${port}`);
Were also going to need a start script in package.json, so that Heroku knows how to start the app. Open package.json and add a scripts section at the bottom. The full file should look something like this:
{
  "name": "rando",
  "version": "1.0.0",
  "main": "index.js",
  "license": "MIT",
  "dependencies": {
    "express": "^4.15.3",
    "password-generator": "^2.1.0"
  },
  "scripts": {
    "start": "node index.js"
  }
}
Test It
It's always good to make sure things are working as you go along. Much better than getting to the end and realizing nothing works. So, let's try it out.
Start up the Express app by running:
$ yarn start
Open up your browser and go to http://localhost:5000/api/passwords. You should see something like this:

Set Up Heroku
Now well deploy the app to Heroku, make sure it works, and then well add React to the mix.
Git Init
Heroku needs your project to have a Git repository, so well create one along with a .gitignore file to ignore node_modules, and then commit the code:
$ git init
$ echo node_modules > .gitignore
$ git add .
$ git commit -m "Initial commit"
Now we're ready for Heroku. Run its ˜create command:
$ heroku create
And you'll see something like this:
To make it work, we just need to push up our code by running:
$ git push heroku master
It will print out a bunch of stuff, and then the app will be live. One of the last lines will tell you the URL of the app:
Now you can go to <your url>/api/passwords and make sure it works.
Woohoo! You've got an app live on the real internet! Except it's not very nice to use, yet. Let's add a React frontend now.
Create the React App
Were going to use Create React App to generate a project. Remember that we decided the React app would live in the client folder? (we did, back when we set up Express to point to client/build for static assets).
If you don't have Create React App installed yet, do that first:
$ yarn global add create-react-app
# or npm install -g create-react-app
Generate the React app inside the Express app directory:
$ create-react-app client
Create React App will proxy API requests from the React app to the Express app if we add a proxy key in package.json like this:
"proxy": "http://localhost:5000"
This goes in client/package.json, not in the Express apps package.json, and it will be ignored by Heroku after deploying.
Open up src/App.js and replace it with this:
<code class="language-jsx">import React, { Component } from 'react';
import './App.css';
class App extends Component {
state = { passwords: [] }
componentDidMount() {
this.getPasswords();
}
getPasswords = () => {
fetch('/api/passwords')
.then(res => res.json())
.then(passwords => this.setState({ passwords }));
}
render() {
const { passwords } = this.state;
return (
<div className="App">
{}
{passwords.length ? (
<div>
<h1>5 Passwords.</h1>
<ul className="passwords">
{}
{passwords.map((password, index) =>
<li key={index}>
{password}
</li>
)}
</ul>
<button
className="more"
onClick={this.getPasswords}>
Get More
</button>
</div>
) : (
<div>
<h1>No passwords :(</h1>
<button
className="more"
onClick={this.getPasswords}>
Try Again?
</button>
</div>
)}
</div>
);
}
}
export default App;
You can update the CSS too, if you like (in src/App.css):
<code class="language-css">.App {
  text-align: center;
  font-family: "Courier New", monospace;
  width: 100%;
}

h1 {
  font-weight: normal;
  font-size: 42px;
}

.passwords {
  list-style: none;
  padding: 0;
  font-size: 32px;
  margin-bottom: 2em;
}

.more {
  font-size: 32px;
  font-family: "Courier New", monospace;
  border: 2px solid #000;
  background-color: #fff;
  padding: 10px 25px;
}
.more:hover {
  background-color: #FDD836;
}
.more:active {
  background-color: #FFEFA9;
}
Now start up the React app by running yarn start inside the client folder.
Make sure the Express app is running too: run yarn start from its folder as well.
Go to http://localhost:3000 and the app should be working! Now we can deploy the whole thing to Heroku.
Deploying to Heroku
When you deploy the app with the git push heroku master command, git copies all the checked-in files up to Heroku. There are two complications now:
- We need to check in the new
client code - Express depends on the built client code in client/build, which we don't have yet, and which we'd rather not check in to git.
What we'll do is tell Heroku to build the React app after we push up the code, and we can do that by adding a heroku-postbuild script in the top-level (Express apps) package.json:
"scripts": {
  "start": "node index.js",
  "heroku-postbuild": "cd client && yarn --production=false && yarn run build"
}
This tells Heroku hey, after you're done doing what you do, go into the client folder and build my React app. The yarn run build script will kick off Create React Apps production build, which will put its output files in the client/build folder so Express can find them.
The --production=false flag might look odd. It's there because by default, yarn will not install devDependencies in production, and we need those (react-scripts in particular) to build the React app.
Once you make that change, add everything to git (run this from the top-level rando directory, not inside client):
$ git add .
$ git commit -m "Ready for awesome"
And deploy it:
$ git push heroku master
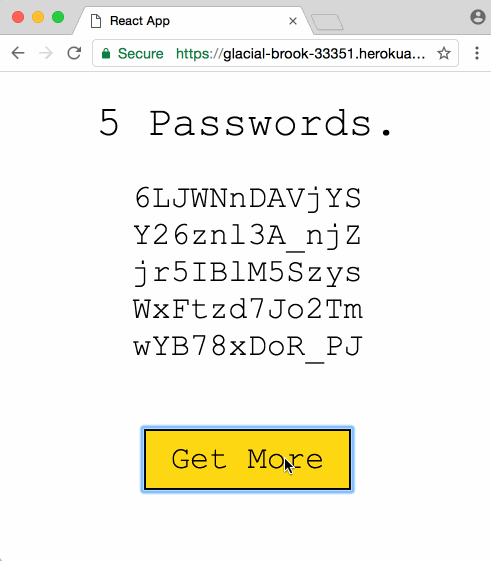
It again prints out your apps hostname. Mine is https://glacial-brook-33351.herokuapp.com/. Go there and try it out!
Congratulations, you've got a React + Express app in production. ;)
Create React App with Express in Production was originally published by Dave Ceddia at Dave Ceddia on June 07, 2017.

