In this series, I want to show you how to set up and deploy web applications using Flask and Redis on the Backend, and ReactJS on the Frontend. Using Docker Compose, it will be very easy to start, debug and deploy this application. My goal here is not to create a very sophisticated application, but rather to show you how we can use Docker to simplify development and deployment. Therefore, our Flask API will contain only a single controller (to show, add and remove items from a todo-list) that will be used by a ReactJS client.
In this part, we will set up a simple Web API, using Flask as a REST Framework and Redis as a data store.
Software
Additionally, you should install the following packages using pip:
pip install Flask flask_restful flask-cors redisworks
Project Structure
Our project will consist of three parts: One client and one server directory, as well as a docker-compose.yml file to tie them together. So, the overall project structure should look like this:

Configuring Redis
We will start by configuring redis (see my previous post for more details).
First, we have to setup a custom config file, so add the default redis.conf from http://download.redis.io/redis-stable/redis.conf to the root directory of the project.
To easily connect to a local Redis instance from Python, comment out the following line in the config...
bind 127.0.0.1
...by adding a # in front of it.
Note that you should only use this configuration for development, for deployment, please consider the documentation to set up a secure and persistent instance of Redis.
Setting Up Redis
At the core of our application, redis will be the first service we add to our docker-compose.yml file:
version: '2'
services:
  redis:
    image: redis
    command: redis-server /usr/local/etc/redis/redis.conf
    volumes:
      - /redis.conf:/usr/local/etc/redis/redis.conf
    ports:
      - "6379:6379"
Save your progress, open a terminal in the root directory and type:
docker-compose up
After the image is downloaded and started, we should have a redis-instance ready to accept connections.
Setting Up Flask
Now it’s time to set up the Flask API for our project. In the server directory, we will first add a requirements.txt file containing all the dependencies of the project:
Flask
flask_restful
flask-cors
redisworks
With that, creating our API is a simple as adding an app.py file to the server directory and initializing Flask inside it:
from flask import Flask
from flask_cors import CORS
app = Flask(__name__)
CORS(app)
if __name__ == '__main__':
app.run(debug=True, host='0.0.0.0')
I added the default CORS headers to make sure we can access the API easily from our React app later. Again, you should use a more secure configuration for production deployment!
Adding a todo-list Controller
Now we are ready to add the first controller to our app, inside the server directory, add the following todo.py file:
from flask import Blueprint, request, jsonify
from redisworks import Root


root = Root
root.todo_list = {"item1": "This is a nice day", "item2": "Python is awesome"}
todo_api = Blueprint('todo', 'todo', url_prefix='/todos')


@todo_api.route('/', methods=['GET'])
def api_list():
    items = root.todo_list
    return jsonify(items)


@todo_api.route('/<item_id>', methods=['GET', 'DELETE', 'PUT'])
def api_item(item_id):
    if request.method == 'GET':
        return get_item(item_id)
    elif request.method == 'PUT':
        return put_item(item_id)
    else:
        delete_item(item_id)


def get_item(item_id):
    return root.todo_list[item_id]


def put_item(item_id):
    item = request.data
    root.todo_list[item_id] = item.decode('utf-8')
    return item, 201


def delete_item(item_id):
    root.todo_list.__delitem__(item_id)
In the first three lines after the import statements, we set up a redis-client using redisworks and initialize a small todo-list in it. I also added a blueprint for our the todo-API which will simplify accessing and configuring it later. The next lines contain the methods that will be called when we send requests to our API. I added a api_list method to return the entire list as a simple json document as well as methods to get/add/change/delete a single item.
Again, this is not a very sophisticated example, but it will do fine for our needs.
Making the todo-API Accessible
Since we used the Blueprint class to configure our todo-API, configuring Flask to use it is very easy. Simply import the todo_api defined above in the app.py file and register it:
from flask import Flask
from todo import todo_api
from flask_cors import CORS
app = Flask(__name__)
app.register_blueprint(todo_api)
CORS(app)
if __name__ == '__main__':
app.run(debug=True, host='0.0.0.0')
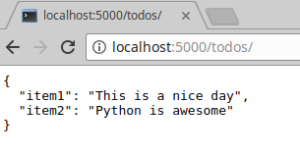
That’s it! With Docker Compose running our redis instance, you should now be able to run and debug the API and send requests to it. Go to http://localhost:5000/todos/ and you should see the two todo-items we initialized our todo-list with:

Dockerizing Our todo-API
To run this API from Docker, we must first add a Dockerfile to the server directory. I used the basic Python+Flask container from http://containertutorials.com/docker-compose/flask-simple-app.html. It will install Python and all dependencies from the requirements.txt file and run our app.py file to start the API.
To start this Docker-image with Docker Compose, simply add the following service to the docker-compose.yml file:
web:
  build: ./server
  working_dir: /var/www/app
  ports:
   - "5000:5000"
  volumes:
   - ./server:/var/www/app:rw
  depends_on:
   - redis
By pointing build to the server directory, Docker Compose will detect and run the Dockerfile we just created. I added a dependency on the redis-service to make sure our API doesn’t receive requests before Redis is started.
Conclusion
That’s it for part 1, in the next part, we will create a simple ReactJS app to use the API we just created and connect it with our docker-compose.yml file.
If you have any questions, problems or feedback, please let me know.
