Introduction
This is a note on building Java applications by Gradle. It will give an example to build a multi-project application.
Background
In my earlier note, I talked about how to build a single-project application by Gradle. I strongly recommend you to take a look at my earlier note, so you have the answers to the following questions.
- How to use Buildship in Eclipse;
- What is a Gradle wrapper and how to use the wrapper to issue Gradle commands;
- What are the "settings.gradle" and "build.gradle" files and How to build a single-project Java application by Gradle.
In this note, I will give an example to build a multi-project application.

The application is converted from a Maven application that I built earlier. It implements exactly the same functionality as the example in my earlier note.
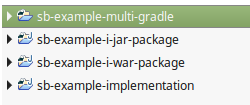
- The "sb-example-multi-gradle" project is the parent project. It specifies the common build options to all the child projects and group them for a multi-project build by Gradle;
- The "sb-example-implementation" project provides all the implementations for a Spring Boot application;
- The "sb-example-i-jar-package" project packages the implementation into an executable JAR file that we can run from the command line;
- The "sb-example-i-war-package" project packages the implementation into a WAR file that we can deploy to a servlet container such as Tomcat.
If you have BuildShip installed to your Eclipse, you can click on "File" -> "Import..." -> "Gradle" -> "Existing Gradle Project" and select the parent project to import all the projects into Eclipse. The idea of this example is to have a single implementation but two packages by Gradle's multi-project capability. Since this note is about Gradle, I will not spend time on Spring Boot. You can take a look at my Maven implementation for more details on the projects.
The Parent Project

The "sb-example-multi-gradle" is the parent project. Besides the Gradle wrapper files, it also specifies how the projects should be built.
include 'sb-example-implementation'
include 'sb-example-i-jar-package'
include 'sb-example-i-war-package'
The "settings.gradle" tells Gradle to build all the child projects. The "build.gradle" file specifies the common build options for all the projects.
allprojects {
group = 'com.song.example'
version = '1.0'
repositories { jcenter() }
buildscript { repositories { jcenter() } }
}
subprojects {
apply plugin: 'java'
apply plugin: 'maven'
apply plugin: 'project-report'
sourceCompatibility = 1.8
targetCompatibility = 1.8
}
- For all the projects, we want to get the Gradle plug-ins and Java dependencies from the "jcenter";
- For the child projects, we want to build the Java code for version "1.8" and apply the "java" and "maven" plug-ins to them.
Because the "sb-example-multi-gradle" project is a parent project, it does not have the standard "src" folder. The only purpose is to group all the child projects and provide the common configurations to them.
The "sb-example-implementation" project

The "sb-example-implementation" project provides all the implementations. Because this note is about Gradle but not Spring Boot, I will not spend much time on the implementations. You can take a look at my earlier note for the details. The "build.gradle" tells Gradle how we want to build this project.
dependencies {
    compile('org.springframework.boot:spring-boot-starter-web:1.5.9.RELEASE')
}
Because we have put majority of the specifications in the "build.gradle" in the parent project, the only thing needed here is to tell Gradle that the project needs the "spring-boot-starter-web" to compile.
The "sb-example-i-jar-package" Project

The "sb-example-i-jar-package" project packages the "sb-example-implementation" into an executable JAR file.
buildscript {
    dependencies {
        classpath 'org.springframework.boot:spring-boot-gradle-plugin:1.5.9.RELEASE'
    }
}

apply plugin: 'org.springframework.boot'

dependencies {
    compile project(':sb-example-implementation')
}

bootRepackage {
    mainClass = 'com.song.web.boot.ApplicationStart'
}
The "build.gradle" file specifies how the executable JAR file should be built.
- The project is dependent on the "sb-example-implementation" and it is the content to be packaged;
- The "org.springframework.boot" plug-in should be used to package the JAR file;
- The "ApplicationStart" class is the Spring Boot JAR's entry point. This class is implemented in the "sb-example-implementation" project.
The "sb-example-i-war-package" Project

The "sb-example-i-war-package" project packages the "sb-example-implementation" into an executable WAR file.
apply plugin: 'war'

dependencies {
    providedRuntime('org.springframework.boot:spring-boot-starter-tomcat:1.5.9.RELEASE')
    compile project(':sb-example-implementation')
}

war { archiveName = 'sb-example.war' }
The "build.gradle" file specifies how the WAR file should be built.
- The project is dependent on the "sb-example-implementation" and it is the content to be packaged;
- The WAR file will be deployed to Tomcat, so the "spring-boot-starter-tomcat" dependency is not needed in the WAR package;
- The name of the WAR file is "sb-example.war".
Build and Run the Example
You can build the multi-project application by the following command on the parent project.
gradlew clean build install
When the build succeeds, all the projects should be built successfully. You can find the JAR and WAR files in the "build/libs" directory in the corresponding projects. To debug the application in Eclipse, you can right click the "sb-example-implementation" project -> "Debug As" -> "Java Application" and choose the "ApplicationStart" class to start the Spring Boot application.

You can issue the following command to run the executable JAR file.
java -jar build/libs/sb-example-i-jar-package-1.0.jar
You can also deploy the generated WAR file to a Tomcat server. Regardless how you start the application, if it is started successfully, you can test it through a browser.

If you deploy the WAR to a Tomcat, the port number to the web application is no longer "8090". It will be the port number that your Tomcat instance to serve the HTTP requests.
Points of Interest
- This is a note on building Java applications by Gradle. It gave an example to build a multi-project application;
- I hope you like my postings and I hope this note can help you one way or the other.
History
First Revision - 2/5/2018
