Introduction
To refresh myself on Angular, and get some experience with the latest (version 6 already!), I went straightawy to the Angular CLI package installer, having learned from previous experiences with version 1.3 and 4 that you need the command line interface (CLI).
Since I have learned not to expect as much polish in the FOSS world as you get with customer-funded software, I was not totally surprised to discover that the Angular CLI is missing a useful piece or two. Some might claim that a large part of the joy of using open source tools is that some assembly is required. While the need for assembly means that you can customize the tool to the nth degree, sometimes, you just want to get started on the work for which you acquired it.
Background
Even when you create a global installation of the Angular CLI, when you open a terminal (console) window, the NG command does nothing, since ng.cmd isn't in a directory that is on your system path. One simple solution that avoids further polluting your path list, potentially retarding access to other programs, is to create a special purpose command prompt.
Since much of my work involves the Microsoft technology stack, I am accustomed to its plethora of custom command prompts. Although I had a good idea of how they were implemted, I had never before created one, so I headed over to Developer Command Prompt for Visual Studio, where I found complete instructions that allowed me to quickly construct a custom command prompt for use with the Angular CLI.
To create your own shortcut, do the following.
- Right click the File Explorer window whee you want th create the shortcut, or choose Shortcut from the New Item list box in the default File Explorer ribbon.
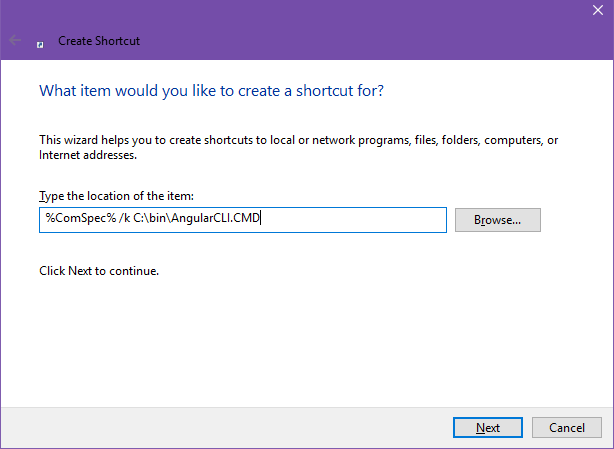
- Enter text substantially as shown in Figure 1. The first part,
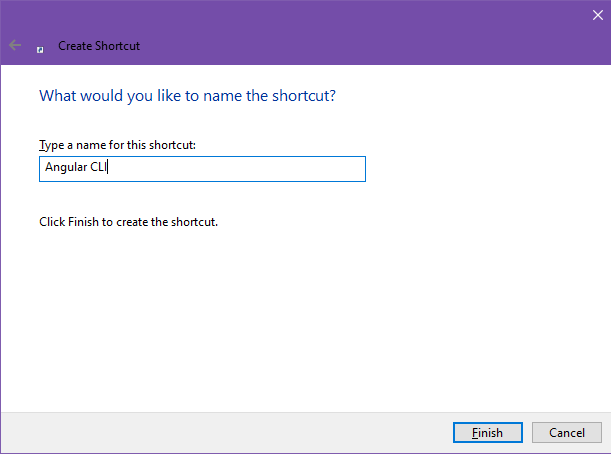
%ComSpec% /k, must appear exactly as written. Substitute the absolute (fully qualified) name of the directory where you copied the files from the download for C:\bin\, and keep AngularCLI.CMD as written. - Figure 2 shows the next panel, where you give your shortcut a name. Though I called mine "Angular CLI," there is nothing magical about that name.
- Before you use the shortcut, you may wish to change the startup directory to reference the directory in which your Angular projects live. For example, the sample shortcut included in the download package sets the startup directory to
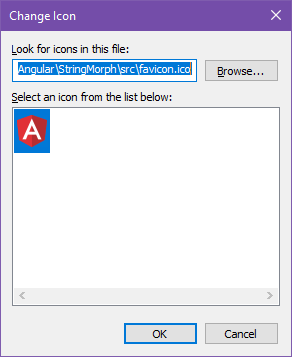
F:\Source_Code\Angular\StringMorph. To do so, you must view and edit the shortcut properties. - Figure 3 shows the optional step of assigning an icon to the shortcut. The shortcut creation wizard has no provisions for editing this property; you must display the property sheet of the completed shortcut. To associate it with the Angular tool chain with which the shortcut is used, I copied
favicon.ico from an existing project into the directory where I created AngularCLI.CMD, renaming it AngularCLI.ico to match.
Alternatively, you can edit the included shortcut, Angular CLI.lnk; the panels look about the same as those shown in figures 1 and 3, and are left as an exercise.
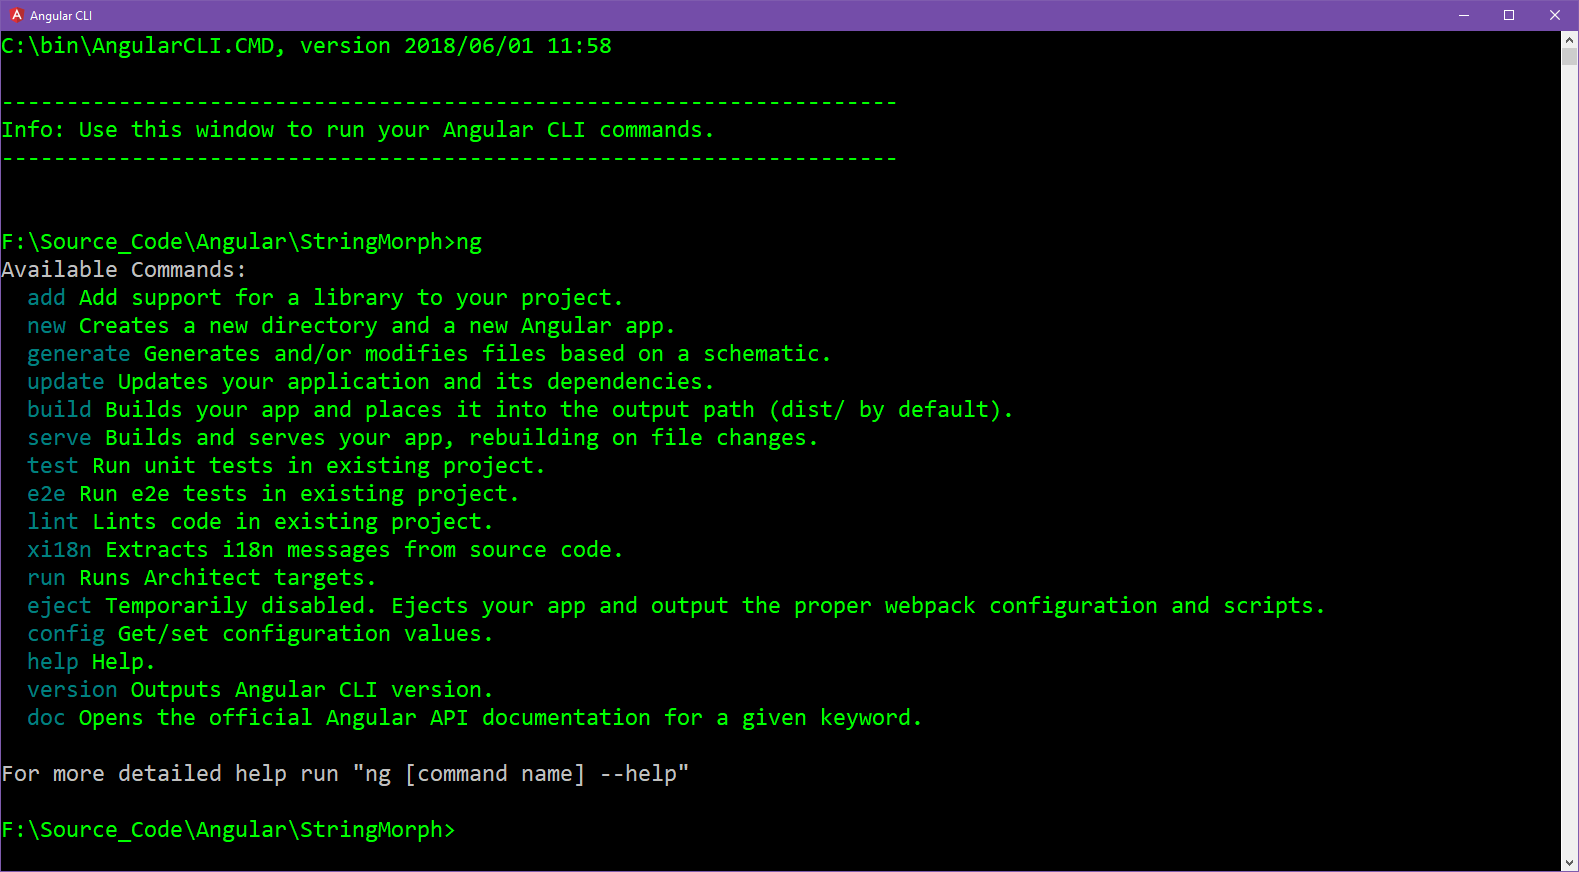
Figurre 4 shows that it works.

Figure 1 shows the first page of the shortcut creation dialgo box, where the command is input.

Figure 2 shows the second page of the shortcut creation dialog box, where you assign the shortcut a name.

Figure 3 shows the dialog box where you assign an icon to the shortcut.

Figure 4 shows the Angular CLI, displaying the output of an unqualified ng command.
Displaying the subcommands in dark blue wasn't my idea; that's the way the CLI works "out of the box." Though it's not the worst I've ever seen, their color choices earn them a place in my rogues' gallery of bad user interface designs, given that most people leave their command windows configured with a black background. The green text is my choice, but I've run the Angular CLI in a plan command prompt window, and you still get that awful blue text for the subcommands. I haven't investigated whether those colors can be configured.
Using the code
The easiest way to create your own command prompt is to use Angular CLI.lnk (in the article download) as a starting point to create your own prompt. Whether you make your own shortcut from scratch or use the included shortcut as your starting point, you will need to copy AngularCLI.CMD and AngularCLI.ico, also in the download, into a permanent location, and adjust the settings shown in figures 1 and 3 accordingly.
I put AngularCLI.CMD and AngularCLI.ico in a directory that is on my Windows path list, which affords the option of launching the CLI directly in any directory from a command window.
Points of Interest
While many may think it's picky, I changed from .BAT to .CMD for most of my shell scripts soon after I began working exclusively on Windows NT. This habit began as a way of signaling that the files in question may in some way be incompatible with MS-DOS.
Of the 42 lines in AngularCLI.CMD, only one is truly required.
set PATH=%CD%\node_modules\.bin;%PATH%
Astute readers will notice incorporation of the %CD% environment variable, which holds the name of the current working directory. This command prepends the node_modules\.bin directory to the system PATH list, making it the first directory after the current directory in the search order for programs and scripts. Since the change is imposed by the internal SET command in the script that runs when the prompt is opened, it goes away when you close the command prompt.
The only other unusual line is the non-blank line immediately above the set command.
echo %~0, version %~t0
This command displays the name of the script, followed by its modified date, which makes a self-maintaining version display.
History
Friday, 01 June 2018: This article was submitted for publication.
Saturday, 02 June 2018: Restore the pictures that didn't get into the initial publication.
Thursrday, 07 June 2018: Correct typographical errors found during review, and add information omitted from the first edition.
