Note: This article was pulled from my blog at: http://www.raddev.us/Arduino/
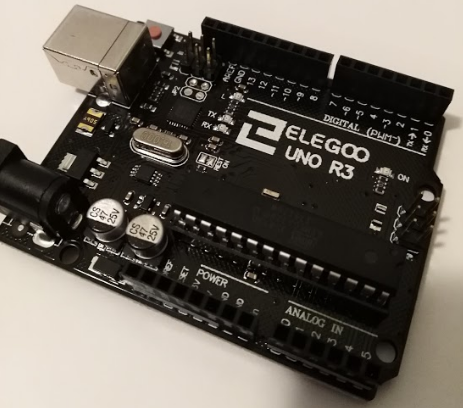
If you've spent any time at all with an Arduino, then you know how to write a program for it. I uploaded the program (shown below) to simply blink an LED on digital pin 5 on my Arduino Uno (knock-off) board (Amazon link).

setup(){
 int LED = 5;
 pinMode(LED, OUTPUT);
}
loop(){
  delay(500);
  digitalWrite(LED, HIGH);
  delay(500);
  digitalWrite(LED, LOW);
}
We use the Arduino Uno to program the ATmega328p chip that is connected to the board on the IC (integrated circuit) socket.
Once You're Done Programming the Chip
But, after you're done programming the chip, it doesn't make sense that you keep it attached to the Arduino Uno board. The board takes up a lot of space and is really used to provide you with an easy way to program the chip.
Here's what it looks like when you remove the chip from the Uno.
You can see the socket that I removed the chip from and you can see that the chip itself is far smaller than the board. That means your final product can be much smaller.

But, how do we get the chip to run our program?
Build the Circuit to Power the ATmega328p
Here's a quick snapshot of the initial circuit we are going to build.

It's very simple. It's one GND (ground) wire connected to pin 8 of the ATmega328p. It's one 5V wire (coming off bread board rail) to pin 7 of the ATmega328p.
Then you can see that I've connected the anode (positive) pin of the LED to PD5 of the ATmega328 because that is the same pin as digital pin 5 on the Arduino Uno.
That _should_ be all you need. But as you can see, the LED is not lit up.
The ATmega328p is actually powered in the picture, but for some reason, it is not running our sketch. Why not?
How is the ATmega328p Set Up on Arduino Uno?
This all has to do with the way the ATmega328p is set up to work on the Uno. When the manufacturer sets up the chip for use with the UNO, they have to set some internal switches on the ATmega328p called fuse bits, so that it works properly with the associated Arduino Uno hardware.
These settings are conventions (arbitrarily chosen but are expected by Arduino users).
You cannot set the fuses unless you have an AVR(Atmel) ISP (In System Programmer/Programming).
ATMega328p Can Run At Various Speeds
An ATmega328p can run at various clock speeds. It can run at 1Mhz (one million cycles per second), 8Mhz and 16Mhz. However, it can only run at 16Mhz if it has an external crystal attached to it.
16Mhz Crystal On Arduino Uno Board
The Arduino Uno board does have a 16Mhz crystal on board.
I've highlighted the crystal in the following picture:

Since the manufacturer has set these chips to run with the external crystal (oscillator), the chip will not run properly without one.
ATmega328p Datasheet
If you take a look at the datasheet and go down to section 5.1, you'll see a nice pinout diagram for the ATmega328p-u (dip dual inline package).

Crystal Pins
You can see that pin 7 is VCC and pin 8 is GND just as I mentioned earlier. But now, we need to find the place where we should install the crystal. If you look closely, you'll see pin 9 is marked xtal1 and pin 10 is marked xtal2. xtal is the abbreviation for crsytal.
Two 22pF Capacitors
However, by looking at this diagram, you would not know that you also need to add two 22pF ceramic (non-polarized) capacitors to those pins also.
You will connect one pin of one cap to the pin 9 and the other pin to ground. You will then connect one pin of the other cap to pin 10 and the other pin to ground. Then you will connect the 16Mhz crystal so that one pin is on pin 9 and one pin is on pin 10.
Here's a quick snapshot of it on the breadboard (and then at the bottom of this article, I'll provide you with a schematic so you can more easily see how things are connected).

Now, when you power this circuit up, it will actually run the sketch.

Clears Up A Few Things
Hopefully, this will clear up a few things:
- You can actually run the chip stand-alone -- and you should since it is a smaller footprint.
- If you haven't been successful getting it to work, it may be because you didn't add the 16Mhz crystal: it won't work without it.
- You definitely need 22pF caps. I tried it what 47pF and it didn't work. Use 22pF caps.
Keep on building, keep on learning.
~raddevus (roger deutsch)
CodeProject
