Let us start from where we last stopped, for those still wanting to follow along, you can find the solution here.
There is a small mention, since the last release and now I made a small modification inside the Program.cs file, the console project trying to follow the design rules of StyleCop.
And now let’s continue with cleaning up the code, adding unit test and making the application more extensible. Also in this iteration, we will try and follow the TDD pattern.
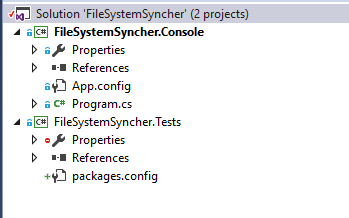
For starters, we’re going to create a new project dedicated to testing. I find that having the test and production code separated in projects keep our code clean and lean.
Now we are going to right-click on the solution and select Add > New Project… and then we will be prompted with the Add New Project dialog (figure 1.2), then we select the Class Library template, and give it a name (I choose FileSystemSyncher.Tests to keep in sync with the solution).

After creating the test project, I got into the habit of installing the dependencies we will require off the bat. For this end, we will be using two very well know libraries for testing. Right-click the reference node and then click Manage NuGet Packages…
Once the dialog (or panel if you’re using Visual Studio 2015) shows up, we will search for the following packages:
- NUnit
- This will allow us to write tests using the NUnit test engine.
- I explicitly selected version 2.6.0 because of the
TestCase attribute implementation
- FluentAssertions
- This will give as an easier way to write the tests and it also unifies the APIs of the most common unit test frameworks.

Now that we got that out of the way, the first thing we would want to extract would be the source of our configurations, in the true spirit of TDD, we will start off by creating a unit test that fails.

So let’s discuss what happens here:
- Following the TDD pattern, we first design the API we want to follow.
- First, we designed the test cases, writing which are expected to pass and which are expected to throw exceptions (please note that the proper way would be to advance one test at a time to keep a trailing path of passing tests, but for this example I wanted to illustrate the possible test case that can and should be taken into consideration)
- We write the code for the unit test such that it will follow the API we will want to follow in the future.
- We will be using mocks so that we can test the interface
IConfigurationProvider. - We will create the types required for the test inside the test project and make them pass (see the types written in red) with the simplest implementation that we can (this will prevent us from over-engineering, just do the most simple thing to make your feature work).
- After the test passes and everything is green, then we will refactor to an additional project knowing that we have tests to prove that we’re not breaking any code when we refactor.
What we end up with will be the following:


Now that we created the types and the tests are passing, we can extract the interface and ConfigurationsOptions class into a project called FileSystemSyncher.Commons and add a reference to it from the test classes.
With tests in hand proving we can create valid sources, we can now go back to the console project, add a reference to the Commons project and create a ConfigurationProvider for the config file.
The result provider looks like this:

After all of this, we come to the new form of the Program.cs file, which is:

As you can see, now instead of one big lump of code, we have a class that holds the configuration we need and also validates the source, we have a decoupled provider which could be extended to get the sources from anywhere we desire, be it files, command line, a database or a web service. Also, the code looks a little cleaner :).
Next time, we will look into how we can implement different file comparison algorithms, and even file copy algorithms.
As before, the changes can be found here.
Thank you for reading!
CodeProject
