Introduction
Whenever we talk about web scraping or web data extraction, we always think it would be a difficult part and trust me, to get exact HTML code and fetch what is needed is a bit complicated, not an easy task.
But Power BI made it very easy to extract data on which we can do the analysis.
Let me take an example here. Suppose we want to create a tool which extracts data from different shopping sites and compares them to get the best deal of a particular product.
This extraction of the data and comparison can be easily done in a few steps in Microsoft Power BI.
Let’s understand it more in a hands on manner using few steps as mentioned below in this post.
In this example, we are going to extract data from Amazon.in web site.
Step 1
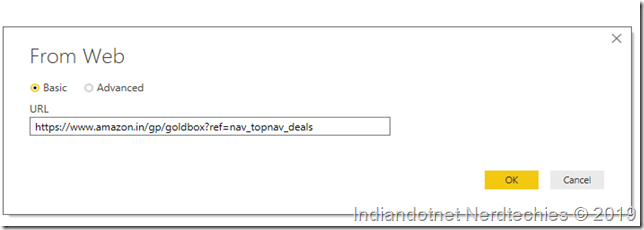
Open web data source and provide the URL of the web page from where you want the data. As shown in the below figure, we are going to extract data from the below URL:

Step 2
When you click on OK button, you will get a new popup window in which power BI tried to extract the data and provided you tables. As you can see in below image, there are two tables which Power BI provided, Document & Table 0.

But when you viewed those tables, you didn’t get any fruitful information. So, Power BI has a feature to extract the data as per your requirement. For that, you have to click on the Button “Add table using Example”.
Step 3
After clicking the button, you will get a new popup screen as shown in the below image.
You can see that there are 2 parts in the popup - the first part is the web part view and you can see the page from where we want to extract data is visible here.
The second part is table structure which we are going to create by giving a few examples to Power BI.

Step 4
Now, here we have to extract the Product Name, Price and percentage offer. So we are going to train the Power BI with 1 or 2 examples. So, let's suppose Column1 will hold the Product name. As we can see, the product name in the web page is “Kevin 80 Cm”, “WOW Raw apple”, etc. So, in the first column, we will try to write Kelvin and what you will see is a list of data which Power BI extracted. Just select exact name, just follow this step for 2 or 3 rows and you will be surprised to see that rest of the row data will fill automatically.

Step 5
Now add another column in the below table where we will keep the price of the items.
So as you can see for the Kevin 80 cm TV, the price is 8,499. So, when you click and try to write the amount of 8499, Power BI is intelligent enough to provide the list of extracted data with similar value. Just try the same step for next 2 or 3 rows and you will find all the prices against the product name.

Step 6
Now, we will fetch data of percentage off. As you can see for kevin TV, price is 39% off. So, to achieve this, just add another column in the grid and try to type 39% as you can see in the below image. Just repeat the step for few other rows and Power BI will do for it for the rest of the rows.

Step 7
Wow, you have extracted the data which you want, so far as you can see in the below image:

Step 8
Now, just click on Load button to proceed further, you will get the following screen. Proceed further by selecting Custom Tables.

Step 9
Now, great news! You got the data that you wanted as you can see the grid:

Step 10
The only thing which might be bothering you is that in Percentage Off column, you were seeing brackets and % Off extra text as well. Now, to avoid this, just add another column by example as you can see the below screen.

Step 11
That’s great! Now you have the data that you want.

Now, we have data so we can apply any analysis that we want.
Hope this feature might help you.
Happy learning!
History
- 9th March, 2019: Initial version
