Introduction
About three years ago, I started developing in .NET using a famous free editor and I needed to add some reports to my applications. Since I like to see what I'm going to print, just not to waste half a forest in paper only to adjust that text font, I started developing a little reporting library and a designer that uses it. By the way, my initial work was included into that famous free .NET editor, but I abandoned that project because I saw that it was badly designed (this is the doom of most first drafts), so it became a brand new project: MyNeoReport engine and designer, that let me design reports in a WYSIWYG way and, if I want, I now have total control on each the report objects from my application.
Background
Today, if you are an hobbyist you have also some Microsoft® free solutions to develop your application, but these entry level IDEs still don't have built-in reporting tools (and I also dislike the one included in professional ones). There isn't a free (good and working) solution out there that lets you manage printing in an easy way in managed code, so I decided to begin MyNeoReport and now, after three years, it is quite mature (ok, there are no hyper-advanced features, but boy... it is simple to use, well-organized and free).
Using the Code
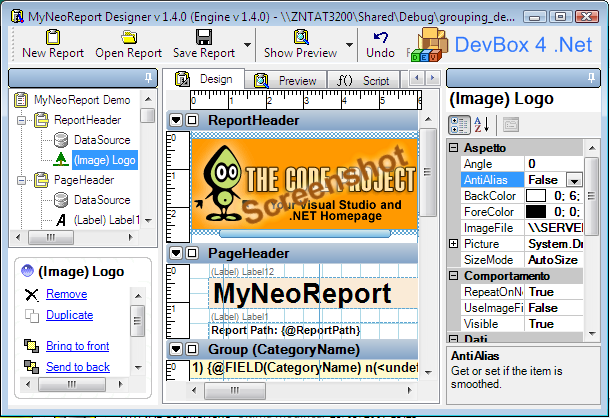
In this article, I'll describe some code that you can use for managing the report content in your application. Note that you can access the report at runtime or you can define the report in the designer. Note that the full designer covers almost all the capabilities of the engine, and if you want, you can write your own designer (maybe better than mine).
The preview of the sample report is shown below:

The engine is composed of two libraries:
- NeoDataType.MyNeoReport.dll - The core of all
- NeoDataType.LiveCodeEngine.dll - The engine for scripting feature
These libraries must be distributed with your application, but you need to reference only NeoDataType.MyNeoReport.dll, since the other is just for support. The main namespace you need to include is NeoDataType.MyNeoReport:
using NeoDataType.MyNeoReport;
Imports NeoDataType.MyNeoReport
Here you can find all the report entity classes. The most important ones are:
Report, of course, the most important Page, that defines the page characteristics Section, that identifies a section (report and page headers and footers, details and groups) Label, Image, Shape, DataLabel, Dataimage, that are the base items that you can print
Report identifies the report document, it allows you to load and save a report to disk, it gives you some information such as how many pages the report will print, but, more important, it exposes the Page property.
Page describes the page size, orientation, measure unit, and, of course, the sections to be printed.
Section is a horizontal band that contains the items to be printed. Default sections are ReportHeader, PageHeader, Details, PageFooter, ReporFooter, but MyNeoReport also supports grouping sections.
In summary, the structure of a report is as follows:
Report
 +- Page
     +- Sections
         +-Items
Create a New Report and Add Items
private void CreateANewReportSample()
{
Report report = new Report();
Page page = report.Page;
page.Units = ScaleMode.Inches;
page.Width = 5;
page.Height = 8;
Label label = page.ReportHeader.AddLabel();
label.Text = "Page {@PageNumber} of {@PageCount}";
Shape shape = new Shape();
shape.ShapeType = ShapeType.Ellipse;
shape.Angle = 20;
page.ReportHeader.AddItem(shape);
pageControl.SetPage(report.Page);
}
Define the Details Data Source
private void SetDetailsDataSource()
{
OleDbDataSource dataSource = (OleDbDataSource)report.Page.Details.DataSource;
dataSource.ConnectionString = myConnectionString;
Label label = page.ReportHeader.AddLabel();
label.Text = "Product {@RecordNumber} of {@RecordCount}";
DataLabel datalabel = page.Details.AddDataLabel();
datalabel.X = label.X + label.Width;
datalabel.DataField = "ProductName";
datalabel2 = page.Details.AddDataLabel();
datalabel2.X = datalabel.X + datalabel.Width;
datalabel2.DataField = "UnitPrice";
datalabel2.NullText = "Price undefined";
datalabel2.Format = "#,###.00";
}
Show the Preview and Print
private void ShowThePreview()
{
report.ShowPrinterDialog();
report.ShowPreview();
}
Points of Interest
I like MyNeoReport because its classes let you create a report (data bounded or not) without a designer, but just via your code because the classes give you total control over each aspect of the report and its components.
If you think that the built in items (Label, Image, Shape, DataLabel, DataImage) are too few, you must know that MyNe<code>oReport is extensible: you can write your own item by just inheriting from NeoDataType.MyNeoReport.ItemBase. You can look at the Designer code that is supplied to check all the abilities of the Report classes.
This is just a little introduction to the power of MyNeoReport library. For more information, documentation, support and newer releases, you can visit the site that supports me.
History
The MyNeoReport 1.4 is a big update, with some new enhancements, optimizations and bug fixes. This is described in the file upgradeinfo.txt contained in the download package.
