Introduction
AJAX is a great thing for ASP.NET developers. It has begun to level the playing field with rich client applications, in terms of user experience and responsiveness. One downside has been that many things that once worked are broken; including the FileUpload control.
The essence of the problem is that the FileUpload control does not work with asynchronous postbacks, and therefore does not work from within an AJAX UpdatePanel. The technique presented in this article allows the FileUpload control to work within an UpdatePanel, by forcing a full postback; however, the rest of the controls can still take advantage of the asynchronous postbacks provided by the UpdatePanel. The example application will be a simple web form containing a DatePicker Control, a Label and a FileUpload. We will see that the FileUpload will function via a full postback, but the DatePicker will retain its AJAX behaviour.
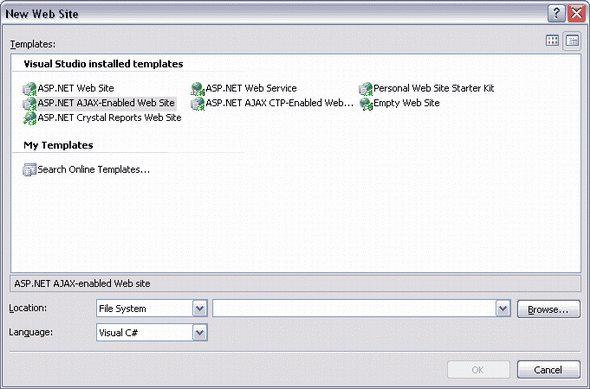
1. Create a New AJAX-enabled Web Project
When Microsoft AJAX is installed, it adds a new template to Visual Studio, ASP.NET AJAX-Enabled Web Site. Create a new one of these:

2. Create a New Web Form
In this example, I have added an Eclipse Web Solutions ASP.NET DatePicker control, a Label, and a FileUpload control, all within an UpdatePanel:

<asp:UpdatePanel ID="UpdatePanel1" runat="server" UpdateMode="conditional">
   <ContentTemplate>
      <ews:DatePicker ID="DatePicker1"
         runat="server" UsingUpdatePanel="True" /><br />
      <asp:Label ID="Label1" runat="server"></asp:Label><br /><br />
      <asp:FileUpload ID="FileUpload1" runat="server" />
      <asp:Button ID="Button1" runat="server"
         Text="Upload" />
   </ContentTemplate>
</asp:UpdatePanel>
Code-behind:
protected void DatePicker1_SelectionChanged(object sender, EventArgs e)
{
    Label1.Text = DatePicker1.DateValue.ToShortDateString();
}

protected void Button1_Click(object sender, EventArgs e)
{
    if (FileUpload1.HasFile)
    {
        Label1.Text = FileUpload1.FileName;
    }
}
It is at this point that we experience the problem. Run the form, and you will find that the file upload control does not work. Because the file upload control is within an UpdatePanel, the file is not posted to the server.
3. Enable File Upload Full Postback
As mentioned earlier, the trick is to force the file upload control to perform a full postback, and we do this using triggers. Triggers allow the developer to specify what will cause partial and full postbacks. They must be defined within the UpdatePanel but outside of the ContentTemplate. We want to create a trigger that will instruct the button that we are using for the upload to perform a full postback. The updated markup is:
<asp:UpdatePanel ID="UpdatePanel1" runat="server" UpdateMode="conditional">
 <Triggers>
  <asp:PostBackTrigger ControlID="Button1" />
 </Triggers>
 <ContentTemplate>
  <ews:DatePicker ID="DatePicker1" runat="server" UsingUpdatePanel="True"
                  OnSelectionChanged="DatePicker1_SelectionChanged" /><br />
  <asp:Label ID="Label1" runat="server"></asp:Label><br /><br />
  <asp:FileUpload ID="FileUpload1" runat="server" />
  <asp:Button ID="Button1" runat="server" Text="Upload" OnClick="Button1_Click" />
 </ContentTemplate>
</asp:UpdatePanel>
Now, when the form is run, the DatePicker is still working asynchronously, but the file upload is also working, thanks to the PostBackTrigger.
