Introduction
This little application might come in handy if you have lots of pictures, and you would like to make them searchable in an easy way, instead of relying on the directory names you organize them in.
Background
One friend of mine, working as a photographer, and already having thousands of pictures, asked me whether I could write a little and simple application that can be used for selecting them by given keywords. He asked it because he just couldn't find any adequate program. As I managed to develop this, I thought it would be a good idea to share it with others, as many of you may be suffering from the same problem.
Assigning keywords to images
The user can assign keywords to each of his/her pictures, that are stored in the image file itself. This is done thanks to the EXIF information residing in JPEG files. Currently, the Image Description (ID:270) tag of EXIF is used for storing these keywords, separated simply with spaces. This keyword information can be entered using any program that is capable of modifying a JPEG's EXIF information, or you can use the Burner Tool in ExifQuery, which is more easy and time saving because you can assign keywords to a group of images and also append keywords to existing ones. This way, you can assign common keywords to all pictures, then append more keywords to a subgroup of pictures, and so on..
How it works - Caching necessary information
After setting the current root directory in the application, one could start searching. But as searching in the images' EXIF can be a very painful and long running process, especially when working with lots of pictures, the application caches this information once in every subdirectory of the root. This process can be initiated by clicking on the 'Rebuild Cache' button. As a result of this, a cache.xml file is created in each subdirectory, containing all the JPEG files' necessary details that are found in the directory, such as name, creation date, and the Image Description tag of EXIF. If any of the images are modified, deleted, or new ones are copied or created in any subdirectory of the currently configured working directory, the rebuild process should be performed again. But this time, it will not take as long as it did the first time, because only these modified files are queried for their necessary information and are put to the cache. But, for example, if you just move a complete subdirectory to a new location, you don't need to perform the rebuild, as the content of the directory hasn't changed (none of the pictures in the directory changed) and the cache.xml travels as well and is already up to date.
The cache files can be removed immediately if this is needed, by clicking on the 'Remove cache' button.
Searching
After having performed the rebuild process successfully, the user can start doing any searches that will likely to be very fast.
- Keywords to be contained
- Not to be contained
- Search options (match whole, etc...)
- Result view
Advantages
Using this tool, you can also set the keywords to each picture easily, and then search them. If you give some of your pictures to someone, the keyword information, of course, is delivered as well with the image file. So other people having this tool can easily have their cache rebuilt and immediately search for the new pictures. Additionally, if you give a whole directory of pictures and include the cache.xml file, the rebuild process does not need to be performed on the other side, as the cache.xml remains valid for the directory. As you see, this works completely location transparently, and also safely because the keyword information just resides in the image and not in a surrogate database or text file.
The web interface
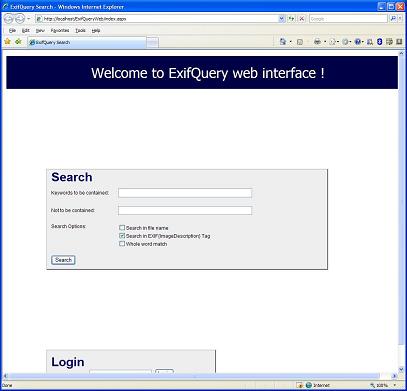
I also made a web application, which enables your images to be published if you have a web server, so others can search your image store by keywords. One example is here, under 'Kereses' link. This site is not on a 24/7 server, so it may be shut down at certain times.
All you have to do is to make a virtual directory (application) in IIS, pointing to the web application directory, and modify the web.config file settings appropriately.


