Introduction
This article is aimed towards demonstrating various features of the .NET framework
to build a very simple tool to analyze various activities on a web site. This
tool will ultimately provide complete web log analysis. But for starters we
have focused mainly on reporting the various kinds of browsers that are being
used by clients to visit a web site.
This tool demonstrates the use of following namespaces and classes.
-
System.Diagnostics
-
System.Web
-
System.Xml
-
System.Data
-
System.Data.SqlClient
-
System.Drawing.Imaging
-
System.IO
There are some other namespaces used to accomplish the goal, but those are the
ones that are pretty much used commonly in all the .NET application, like System
and System.Diagnostics.
Browser Information
When a client makes an HHTP request to a web server, the browser information is
sent in the header of the request. The Page class exposes this
information through the Request property. This property returns
a HttpRequest
object. This class exposes the browser capabilities through a number of
properties like UserHostAddress, Browser, etc. For
more information check the documentation for the HttpRequest class.
When a client connects to the web site, we pass on the HttpRequest object
to the WebLogManager class. This class extracts the browser
information and packages it in a XML document. This document is sent to the
data access layer. The WebLogDBManager class implements the data access
to SQL Server. The AddInfoToDatabase method of this class accepts the
XML document containing the browser information and puts a the record into SQL
Server table. We could have directly passed the HttpRequest object to
the
data access layer but that would defeat the purpose of making the data
access layer independent of source of information.
Although HttpRequest provides most
of the information about the browser's capabilities, there still is some
information that has to be generated based on some preliminary information. For
example, HttpRequest does not tell anything about client side
capabilities e.g. if the browser supports getElementById or
the all property. This
information has to be found based on the browser name and version. By defining
a schema for the XML document we can pass all kinds of information to
the data layer
to save in the database. And the most important point is that the
HttpRequest object cannot be remoted. If the data access layer is running on a
remote machine then HttpRequest can't be marshaled across
boundaries.
A lot of this information is already available in the web log of IIS.
However, saving the information into SQL Server sets you free from any changes in the
web log file formats and the tools used to analyze them.
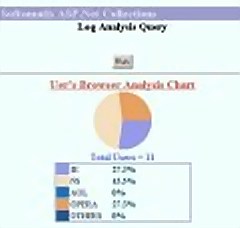
Graphical Chart Display
.NET/GDI+ has provides some very powerful APIs that have made displaying the
statistical information in graphics forms like bar graphs, graphs, pie-charts,
etc. very easy. This makes use of the classes defined in System.Drawing
namespace to convert the data stored in SQL Server into nice looking Pie Chart.
Graphics class exposes a lot of methods to draw various graphics objects like
rectangles, curves, lines, pie charts etc. We have made extensive use of these
methods to draw the pie charts and render on the client's browser.
The technique is pretty simple. Like our good old Win32 applications, we need a
device context to draw. The Graphics object attaches itself to a device context
for this purpose. The Image class provides this device context. First we
created a Bitmap object and then attached this device context to Graphics
object.
chartBmp = new Bitmap(100, 100);
chartGraphics = Graphics.FromImage(chartBmp);
The FillPie method is used to draw the Pie Chart. When the drawing of chart is done, we
save the bitmap to a file in JPEG format. This is accomplished by calling
the Save
method from the Image class.
chartBmp.Save(jpgFile, ImageFormat.Jpeg);
The second parameter to this method is the graphics file format. You can
specify a number of file formats. Look at the documentation for this method to
check what all formats are supported.
Rendering Graphics in the Browser
After the graphics file has been created in the server, now comes the final
task of showing it on the client's browser. We have made use of ASP
.NET server
side controls for this purpose. We have a put a asp:Panel control on the page.
This control is equivalent to "div" tag. Initially this panel is set to hidden
mode. When user clicks on "Run" button, the server side processing starts and
after the chart graphics file has been added, an asp:Image control is added to
this hidden panel. After that a table showing legends for the information is
added by creating an asp:Table control and adding it to the hidden panel. After
all the information controls have been added to the panel, the visible state of
the panel is toggled to make it visible.
Gotchas
-
ASP .NET runs in the ASPNET account, which is created as a local account on
installation and belongs to the User Group on the machine. This account does
not permissions to write in /inetpub folder. Therefore when you try to create
the JPEG file in the virtual folder of your web site, the creation of
FileStream
object failed with the following message.
Access permission to xxx.jpg denied.
To fix this problem make sure that you provide write permissions to ASPNET
account for the folder where you want to save the JPEG file.
-
Since the information for analysis changes very rapidly make sure
that you set the content expiration to a very small time or preferably to
immediate. These ways the server will not server the cached pages to the client
requests. And also tell the client browsers not to cache the page.
Response.Cache.SetExpires(DateTime.Now.AddSeconds(1));
Response.Cache.SetNoServerCaching();
Make The Project Work
We have included the script file to create BrowserCapLogs table in the SQL
Server. Just create a WebLogs database on SQL Server 2000. And use the script.
Also you may have to change the connection string in WebLogDbManager class to
use the right credentials for accessing your database. We have used localhost
and sa account with no password.
For any comments or suggestions, feel free to contact us at
softomatix@pardesiservices.com


 General
  News
News  Suggestion
  Question
  Bug
Bug  Answer
  Joke
Joke  Praise
  Rant
Rant  Admin
Admin 


