Introduction
A Theme in Silverlight is just a collection of styles. We define the styles in the resource. The scope of the resource might be set to application level or UserControl level. The scope depends on the location where a resource is defined. A resource can be defined at the following locations:
- App.xaml
- Custom UserControl.xaml
- External Resource Dictionaries
To apply a common User Interface behavior across the Application, the resource should be defined at App.xaml level. One can define the resources under Application.Resources section in App.xaml file or in resource dictionaries defined in the external .xaml files and then refer those resource dictionaries in the App.xaml file through ResourceDictionaries.MergedDictionaries.
I am going to define my Resource in the external resource dictionaries and I will refer to those resource dictionaries into App.xaml through ResourceDictionaries.MergedDictionaries.
Now I want the User to apply the theme according to his liking by selecting the theme from a theme dropdown. In Silverlight, the styles are Static Resources which can be set in the XAML or in code behind. To set the styles in code behind, the style should be defined in App.xaml or in UserControl.xaml file and one has to go through the controls one by one in the code and set the styles explicitly.
To overcome this, I am going to show you a trick to change styles of controls dynamically in one go in the next section.
Implementation
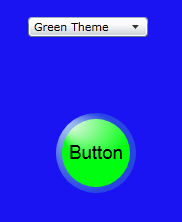
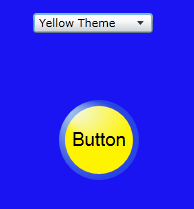
I am having one dropdown which will provide options of different themes to the user. On selecting a theme, the button present in the page will change its appearance. For different themes, I have created a number of external resource dictionary files as there are themes to display. Each resource dictionary file represents a different theme. For example, to apply green theme to the button, there is a file GreenTheme.xaml which corresponds to that theme. In my example, I have two themes Yellow and Green. For these two themes, I have two resource dictionary files GreenTheme.xaml and YellowTheme.xaml respectively under Themes folder in Silverlight Project. By default, I want to apply Green theme to the application so I have referred the GreenTheme.xaml file in the App.xaml by using ResourceDictionaries.MergedDictionaries. The YellowTheme.xaml file I will refer when user changes preference for theme to Yellow theme.


Below are the few things to remember about the external resource dictionary .xaml files:
- The Build Action property of the resource dictionary file should be set to Content because I want the resource file to be part of the application package and should not be embedded in the assembly.
- Copy to output directory should be set to Copy if newer.
- Custom Tool should be set to empty.
Once the user selects a new theme from the theme Comboxbox, the ComboBox_SelectionChanged event will fire and I will find out which theme user has selected in that event. The SelectionChangedEventArgs of the event will give me the information about RemovedItems (previously selected item) and AddedItems (newly selected item). Using the RemovedItems, I will find out what was the previous theme and I will remove that resource dictionary from the MergedDictionary of the Application. And using the AddedItem, I will add new resource dictionary in the MergedDictionary.
The theme resource dictionary .xaml file will be having default styles defined for all the controls in the application. So once the previous resource dictionary is removed from the application resource and new resource dictionary added, the controls will take the default styles defined in the new theme file. So in this case, there is no need to go through each control and set the styles explicitly as the default styles will be applied automatically.
Using the Code
The code below shows hows to change the style dynamically. Just attach ComboBox_SelectionChanged event handler to the selection changed event of theme combo box on your page. The code below will remove the previously selected theme and add newly selected theme to the Application Resource. For more details on implementation, please go through the code attached with the article.
private void ComboBox_SelectionChanged(object sender, SelectionChangedEventArgs e)
{
    if (e.RemovedItems.Count > 0)
    {
        ComboBoxItem removedComboBoxItem = e.RemovedItems[0] as ComboBoxItem;
        if (removedComboBoxItem != null)
        {
            ResourceDictionary res =
		Application.Current.Resources.MergedDictionaries.Where
            	(q => q.Source.OriginalString ==
			removedComboBoxItem.Tag.ToString()).FirstOrDefault();
            if (res != null)
            {
                Application.Current.Resources.MergedDictionaries.Remove(res);
            }
        }
    }
    if (e.AddedItems.Count > 0)
    {
        ComboBoxItem addedComboBoxItem = e.AddedItems[0] as ComboBoxItem;
        if (addedComboBoxItem != null)
        {
            ResourceDictionary res =
		Application.Current.Resources.MergedDictionaries.Where
            	(q => q.Source.OriginalString ==
			addedComboBoxItem.Tag.ToString()).FirstOrDefault();
            if (res == null)
            {
                Uri stylePath = new Uri
		(addedComboBoxItem.Tag.ToString(), UriKind.Relative);
                ResourceDictionary newResource = new ResourceDictionary();
                newResource.Source = stylePath;
                Application.Current.Resources.MergedDictionaries.Add(newResource);
            }
        }
    }
}
Conclusion
This trick will allow the user to change the styles according to his preference and even the user preference can be saved in the database so that when user logs in next time, he will be presented with the theme of his liking.
