Today, Flash Builder Burrito (still in beta) lets you develop native applications for Android devices and the BlackBerry PlayBook. The new <s:MobileApplication> tag and the new mobile components of Flex Hero dramatically improve the way you design an application. It's already the most efficient framework for developing multi-screen applications, and it's just a start, since Adobe will be adding more and more supported devices.
TIP #1: Kill Your Application
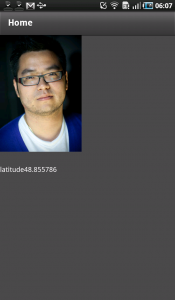
This is the number one misunderstanding with Android applications for Flash developers. When you exit your application (pushing the home button for instance), the application is still running in the background. You need to be aware of this default behavior and control it. This is a very powerful behavior inherited from Android, but it can sometimes kill the user experience on a smartphone. Let me give you an example. The Geolocation API introduced in AIR 2.5 returns your coordinates in real-time. On Android, it directly leverages the GPS API of the OS and we all know that that consumes a lot of resources. In this sample I just ask for my location using the Geolocation API and display the latitude in a text field. Don't forget to add the Android permission “ACCESS_FINE_LOCATION” in the XML manifest.


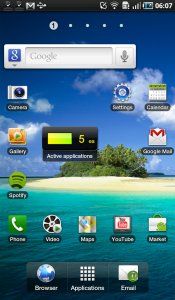
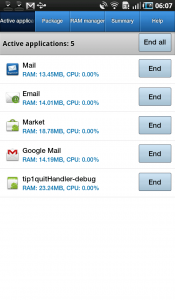
On the first screen, you can see that my application is looking for my location as the GPS Android icon appears in the status bar. Then I click on the home button (screen 2). The GPS is still working in the background!!! If I look at the running services, the tip1quitHandler app is indeed still perfectly alive. It's consuming my resources for nothing.
To control the behavior of your application, you must listen for the DEACTIVATE event on the native application. Just add these lines of code in your main MXML file:
<?xml version="1.0" encoding="utf-8"?>
<s:MobileApplication xmlns:fx="http://ns.adobe.com/mxml/2009"
		xmlns:s="library://ns.adobe.com/flex/spark"
		firstView="views.tip1quitHandlerHome"
		creationComplete="mobileapplication1_creationCompleteHandler(event)">
	<fx:Script>
		<![CDATA[
			import mx.events.FlexEvent;

			protected function mobileapplication1_creationCompleteHandler(
                               event:FlexEvent):void
			{

				NativeApplication.nativeApplication.addEventListener(
                                        Event.DEACTIVATE, onDeactivateApp);
			}

			protected function onDeactivateApp(event:Event):void
			{
				NativeApplication.nativeApplication.exit();
			}

		]]>
	</fx:Script>
</s:MobileApplication>
In this case I just kill the application when the user goes back to the home screen. You can also choose to remove the event listener on the Geolocation, and activate it again when the Event.ACTIVATE is fired. It gives you more freedom and control than ever on Android.
TIP #2: Load your Data Before Pushing a View
This is another classic mistake due to the new MobileApplication architecture. When you need to download some data from the Internet, don't call the service in the view. If you do, you'll launch a useless request every time you go back to it. Update the main application file to call your service and push the view on the result event. Remove the firstView parameter in the MobileApplication tag and call your service on the creationComplete event. When you receive a resultEvent, push the first view and pass the event.result object as an ArrayCollection.
protected function operation1():void
{
Operation1Result.token = speakersDevoxx.Operation1();
}
protected function mobileapplication1_creationCompleteHandler(
event:FlexEvent):void
{
operation1();
}
protected function Operation1Result_resultHandler(event:ResultEvent):void
{
navigator.pushView(views.tip2devoxxHome,
event.result as ArrayCollection);
}
Check out the video to discover how I use the Data Wizard of Flash Builder 4 to build an app connected to the DEVOXX REST service in 5 minutes. Once your data is loaded, it's persisted between the view. In my sample, I get the list of speakers and store it in an Array Collection. When I want to display the details about a speaker, I just push a new view passing the list.selectedItem object. Thanks to AIR 2.5, you can also choose to store the data locally in the SQLite database.
TIP #3: Display a Custom Label
Use the mobile item renderes to have the best performance while scrolling lists of data. Don't forget that you can also use the labelFunction parameter in a List instead of the classic labelField. A typical use case is when you want to display the full name of a user in the list. For example, if you only receive the first name and the last name from the service then use this simple trick.
<fx:Script>
<![CDATA[
public function myFullName(obj:Object):String
{
return(obj.lastName + " " + obj.firstName);
}
protected function list1_clickHandler(event:MouseEvent):void
{
navigator.pushView(views.mySpeaker,
list.selectedItem);
}
]]>
</fx:Script>
<s:List id="list" width="100%" height="100%" dataProvider="{data}"
labelFunction="myFullName" click="list1_clickHandler(event)">
</s:List>
TIP #4: Always Declare a Splash Screen
Your AIR application will always take a second to start up. The Flex Hero framework added a tweak to the current Preloader class to display an image before the classic loading experience. Always declare a splash screen (just a static image) in your main MobileApplication tag to improve the user experience. It's always better to welcome your users with an image rather than a black background. Several “ratio” parameters are available to control the display of the splash screen. You should consider the letterbox and the zoom ratio scale modes. Use the splashScreenImage and the splashScreenScaleMode parameters of your MobileApplication.
<s:MobileApplication xmlns:fx="http://ns.adobe.com/mxml/2009"
	xmlns:s="library://ns.adobe.com/flex/spark"
	xmlns:speakersdevoxx="services.speakersdevoxx.*"
	creationComplete="mobileapplication1_creationCompleteHandler(event)"
         title="Loading..."
	splashScreenImage="@Embed('devoxxSplash.png')" splashScreenScaleMode="zoom">
TIP #5: Check the Orientation of the Screen
I'm a big fan of Flex 4 custom layouts. You can read my article about custom layouts here: http://www.riagora.com/2010/05/flex-4-and-custom-layouts/ By default, the mobile List component will use the VerticalLayout class. Depending on what you display, the VerticalLayout is not always the best choice. Depending on the orientation of your device (portrait or landscape), you may also want to change the layout associated with your list. When I display pictures, I prefer the TileLayout with a “rows” orientation but when I switch to the landscape mode, I prefer the TileLayout with a “columns” orientation. Here are two screenshots of the same application using two different layouts depending on the screen orientation.
On the left, you can admire the portrait mode, and on the right the landscape mode. To find out when the user rotates the screen, I listen for the ResizeEvent on the view… I'm not sure that it's the best way to proceed… but it works 
protected function checkOrientation():void{
				if(navigator.landscapeOrientation == true){
					currentState = "landScapeView";
				}else{
					currentState = "portrait";
				}
			}

			protected function onResizeView(event:ResizeEvent):void
			{
				checkOrientation();
			}
Then just declare the states of your application, and the layouts associated to your states:
<s:states>
		<s:State name="portrait"/>
		<s:State name="landScapeView"/>
	</s:states>
	<s:List width="100%"  height="100%" dataProvider="{myData}"
             itemRenderer="views.mySecondIR">
		<s:layout.portrait>
			<s:TileLayout orientation="rows"/>
		</s:layout.portrait>
		<s:layout.landScapeView>
			<s:TileLayout orientation="columns"/>
		</s:layout.landScapeView>
	</s:List>
TIP #6: Use Custom Layouts
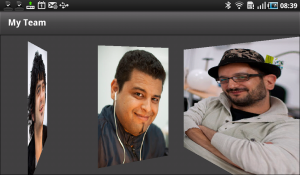
I simply tried to use my custom coverflow layout and I was amazingly surprised by the good performances on my Android devices. Check out the video to see how it works.

TIP #7: Your Tips
Now I need your tips  If you have found great tricks to improve Flex Mobile user experiences, please post a comment or a link to your blog post.
