Introduction
This article is accompanied by somewhat large images to make an easy following.
In this short article, we will be enjoying entering GPU programming world with nVidia CUDA SDK v3.2. With CUDA, we can
write programs that can run on the graphical processing unit(GPU).
Background
Programs written as CUDA *.cu files that run in GPU are called kernels. A kernel is a unit of structure that runs parallel on the GPU. Thousands, even millions of threads that the kernel is running on is not uncommon in the GPU world. But to be able to write them, you have to be able to compile them, duh!
Nine Easy Steps
Follow the steps to create a CUDA 3.2 capable VS2010 project.
Make sure CUDA 3.2 SDK is installed from here, fire up Visual Studio 2010 and...
1. Create a new Win32 Console Project
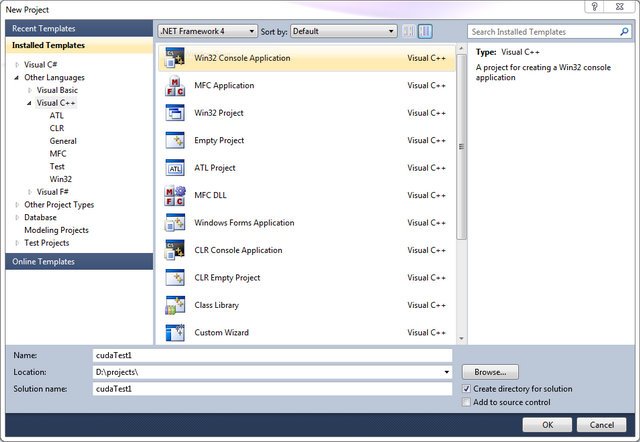
2. Choose 'Empty Project'
Choose 'Empty Project' setting from new project window. We will add our source files later on.
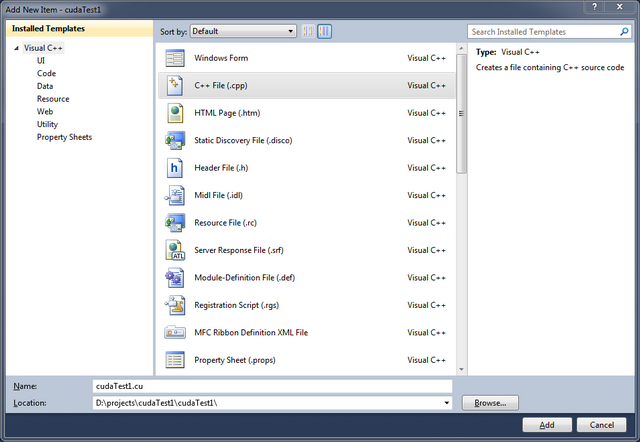
3. Add your CU file
Add a new C++ file with the extension .cu. Files with cu extension are processed with nvcc.exe nvidia compiler driver and are sent to VS2008 C compiler after processing.
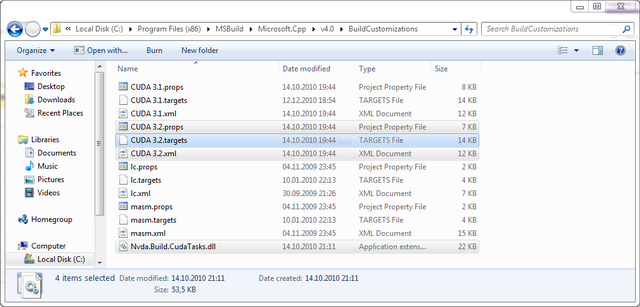
4. Check Build Customizations
CUDA SDK setup installs build customizations for VS2010. They are installed in program files\MSBuild\Microsoft.Cpp\v4.0\BuildCustomizations. If the selected files are not there, you can download them from my blog: CUDA 3.2 Build Rules
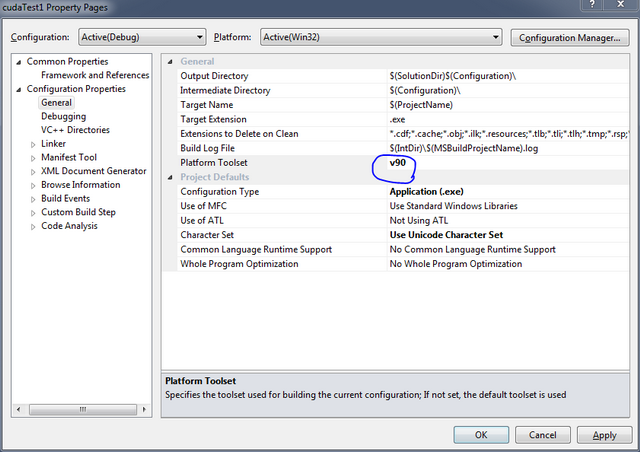
5. Change Platform Toolset
Change Platform Toolset to v90. With CUDA SDK 3.2, VS2010 IDE is supported through custom build targets which in turn use the C/C++ compiler distributed with VS2008. When you are using VS2010 and compiling a CUDA project, using the .NET4 compiler is not supported (yet) by nVidia. So you need to have the C/C++ compiler distributed with VS2008.
Change toolset for the project from project property page.
6. Change CU File Type
Change Item Type of the added CU file to CUDA C/C++ from file property page.
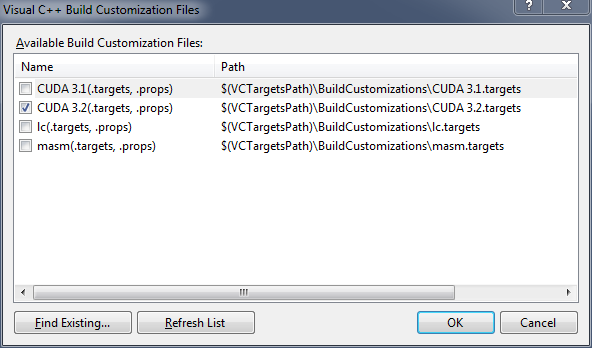
7. Select Build Customization
Select build customization from Project menu. Check CUDA 3.2.
8. Add CUDA Libraries
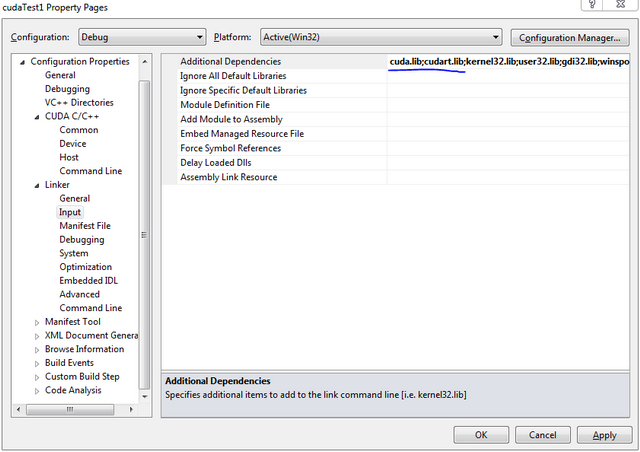
Add libraries that are used with CUDA run-time. In Project Property Page, add cuda.lib and cudart.lib to
Linker->Input->Additional Dependencies.
9. Compile Your First CUDA Capable Program
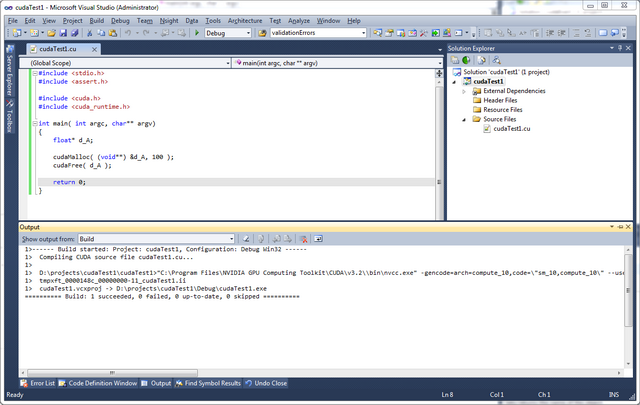
Enter the following code in the cu file and then compile the project.
#include <stdio.h>
#include <assert.h>
#include <cuda.h>
#include <cuda_runtime.h>
int main( int argc, char** argv )
{
        float* d_A;
        cudaMalloc( (void**) &d_A, 100 * sizeof(float) );
        cudaFree( d_A );
        return 0;
}
Points of Interest
There should be VS2010 project and item templates for CUDA 3.2 in the SDK. Maybe there will be in the future versions.
History
Initial article. 24.04.2011 - This article is also available at my blog, albeit Turkish: cuda.nu
