Introduction
This article focuses on how you can consume WCF Service from Windows Phone Application.
First Step – Writing a WCF Service
Run Visual Studio in Administrator mode and create New WCF Service Application.
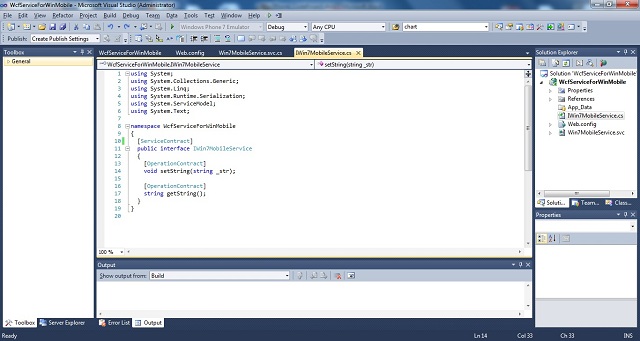
IWin7MobileService.cs defines the interface of the WCF Service.
namespace WcfServiceForWinMobile
{
  [ServiceContract]
  public interface IWin7MobileService
  {
    [OperationContract]
    void setString(string _str);

    [OperationContract]
    string getString();
  }
}
It has two methods which are essentially getter and setter methods.

Win7MobileService.svc.cs is an implementation of the interface. The class contains a static data member and the implementation of the methods of the interface.
namespace WcfServiceForWinMobile
{
  [ServiceBehavior(AddressFilterMode = AddressFilterMode.Any)]
  public class Win7MobileService : IWin7MobileService
  {
    static string str;

    public string getString()
    {
      return str;
    }

    public void setString(string _str)
    {
      str = _str;
    }
  }
}

Web.config file defines essentially the <service> and <serviceBehaviors>. Make a note of the attributes of <service> and of <endpoint> tag.
="1.0"
<configuration>
<system.serviceModel>
<bindings />
<client />
<services>
<service name="WcfServiceForWinMobile.Win7MobileService"
behaviorConfiguration="serviceBehavior">
<endpoint address="" binding="basicHttpBinding"
contract="WcfServiceForWinMobile.IWin7MobileService"/>
<endpoint address="mex" binding="mexHttpBinding"
contract="IMetadataExchange"/>
<host>
<baseAddresses>
<add baseAddress=
"http://192.168.1.3/WcfServiceForWinMobile/Win7MobileService.svc"/>
</baseAddresses>
</host>
</service>
</services>
<behaviors>
<serviceBehaviors>
<behavior name="serviceBehavior">
<serviceMetadata httpGetEnabled="True"/>
</behavior>
</serviceBehaviors>
</behaviors>
</system.serviceModel>
<system.webServer>
<directoryBrowse enabled="true"/>
</system.webServer>
<system.web>
<compilation debug="true"/>
</system.web>
</configuration>

In your implementation, modify the <baseAddresses> tag with the IP address of the machine you write/deploy WCF Service on.
<baseAddresses>
  <add baseAddress="http://{IP Address}/WcfServiceForWinMobile/Win7MobileService.svc"/>
</baseAddresses>
Second Step – Deploying WCF Service
I generally use IIS to deploy WCF Service, so you can consume WCF Service across a network. If you don’t have IIS installed on your system, I suggest you read “First Step: Deploying WCF Service” of my article http://www.codeproject.com/KB/webservices/WCFServiceAcrossNetwork.aspx.
In order to deploy WCF Service on your machine, right click the WCF Service Application project and go to Properties -> Web. Select “Use Local IIS Web Server” and click on Create Virtual Directory button. Now, if you want to check if the web service is deployed correctly or not, type http://localhost/WcfServiceForWinMobile/ in the browser and it should show you the following:

Third Step – Consuming WCF Service using Windows 7 Phone Application
The mobile Client is similar to other desktop based clients consuming WCF Service. The notable difference here is that all WCF Service calls from Silverlight application are routed through asynchronous communications.
Create a new Windows Phone Application. Here, we will not modify manually any XAML code but will make use of toolbox for controls. As shown below, I’ve made use of TextBlock, TextBox and Button controls from toolbox.

In order to consume deployed WCF Service, right click the project and select Add Service Reference. Enter the address of the WCF Service (i.e. http://{IP Address}/wcfserviceforwinmobile/win7mobileservice.svc?wsdl).

This will create ServiceReferences.ClientConfig file in the project. Now you can utilize WCF Service in your Client application.
The following is the MainPage.xaml.cs code:
namespace Win7SampleApp
{
public partial class MainPage : PhoneApplicationPage
{
public MainPage()
{
InitializeComponent();
}
private void button1_Click(object sender, RoutedEventArgs e)
{
ServiceReference1.Win7MobileServiceClient client =
new ServiceReference1.Win7MobileServiceClient();
if (nameTextBox.Text.Length != 0)
{
client.setStringAsync(nameTextBox.Text);
client.getStringAsync();
client.getStringCompleted+=new EventHandler
<ServiceReference1.getStringCompletedEventArgs>(client_getStringCompleted);
}
}
private void client_getStringCompleted
(object sender, ServiceReference1.getStringCompletedEventArgs e)
{
nameTextBlock.Text = e.Result;
}
}
}

As you can see in the code, on button click, we are creating a proxy object of the service. The getString() and setString() contract in the generated proxy is implemented with asynchronous methods. The asynchronous method getStringAsync() and an event client_getStringCompleted are raised when the operation has completed.
The event handler sets the textblock value which is essentially the response from WCF Service.
Now run the application and on button click you should see something similar to the following:

Conclusion
This article demo-ed how you can create a WCF Service Application and deploy using IIS server. I used two different machines acting essentially as client and server for this demo and would suggest you try out the same.
History
- 16th May, 2011: Initial post
