Have you ever wondered how to automate SharePoint approval process in a Sequential Workflow Project? Well, look no further, this article is about that.
Let's start with a scenario to be clear, say we have a product list where someone in your company approves every product listing based on thresholds, that threshold measure can be a price range on a certain product type. Now that person usually declines desk product types when the price indicated by the contributor is below $200 and above $500. At this point, the approver will do it manually by looking whether the product have violated the known threshold, this is an easy task for 10 items but imagine managing 300 of them. That is why we will be automating that based on definitions that we will set on a separate list. That list that we will be creating will define threshold for different product types so if it hits any of the barriers, I will decline the list item and the ones that does not will be auto approved. Sound simple? Read further.
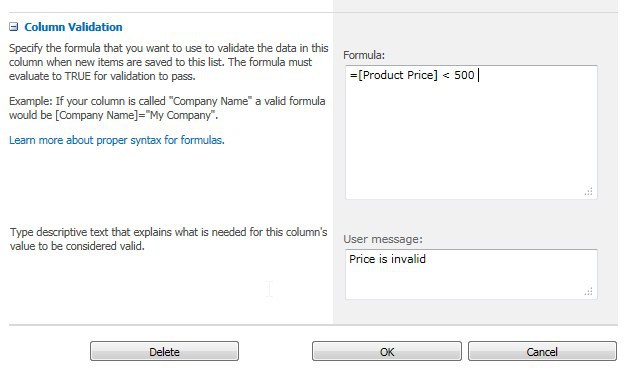
You might be already thinking that we can achieve that by using the Column Validation of a List. Well, not quite as there are some limitations and one important one is the support for Boolean operator. So a formula like this would work:
=[Product Price] < 500
but this will not:
=[Product Price] < 500 AND [Product Price] > 500

Now well, you might think again that we can achieve that on the SharePoint Designer. Well, not quite as well as the SharePoint Designer will only give you 1 search condition for a list lookup. So for example, you need to lookup for a price threshold which meets the condition in multiple columns like for example a product type and maximum date of validity, then it will be impossible.

So our last resort is using Visual Studio! So in this post, I will explain to you how this will be achieved in the simplest manner. All you need is to follow these steps and I can assure you can make more complex scenarios after this one.
1. Create Lists for Product and Product Type
Product Type List

Product List

Take note that the column Product Type Column in Product List is a lookup on Product Type List.
2. Enable Versioning in Product
As you can see, we need to require content approval, we need to create a version each time (this ensures that you can roll back) and choose "only users who can approve items" this makes sure only the authorized can approve the items manually.

3. Create a Task List
This is a library type in SharePoint and the default one would do.
4. Create a Sequential Workflow Project
Choose Sequential Workflow under SharePoint -> 2010.

Follow the wizard:

Choose the List you will invoke the workflow from and the associated Task List and History List.

Trigger it on create and update.

Now you will be presented with a Workflow Diagram.

You can create more complex stuff by choosing items on the toolbar.

But for this instance, we will be making this straightforward and do everything on the onWorkflowActivated section. Now double click that and you will be presented with a code behind. Now copy the code below.
private void onWorkflowActivated1_Invoked(object sender, ExternalDataEventArgs e)
{

    SPLinqDataContext dc = new SPLinqDataContext(workflowProperties.SiteUrl);

    EntityList<ProductTypeItem> ProductType = dc.GetList<ProductTypeItem>("Product Type");

    string sProductType = GetLinkedListItemString(workflowProperties.Item["Product Type"].ToString());
    double dPrice = double.Parse(workflowProperties.Item["Product Price"].ToString());

    var Result = (from p in ProductType
                    where p.Title == sProductType
                    && p.MaxDateValidity >= DateTime.Now
                    select p).SingleOrDefault();

    if (Result.MinPrice > dPrice)
    {
        workflowProperties.Item.ModerationInformation.Status =
        SPModerationStatusType.Denied;
        workflowProperties.Item.ModerationInformation.Comment =
        "Price Below Threshold - Saved on Approval Comment";
        workflowProperties.Item["Notes"] =
        "Price Below Threshold - Saved on Notes Field";
        workflowProperties.Item.Update();
    }
    else if (Result.MaxPrice < dPrice)
    {
        workflowProperties.Item.ModerationInformation.Status =
        SPModerationStatusType.Denied;
        workflowProperties.Item.ModerationInformation.Comment =
        "Price Above Threshold - Saved on Approval Comment";
        workflowProperties.Item["Notes"] =
        "Price Above Threshold - Saved on Notes Field";
        workflowProperties.Item.Update();
    }
    else
    {
        workflowProperties.Item.ModerationInformation.Status =
        SPModerationStatusType.Approved;
        workflowProperties.Item.Update();
    }

}

private string GetLinkedListItemString(string sItem)
{
    if (sItem.Contains("#"))
    {
        return sItem.Substring(sItem.LastIndexOf("#") + 1);
    }
    else
    {
        return sItem;
    }
}
If you notice, I am using here LINQ to SharePoint which you can refer to this post for a full tutorial, this makes my life easier in querying SharePoint Lists.
Now to explain some points on the code above:
- To get and set item values on the current list item that is being processed, use
workflowProperties.Item["Column Name"] - To set Approval Status, use
workflowProperties.Item.ModerationInformation.Status - Since we are querying LINQ style, the search conditions can be as complex as you want and you are just limited by your imagination.
- You can also see that we use the
Approval Comment field and the Notes Custom Field we created, I just want to demonstrate to you how to save comments on Approval fields as well as a field in your list. - If you use a column that is coming from a linked list, it will show in this format ID;
#Value (i.e. "1;#Test")

Now other than that, I guess the code above is straightforward as the only thing it does is when price is above or below threshold levels then it will decline the list entry and leave a note.
Run your project, then put in your data.
5. Run Your Code
First, Add items in Product Type to define thresholds:

Add a new product that will violate your threshold:

Now you can see the progress once its submitted:

Then once it's finished, you will see the note and the final approval status:

